系统;Win10
环境;VS2017 64bit
windows下visualstudio下使用opengl;搭建配置环境并测试窗口
1、opengl库;vs下自带了opengl的库;直接在右键工程名->属性->链接器->输入->附加依赖项;在里面加入opengl32.lib。这里x64和x32依赖的库名字都叫opengl32.lib
2、glfw头文件和库;参考其他文章中编译方法获得(GLFW 是配合 OpenGL 使用的轻量级工具程序库;缩写自 Graphics Library Framework;图形库框架;。GLFW 的主要功能是创建并管理窗口和 OpenGL 上下文;同时还提供了处理手柄、键盘、鼠标输入的功能。有类似功能的库还有 GLUT和 SDL。)。
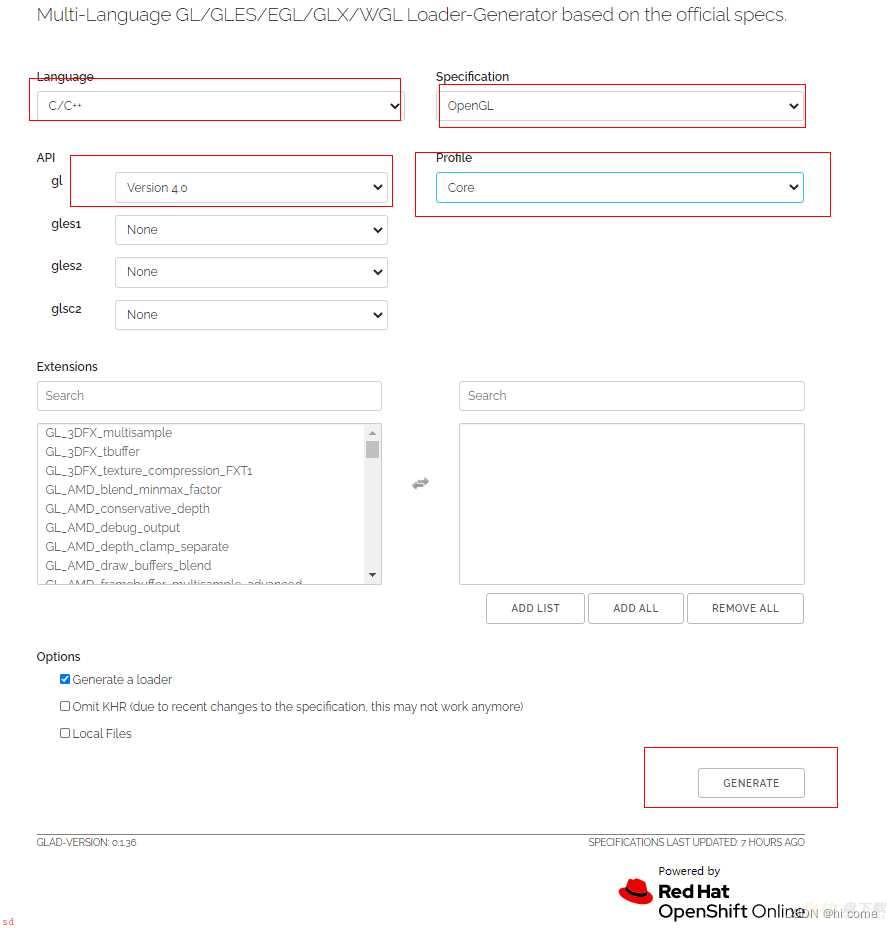
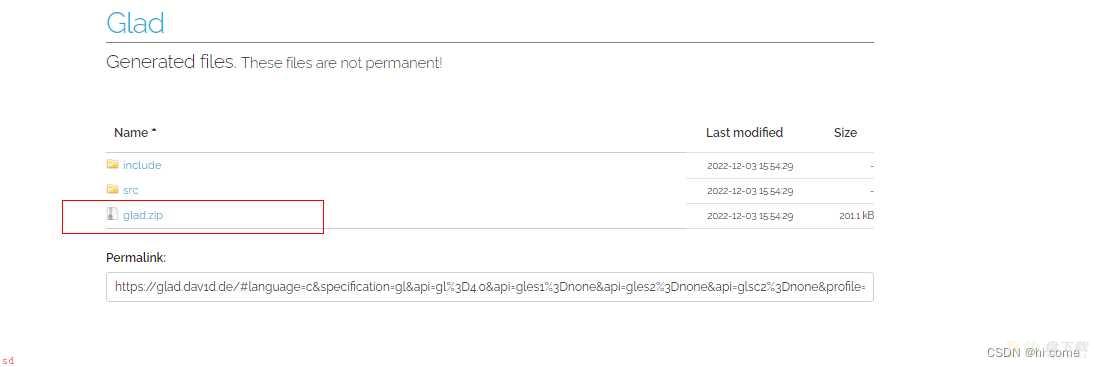
3、glad头文件和资源文件(GLAD作为开源库;用于管理OpenGL函数指针;使OpenGL基础渲染变得更加简单);下载链接https://glad.dav1d.de/, glad是在线直接选下载对应的头文件和源文件。


1、visualstudio新建一个空项目。
2、将glfw和glad文件夹都放进工程文件夹。
3、右键工程名->属性->vc;;目录->包含目录;将glad和glfw的全部头文件所在文件夹全部添加进去。
4、右键工程名->属性->链接器->输入->附加依赖项,在里面添加opengl32.lib glfw3.lib
5、 点击应用;确定。设置完依赖项目。
6、将glad文件中的.c文件添加入工程源代码目录。
7、在工程源代码目录下新建open_gl测试文件;opengl_test.cpp
#include#include#includevoid framebufer_size_callback(GLFWwindow *_window, int _width, int _height);

int main()
{
	glfwInit();

	glfwWindowHint(GLFW_CONTEXT_VERSION_MAJOR, 3);
	glfwWindowHint(GLFW_CONTEXT_VERSION_MINOR, 3);
	glfwWindowHint(GLFW_OPENGL_PROFILE, GLFW_OPENGL_CORE_PROFILE);

	GLFWwindow *win_handle = glfwCreateWindow(600, 600, ;opengl_test;, NULL, NULL);
	if (win_handle == NULL)
	{
		std::cout << ;Failed to crate GLFW Window; << std::endl;
		glfwTerminate();

		return -1;
	}
	glfwMakeContextCurrent(win_handle);

	if (!gladLoadGLLoader((GLADloadproc)glfwGetProcAddress))
	{
		std::cout << ;Failed to initialize GLAD; << std::endl;
		return -1;
	}

	glViewport(0, 0, 600, 600);

	glfwSetFramebufferSizeCallback(win_handle, framebufer_size_callback);

	while (!glfwWindowShouldClose(win_handle))
	{
		glfwSwapBuffers(win_handle);
		glfwPollEvents();
	}

	glfwTerminate();

	return 0;
}

void framebufer_size_callback(GLFWwindow *_window, int _width, int _height)
{
	glViewport(0, 0, _width, _height);
}
编译执行;

源码链接;
https://download.csdn.net/download/Alger_magic/87240028