提供回退机制通常是一种很好的做法;这样可以确保你的网站不会在低版本浏览器中挂掉;只是看起来没有那么炫而已。举例来说;当我们指定一个渐变色作为背景的时候;应该在前面添加一行实色背景的声明。添加实色的一个好方法是取渐变色的平均色值(比如在这个例子中是rgb(255, 128, 0))。
background: rgb(255, 128, 0);
background: -moz-linear-gradient(0deg, yellow, red);
background: -o-linear-gradient(0deg, yellow, red);
background: -webkit-linear-gradient(0deg, yellow, red);
background: linear-gradient(90deg, yellow, red);
Modernizr工具来给根元素()添加一些辅助类;比如 textshadow 或 no-textshadow 等。这样你就可以针对支持或不支持某些特性的浏览器来分别编写样式了;就像这样:
h1 {
  color: gray;
}
.textshadow h1 {
  color: transparent;
  text-shadow: 0 0 .3em gray;
}
h1 { color: gray; }
;supports (text-shadow: 0 0 .3em gray) {
  h1 {
    color: transparent;
    text-shadow: 0 0 .3em gray;
  }
}
如果我们想要检测某个具体的属性值是否支持;那就需要把它赋给对应的属性;然后再检查浏览器是不是还保存着这个值。
function testValue(id, value, property) {
  var dummy = document.createElement(;p;);
  dummy.style[property] = value;
  if (dummy.style[property]) {
    root.classList.add(id);
    return true;
  }
  root.classList.add(;no-; ; id);
  return false;
}

// 举例说明;
var dummy = document.createElement(;p;);
dummy.style.backgroundImage = ;linear-gradient(red,tan);;
if (dummy.style.backgroundImage) {
  root.classList.add(;lineargradients;);
} else {
  root.classList.add(;no-lineargradients;);
}
尽量减少代码重复;代码可维护性的最大要素是尽量减少改动时要编辑的地方。当某些值相互依赖时;应该把它们的相互关系用代码表达出来。
按钮案例;
font-size: 20px;
line-height: 30px;
// 更好的写法如下
font-size: 20px;
line-height: 1.5;
如果我们决定把父级的字号加大;就不得不修改每一处使用绝对值作为字体尺寸的样式。如果改用百分比或 em 单位就好多了:
font-size: 125% /* 假设父级的字号是 16px */
line-height: 1.5;
现在;如果我们改变父级的字号;按钮的尺寸就会随之变化。但是;它看起来很不协调;因为所有其他效果都是为一个小按钮设计的;并没有跟着缩放。如果我们把这些长度值都改成 em 单位(em是一个相对的单位;是当前元素相对于父元素字体的大小而言的);那这些效果的值就都变成可缩放的了;而且是依赖字号进行缩放。
我们需要审视到底哪些效果应该跟着按钮一起放大;而哪些效果是保持不变的。
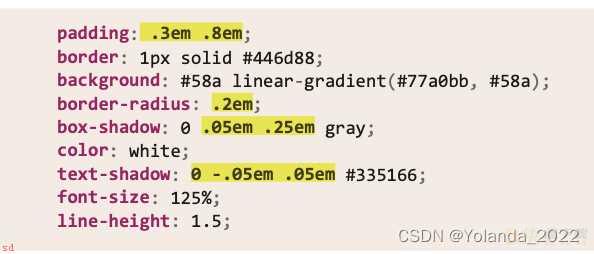
把半透明的黑色或白色叠加在主色调上;即可产生主色调的亮色和暗色变体。
body{
  font-size: 16px;
}
button{
  font-size: 125%
  line-height: 1.5;
  padding: .3em .8em;
  border-radius: .2em;

  box-shadow: 0 .05em .25em rgba(0,0,0,.5);
  color: white;
  text-shadow: 0 -.05em .05em rgba(0,0,0,.5);
  border: 1px solid rgba(0,0,0,.1);
  background: #58a linear-gradient(hsla(0,0%,100%,.2),transparent);
  /* background-color 使用的背景颜色。background-image 使用的背景图像。 */
}
button.cancel {
  background-color: #c00;
}
button.ok {
  background-color: #6b0;
}
inherit 可以用在任何 CSS 属性中;而且它总是绑定到父元素的计算值(对伪元素来说;则会取生成该伪元素的宿主元素)。
视觉上的错觉在任何形式的视觉设计中都普遍存在;需要我们有针对性地进行调整。
总的来说;我们的思路是尽最大努力实现弹性可伸缩的布局;并在媒体查询的各个断点区间内指定相应的尺寸。
当网页本身的设计足够灵活时;让它变成响应式应该只需要用到一些简短的媒体查询代码。
1.媒介查询
2.使用百分比长度来取代固定长度
3.使用与视口相关的单位(vw、vh、vmin 和 vmax)
4.max-width
当你需要在较大分辨率下得到固定宽度时;使用 max-width 而不是width;因为它可以适应较小的分辨率;而无需使用媒体查询。
5.background-size: cover
假如背景图片需要完整地铺满一个容器;不管容器的尺寸如何变化;background-size: cover 这个属性都可以做到。
6.max-width
不要忘记为替换元素(比如 img、object、video、iframe 等)设置一个 max-width;值为 100%。
7.??todo
当图片(或其他元素)以行列式进行布局时;让视口的宽度来决定列的数量。弹性盒布局(即 Flexbox)或者
display: inline-block加上常规的文本折行行为;都可以实现这一点
8.column-width
在使用多列文本时;指定column-width(列宽)而不是指定column-count(列数);这样它就可以在较小的屏幕上自动显示为单列布局。
.gfg {
  column-width:300px;
}
如上css在大小屏幕下的效果;
小屏幕;
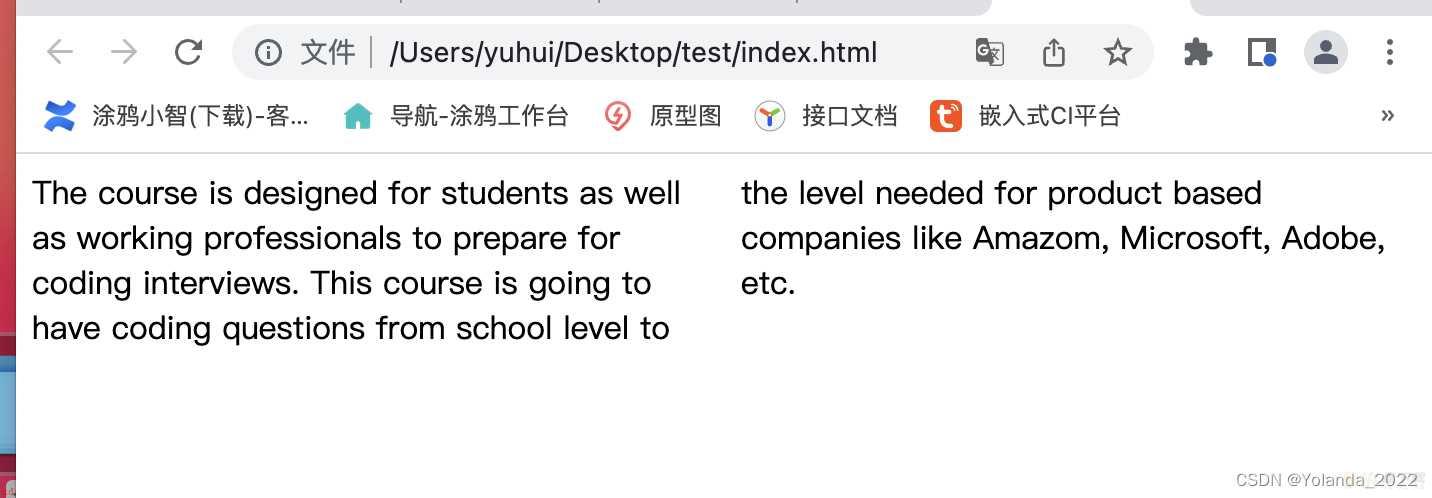
大屏幕;

 .gfg {
   column-count:2;
 }
大屏幕;

小屏幕;
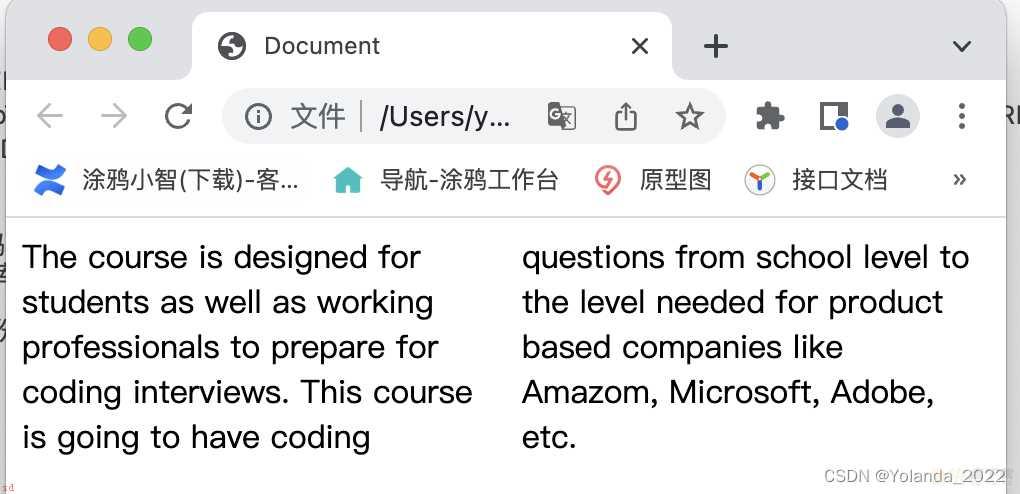
用’/;符号隔开background-position和background-size
background:
url(tr.png) no-repeat top right / 2em 2em,
url(br.png) no-repeat bottom right / 2em 2em,
url(bl.png) no-repeat bottom left / 2em 2em;
更优的写法;把repeat抽离出来
现在;我们只需要在一处修改;就可以改变所有的 background-size和 background-repeat 了
background:
url(tr.png) top right,
url(br.png) bottom right,
url(bl.png) bottom left;
background-size: 2em 2em;
background-repeat: no-repeat;
css预处理器;sass,less等
hsla函数
色相;H;是色彩的基本属性;就是平常所说的颜色名称;如红色、黄色等。
饱和度;S;是指色彩的纯度;越高色彩越纯;低则逐渐变灰;取 0-100% 的数值。
亮度;L; 取 0-100%增加亮度;颜色会向白色变化;减少亮度;颜色会向黑色变化。
透明度;A; 取值 0~1 之间; 代表透明度。
/* 绿色 */
#p1 {
  background-color:hsl(120,100%,50%,0.3);
}
/* 浅绿  */
#p2 {
  background-color:hsl(120,100%,75%,0.3);
}
/* 暗绿  */
#p3 {
  background-color:hsl(120,100%,25%,0.3);
}
/* 柔和的绿色 */
#p4 {
  background-color:hsl(120,60%,70%,0.3);
}
注意元素的背景色是重叠在border上的。假设我们想给一个容器设置一层白色背景和一道半透明白色边框;body的背景会从它的半透明边框透上来。
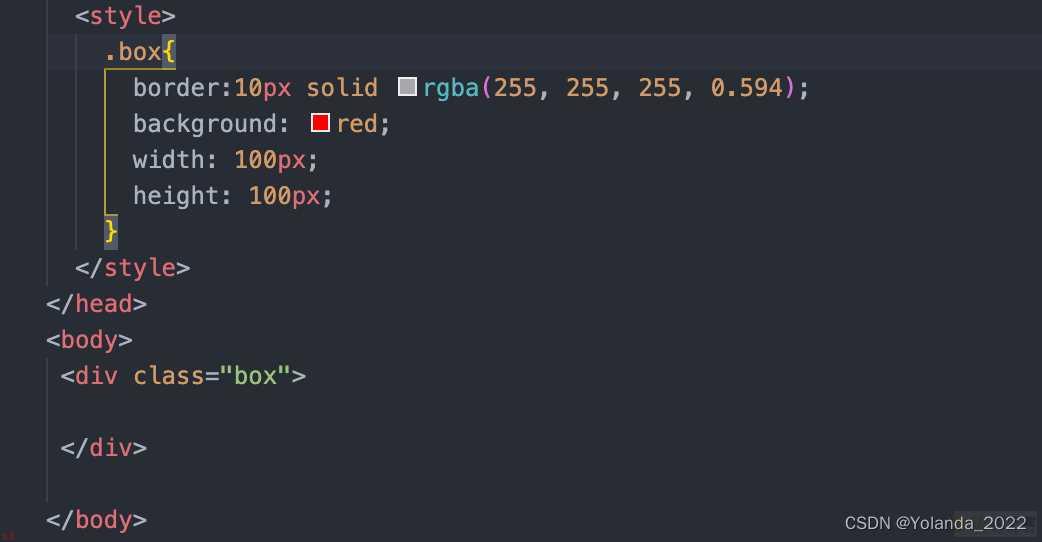
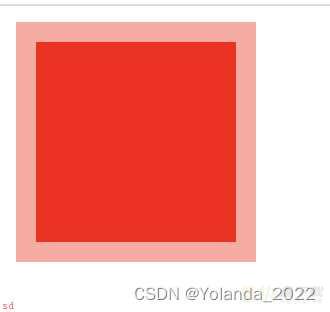
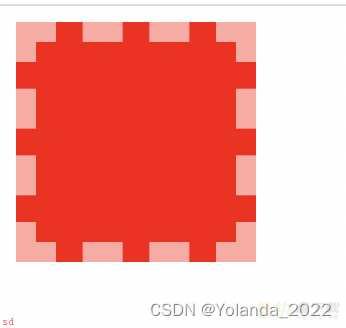
将边框改成dashed虚线边框更能看出来背景会延伸到边框所在的区域下层这一情况。
background-clip属性
控制背景的显示区域;默认情况下是border-box.
我们可以把它改成padding-box;这样边框和背景色就不会重叠了

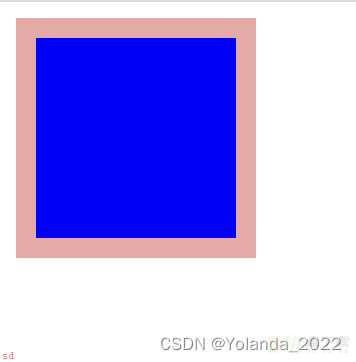
我们可以通过 background-clip 属性来调整上述默认行为所带来的不便。这个属性的初始值是 border-box;意味着背景会被元素的 border box
(边框的外沿框)裁切掉。如果不希望背景侵入边框所在的范围;我们要做的就是把它的值设为 padding-box;这样浏览器就会用内边距的外沿来把背景裁切掉。
针对背景提供回退方案要比其他属性容易得多。举例来说;如果要为半透明背景色提供回退方案;可能只需要准备一张单像素的半透明图片就行了。而对其他属性来说;只能回退到一个实色。
box-shadow: offset-x offset-y blur spread color position;{box-shadow:X轴偏移量 Y轴偏移量 阴影模糊半径 阴影扩展半径 阴影颜色 投影方式 }
offset-x:
第一个长度值指明了阴影水平方向的偏移;即阴影在 x 轴的位置。值为正数时;阴影在元素的右侧;值为负数时;阴影在元素的左侧。
offset-y:
第二个长度值指明了阴影竖直方向的偏移;即阴影在 y 轴的位置。值为正数时;阴影在元素的下方;值为负数时;阴影在元素的上方。
blur:
第三个长度值代表了阴影的模糊半径;举例来说;就是你在设计软件中使用 高斯模糊 滤波器带来的效果。值为 0 意味着该阴影是固态而锋利的;完全完全没有模糊效果。blur 值越大;阴影则更不锋利而更朦胧 / 模糊。负值是不合法的;会被修正成 0.
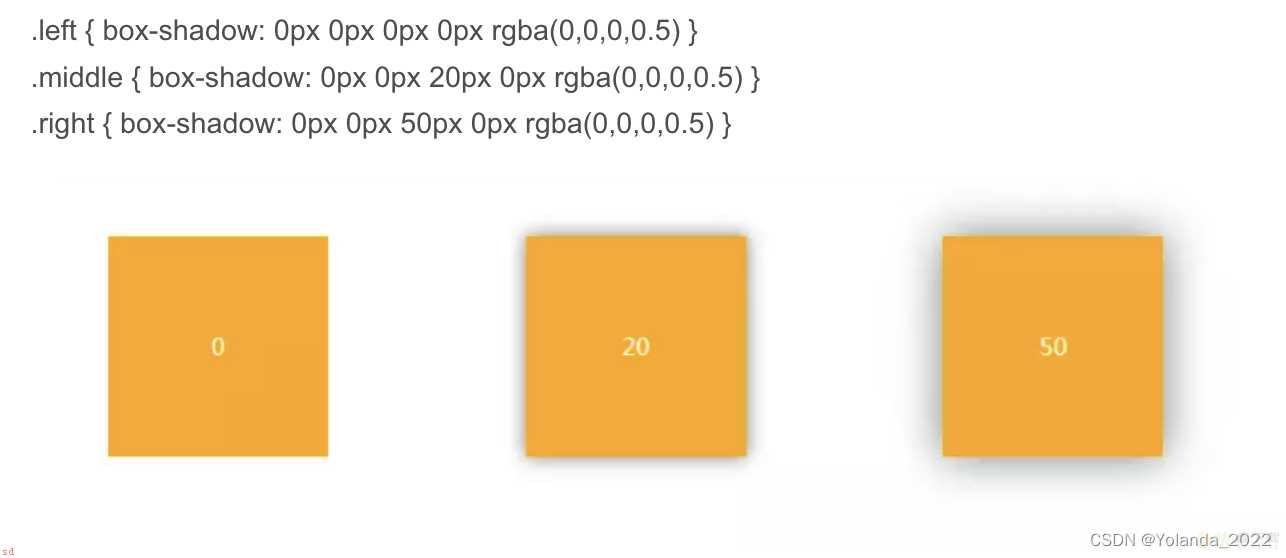
spread:
第四个长度代表了阴影扩展半径;其值可以是正负值;如果值为正;则整个阴影都延展扩大;反之值为负值是;则缩小。前提是存在阴影模糊半径。
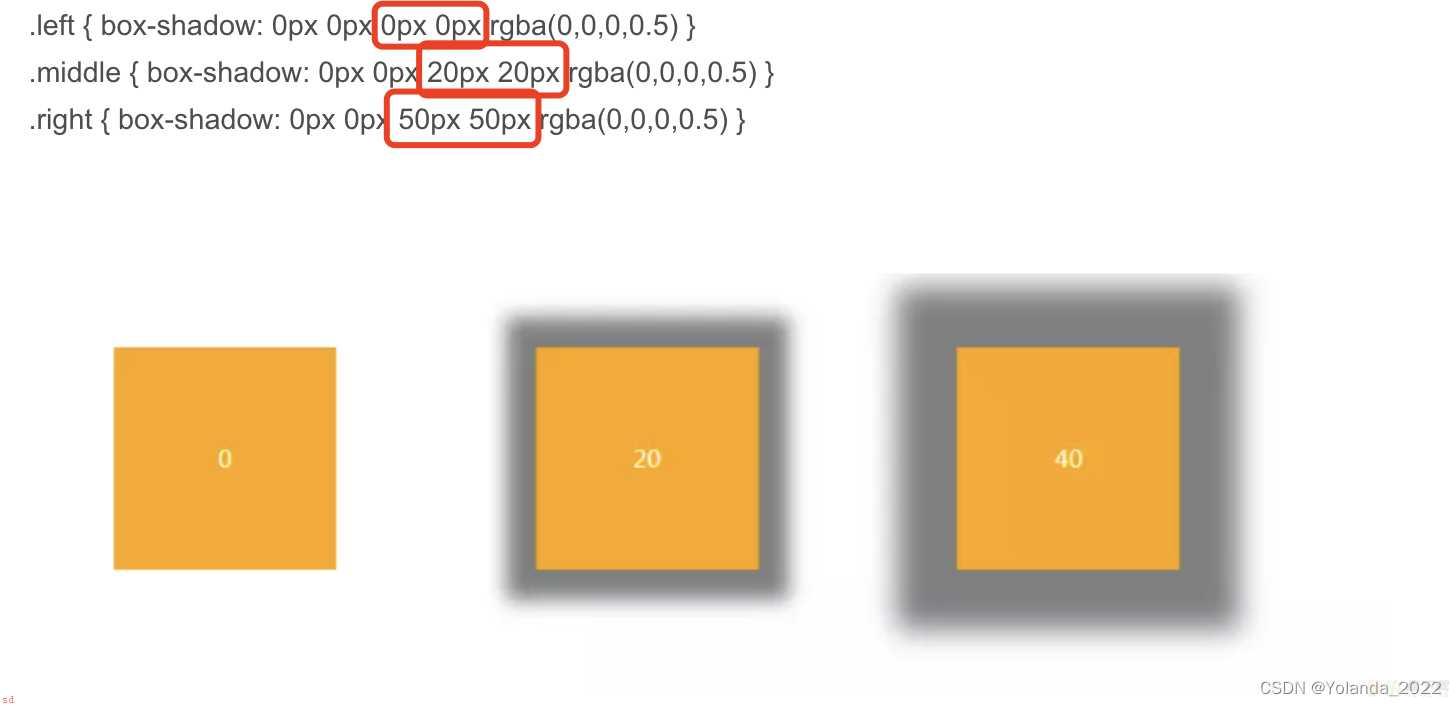
color 部分的值正如你所预料的;是指阴影的颜色。它可以是任意的颜色单元。
position;
此参数是一个可选值;如果不设值;其默认的投影方式是外阴影;
如果取其唯一值“inset”,就是将外阴影变成内阴影;也就是说设置阴影类型为“inset”时;其投影就是内阴影。
多重边框方案;
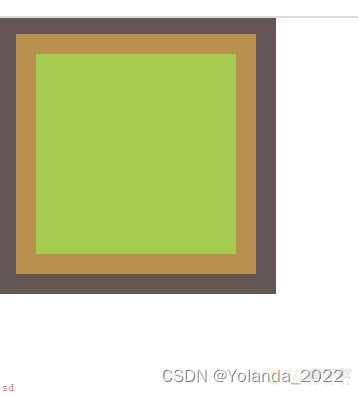
一个正值的扩张半径加上两个为零的偏移量以及为零的模糊值;得到的“投影”其实就像一道实线边框。
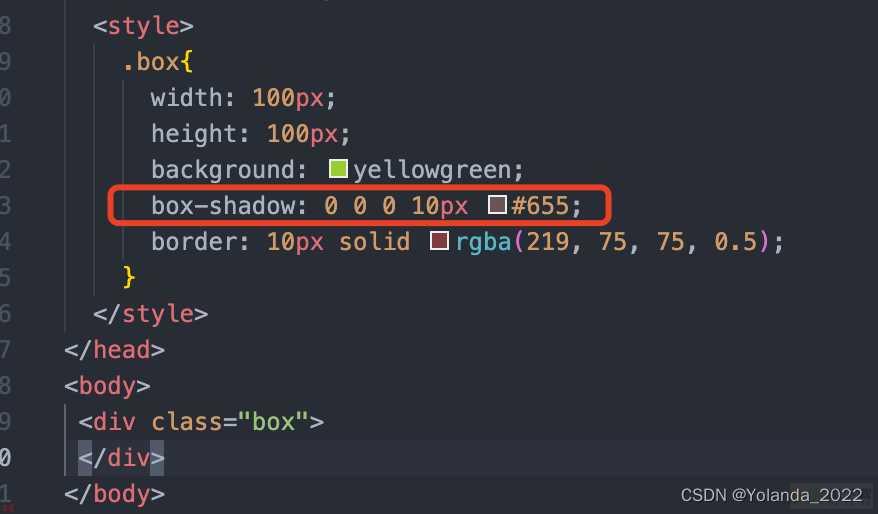
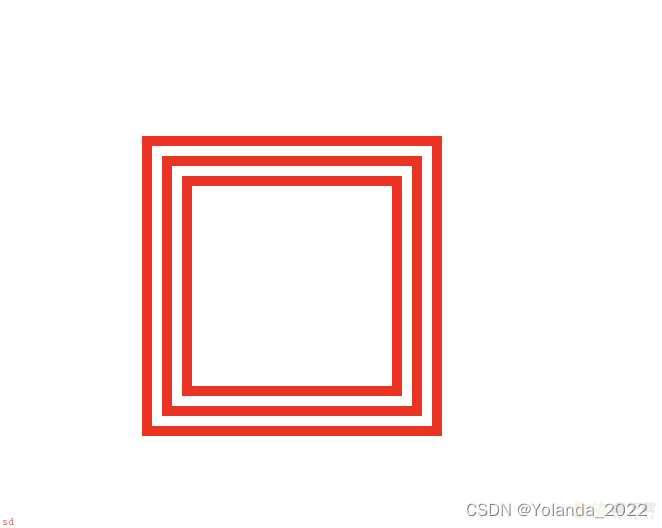
三重边框方案
box-shadow 的好处在于;它支持逗号分隔语法;我们可以创建任意数量的投影。
实现塑胶跑道效果;

注意事项;
投影的行为跟边框不完全一致;因为它不会影响布局;而且也不会受到 box-sizing 属性的影响。不过;你还是可以通过内边距或外边距(这取决于投影是内嵌和还是外扩的)来额外模拟出边框所需要占据的空间。
上述方法所创建出的假“边框”出现在元素的外圈。它们并不会响应鼠标事件;比如悬停或点击。如果这一点非常重要;你可以给box-shadow属性加上inset关键字;来使投影绘制在元素的内圈。
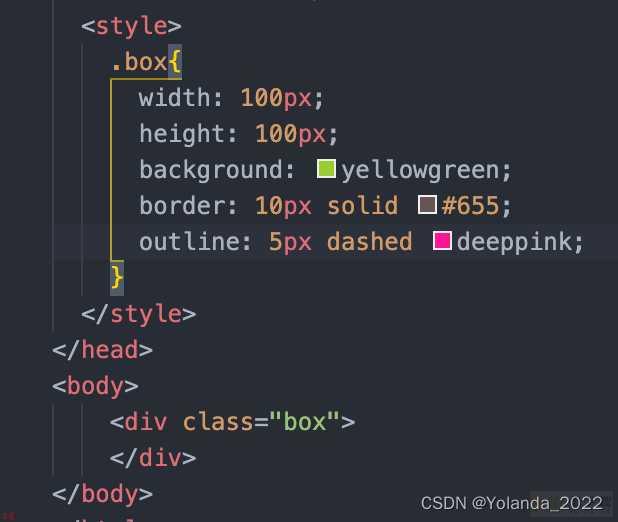
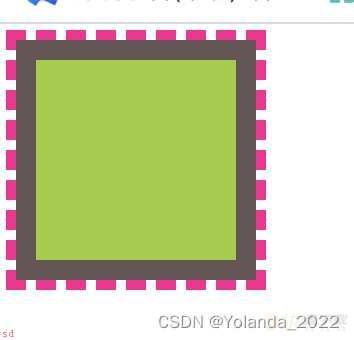
这种方法的一大优点在于边框样式十分灵活;不像上面的 box-shadow 方案只能模拟实线边框
(假设我们需要产生虚线边框效果;box-shadow 就没辙了
注意问题;
它只适用于双层“边框”的场景;因为 outline 并不能接受用逗号分隔的多个值。如果我们需要获得更多层的边框;前一种方案就是我们唯一的选择了。
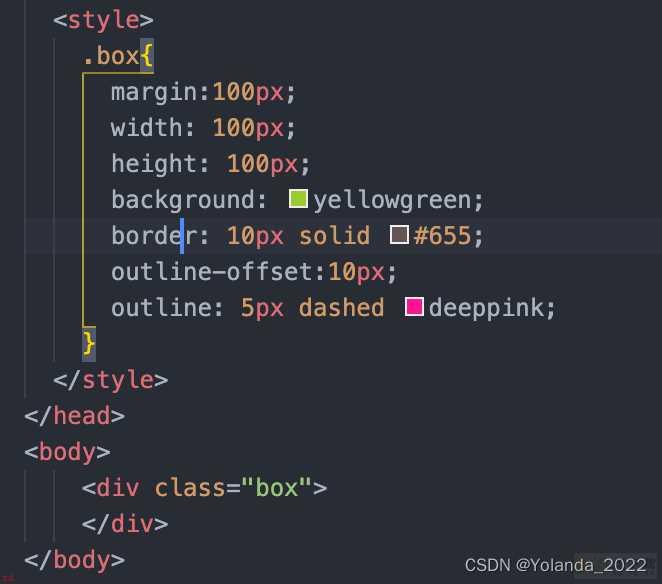
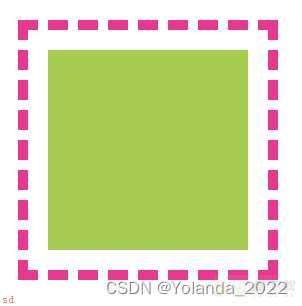
background-position三大类型取值;
1.center、top、left、bottom、right。
2.百分比;同时应用于元素和图像;;
background-position:x% y%。第一个值是水平距离;第二个是垂直距离。左上角: 0% 0%右下角 100% 100%。如果只指定了一个值;那另一个值默认为50%。
注意的是;百分数值同时应用于元素和图像;也就是说图像中描述为50% 50%的点;中心点;与元素描述为50% 50%的点;中心点;对齐。
假如background-position:30% 60% 也就意味着元素上距离左边30% 上边60%的点应该与图像上同样的点重合。
3.长度值
长度值解释的是元素内边距区左上角的偏移。偏移点是图像的左上角。
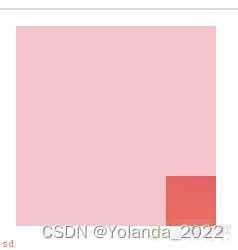
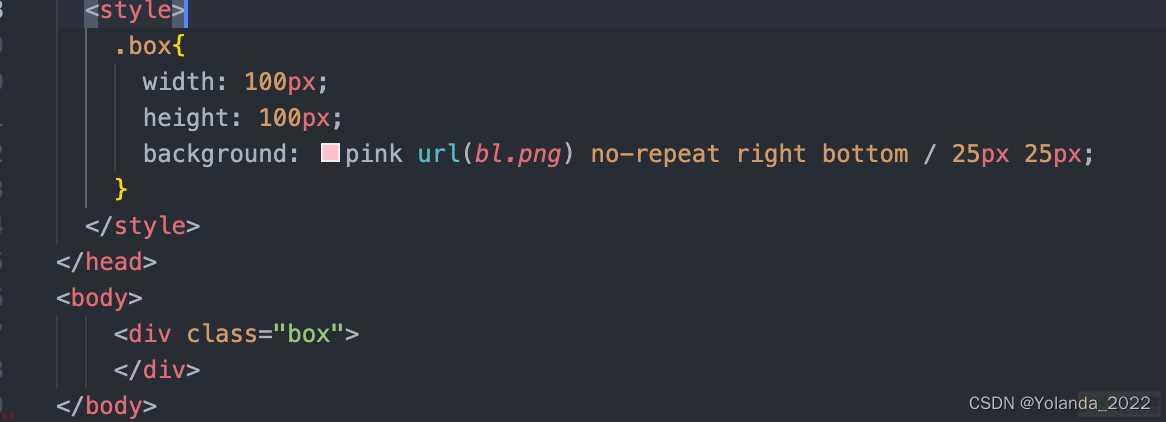
需求如下;
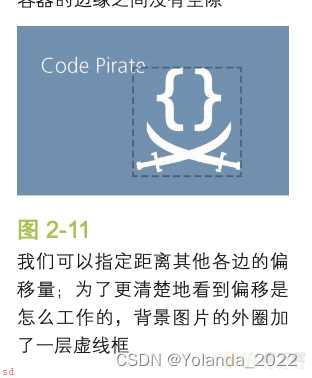
对于具有固定尺寸的容器来说;使用background来做到这一点是可能的;当容器元素的尺寸不固定时(因为内容往往是可变的);这就不可能做到了。
background-position 属性已经得到扩展;它允许我们指定背景图片距离任意角的偏移量;只要我们在偏移量前面指定关键字。
如果想让背景图片跟右边缘保持20px的偏移量;同时跟底边保持10px的偏移量;可以如下书写;
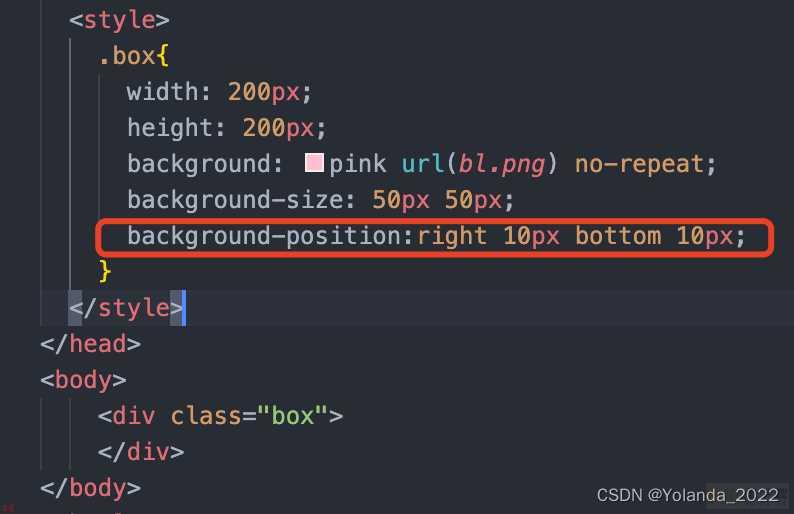
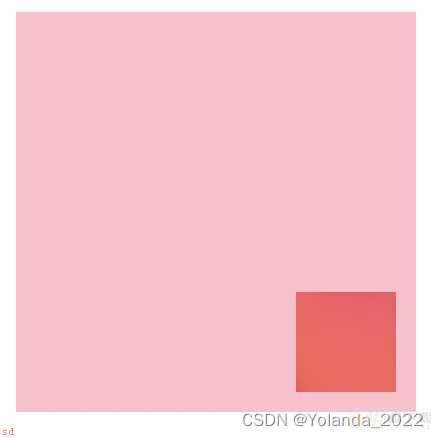
background-position: right 20px bottom 10px;
最后一步;我们还需要提供一个合适的回退方案。因为对上述方案来说;在不支持 background-position 扩展语法的浏览器中;背景图片会紧贴在左上角(背景图片的默认位置)。这看起来会很奇怪;而且它会干扰到文字的可读性。提供一个回退方案也很简单;就是把老套的bottom right 定位值写进 background 的简写属性中:
background: url(code-pirate.svg) no-repeat bottom right #58a;
background-position: right 20px bottom 10px;
在给背景图片设置距离某个角的偏移量时;有一种情况极其常见:偏移量与容器的内边距一致。如果采用上面提到的 background-position 的扩展语法方案;代码看起来会是这样的
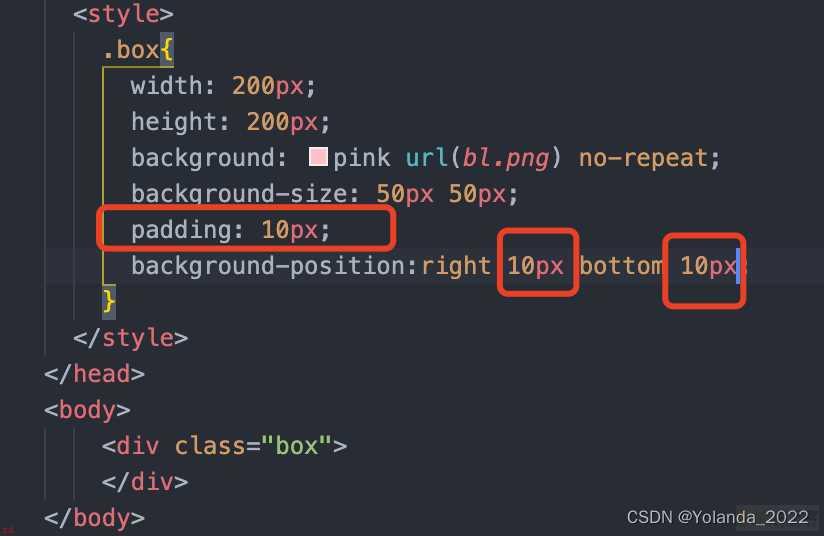
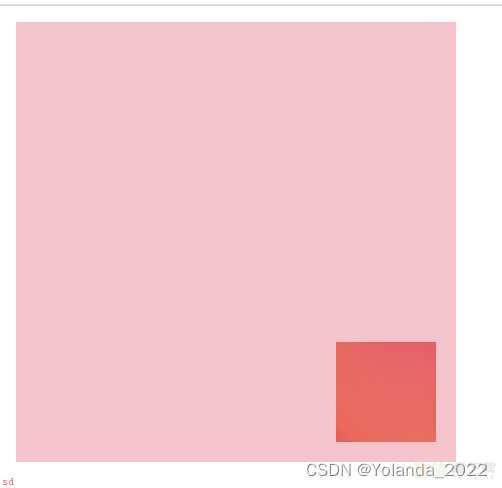
默认情况下;background-position 是以 padding box 为准的;这样边框才不会遮住背景图片。因此;top left 默认指的是 padding box 的左上角。
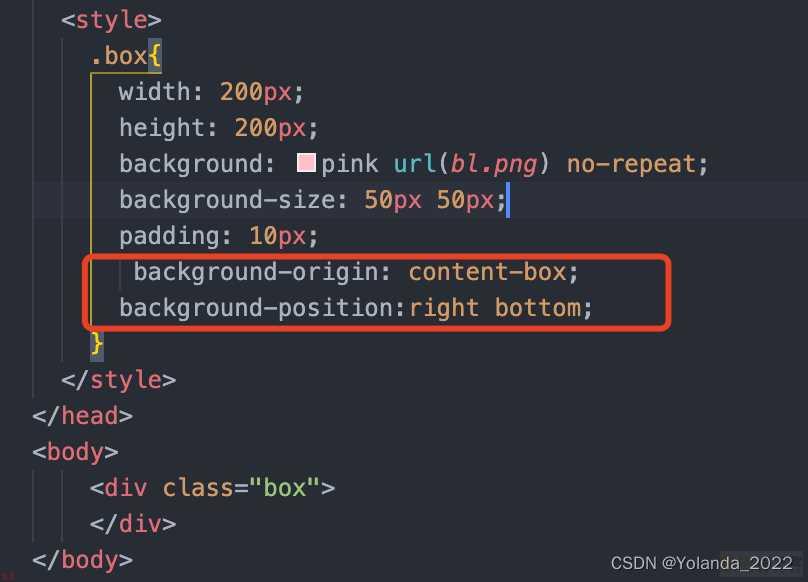
background-origin;可以用它来改变这种行为。在默认情况下;它的值是padding-box。如果把它的值改成 content-box;我们在 background-position 属性中使用的边角关键字将会以内容区的边缘作为基准。
下图的写法和上面的效果一致。
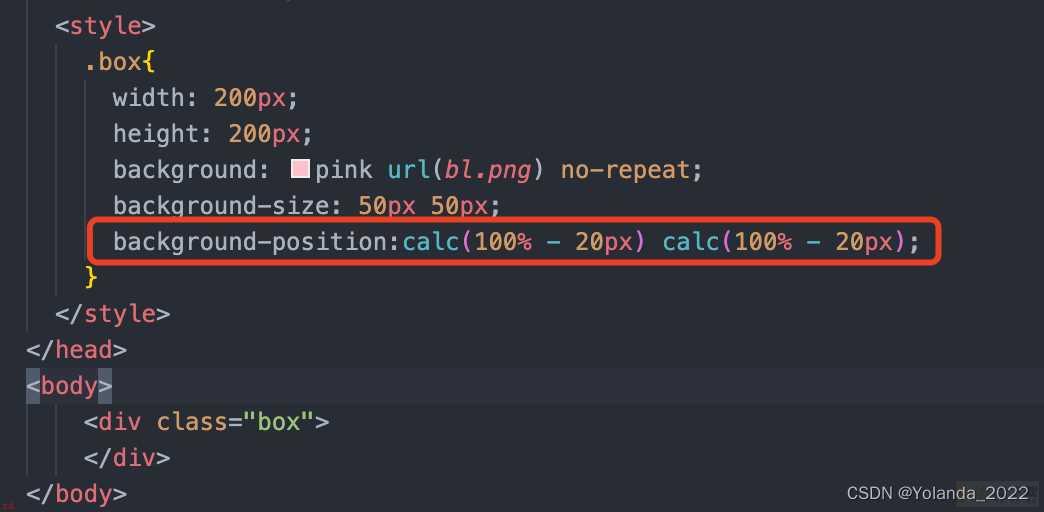
把背景图片定位到距离底边 10px 且距离右边 20px 的位置。如果我们仍然以左上角偏移的思路来考虑;其实就是希望它有一个 100% - 20px 的水平偏移量;以及 100% - 10px 的垂直偏移量。谢天谢地;calc() 函数允许我们执行此类运算;它可以完美地在background-position 属性中使用:
background: linear-gradient(#fb3 20%, #58a 80%);
现在容器顶部的 20% 区域被填充为#fb3 实色;而底部 20% 区域被填充为#58a 实色。
真正的渐变只出现在容器 60% 的高度区域。
(这么理解;0-20%#fb3 实色;20%-80%渐变;80%-100%#58a 实色)
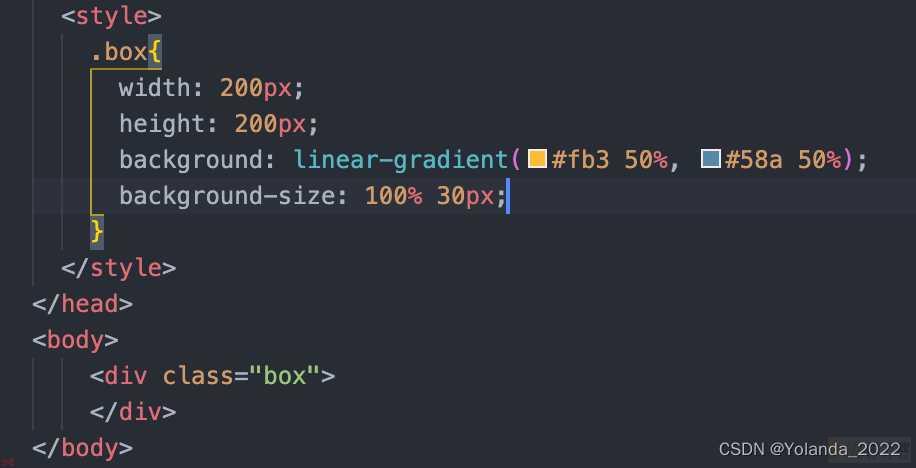
background:  linear-gradient(#fb3 50%, #58a 50%);
(这么理解;0-50% #fb3 实色;50%-100% #58a实色;50%-50%渐变;
已经没有任何渐变效果了;只有两块实色; 各占据了 background-image 一半的面积。
本质上;我们已经创建了两条巨大的水平条纹。
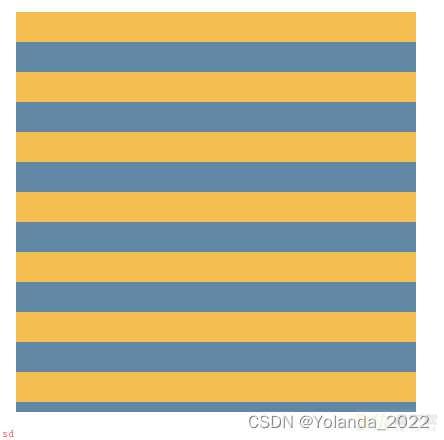
创建不等宽条纹
我们还可以用相同的方法来创建不等宽的条纹;只需调整色标的位置值。
background-size是黄蓝条纹的总宽度和总高度。
background: linear-gradient(#fb3 30%, #58a 30%);
;这么理解;0-30%是#fb3实色;30%-100%是#58a实色;
background-size: 100% 20px;
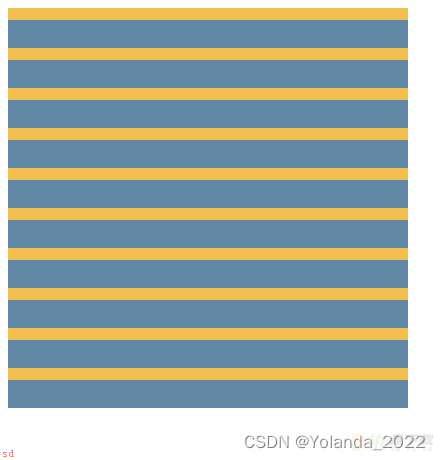
由于背景在默认情况下是重复平铺的;整个容器其实已经被填满了水平条纹。
如果某个色标的位置值比整个列表中在它之前的色标的位置值都要小;则该色标的位置值会被设置为它前面所有色标位置值的最大值。这么写;代码会更加的DRY。
background:
   linear-gradient(#fb3 30%, #58a 0);
   background-size: 100% 30px;
如果要创建超过两种颜色的条纹;也是很容易的。
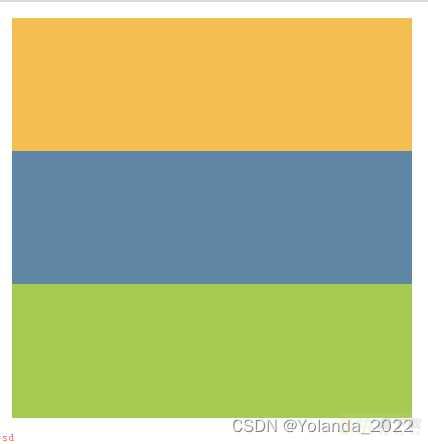
三种颜色的水平条纹
background: linear-gradient(#fb3 33.3%,#58a 0, #58a 66.6%, yellowgreen 0);

等价于如下的写法
background: linear-gradient(#fb3 33.3%,#58a 33.3%, #58a 66.6%,
yellowgreen 66.6%);
;这么理解;0-33.3% #fb3实色;33.3%-66.6%  #58a实色;66.6%-100% yellowgreen实色;
background-size: 100% 45px;
究竟background的linear-gradient是怎么确定颜色的渲染的范围的呢?
;1;色块
red 0%red 33.33%表示从0% ~ 33.33% 从红色渐变到红色;也就是不渐变;所以一直为红色;所以会出现纯红色小块;
yellow 33.33%yellow 66.66%表示从33.33% ~ 66.66% 从黄色 渐变到 黄色;纯黄色小块;
green 66.66%green 100% 表示从66.66% ~ 100% 从绿色 渐变到 绿色;纯绿色小块;
;2;渐变
下面是从0 ~ 125px;相当于0 ~ 75% ;是由红到黄;125px ~ 150px;75% ~ 100%设置为由黄到绿
background:linear-gradient(red 0,yellow 125px,green 150px);
它的默认值to bottom本来就跟我们的意图一致;于是就省略了。最后;我们还需要把 background-size 的值颠倒一下。
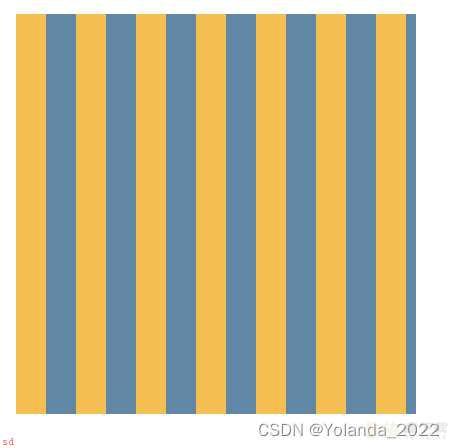
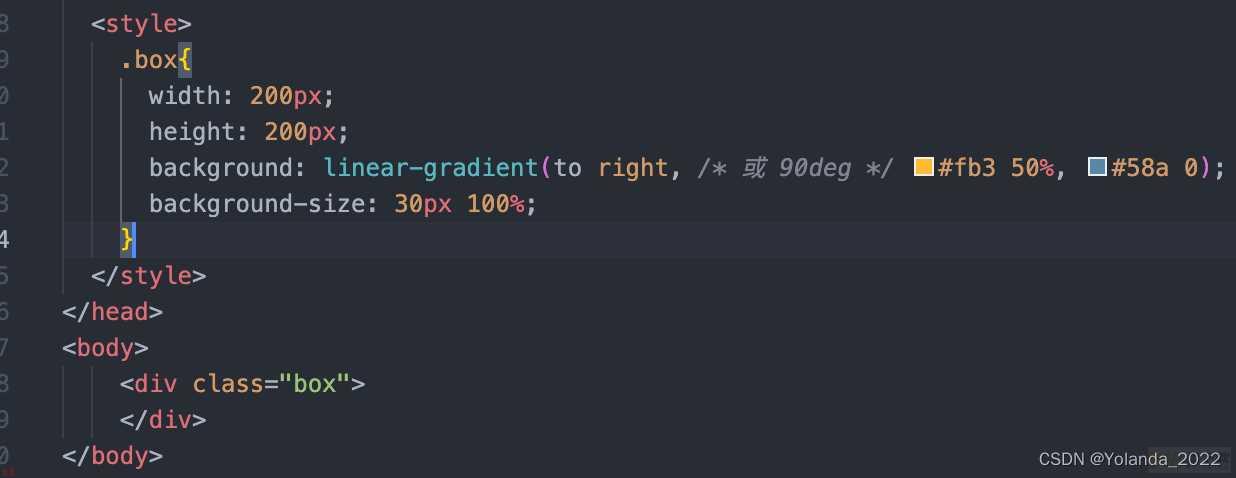
单个贴片包含四条条纹;而不是两条;只有这样才有可能做到无缝拼接。
background:
linear-gradient(45deg,#fb3 25%, #58a 0, #58a 50%,#fb3 0, #fb3 75%, #58a 0);
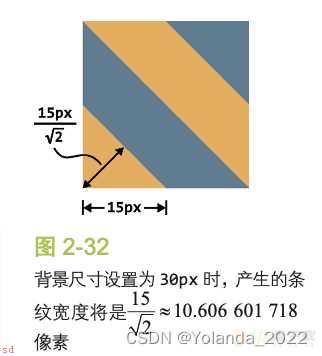
如果想让条纹的宽度变化为我们原本想要的 15px;就需要把 background-size 指定为 2 *15 *根号2 ≈ 42.426 406 871 像素。
inear-gradient() 和 radial-gradient() 还各有一个循环式的加强版:
repeating-linear-gradient() 和 repeating-radial-gradient()。
优点一;不用计算条纹宽度
我们现在是在渐变的色标中指定长度;而不是原来的 background-size。这里的 background-size 是初始值;对渐变来说就是以整个元素的范围进行填充。这意味着代码中的长度值更加直观;因为这些长度是直接在渐变轴上进行度量的;直接代表了条纹自身的宽度。
background:
repeating-linear-gradient(45deg,#fb3, #fb3 15px, #58a 0, #58a 30px);
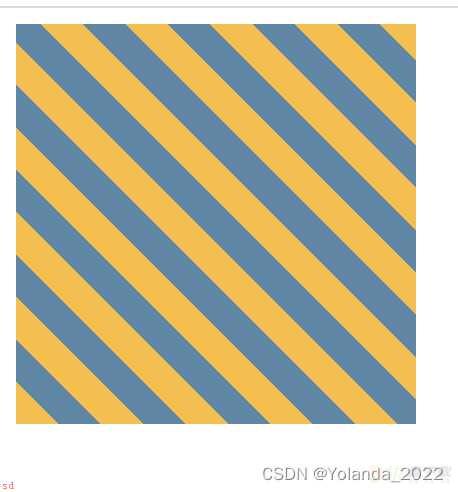
优点二;可以设定条纹的任意角度
background:
repeating-linear-gradient(60deg,#fb3, #fb3 15px, #58a 0, #58a 30px);
结合repeating-linear-gradient和background-size;
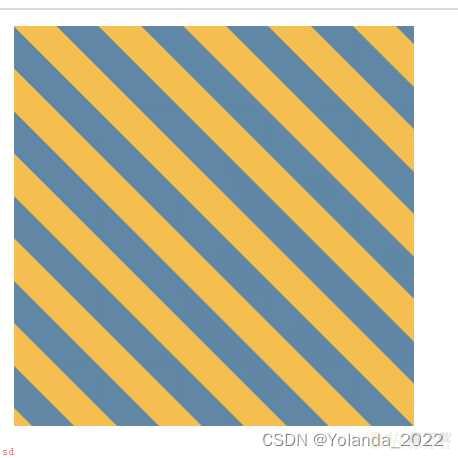
background:
repeating-linear-gradient(45deg,#fb3 0, #fb3 25%, #58a 0, #58a 50%);
background-size: 42.426406871px 42.426406871px;
不再为每种条纹单独指定颜色;而是把最深的颜色指定为背景色;同时把半透明白色的条纹叠加在背景色之上来得到浅色条纹:
background: #58a;
background-image: repeating-linear-gradient(30deg,
                    hsla(0,0%,100%,.1),
                    hsla(0,0%,100%,.1) 15px,
                    transparent 0, transparent 30px);
(可以理解为
hsla(0,0%,100%,.1) 0px,hsla(0,0%,100%,.1) 15px,
transparent 15px, transparent 30px)
我们现在只需要修改一个地方就可以改变所有颜色了。我们还得到了一个额外的好处;对于那些不支持CSS渐变的浏览器来说;这里的背景色还起到了回退的作用。

background: white;
background-image: linear-gradient(90deg,rgba(200,0,0,.5) 50%, transparent 0),
                  linear-gradient(rgba(200,0,0,.5) 50%, transparent 0);
background-size: 30px 30px;
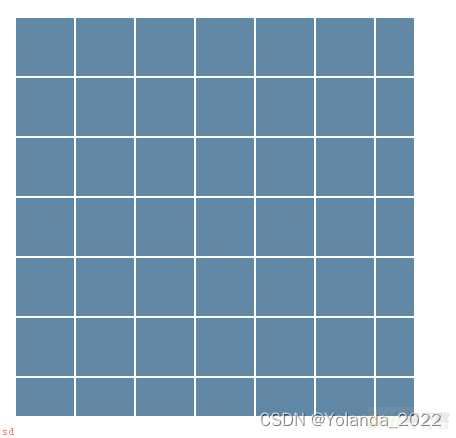
  .box{
     width: 200px;
     height: 200px;
     background: #58a;
     background-image:
      linear-gradient(white 1px, transparent 0),
      linear-gradient(90deg, white 1px, transparent 0);
      background-size: 30px 30px;
    }
图案库
https://projects.verou.me/css3patterns/
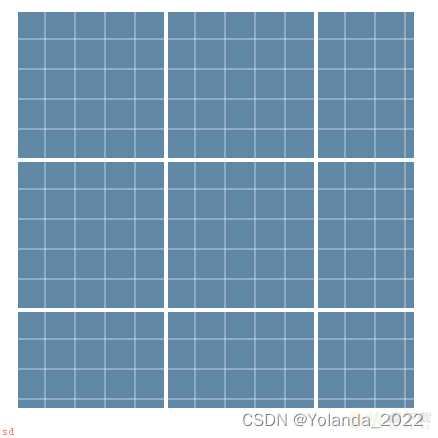
    .box{
      width: 200px;
      height: 200px;
      background: #58a;
      background-image:
      linear-gradient(white 2px, transparent 0),
      linear-gradient(90deg, white 2px, transparent 0),
      linear-gradient(hsla(0,0%,100%,.3) 1px,
      transparent 0),
      linear-gradient(90deg, hsla(0,0%,100%,.3) 1px,transparent 0);
      background-size: 75px 75px, 75px 75px,
                 15px 15px, 15px 15px;
      // 注意;这里background-size用逗号隔开的;分别对应上面用逗号
      // 隔开的background-image
    }
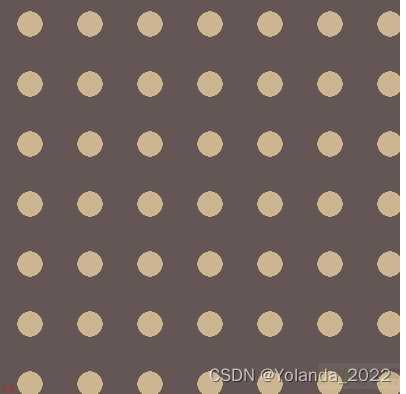
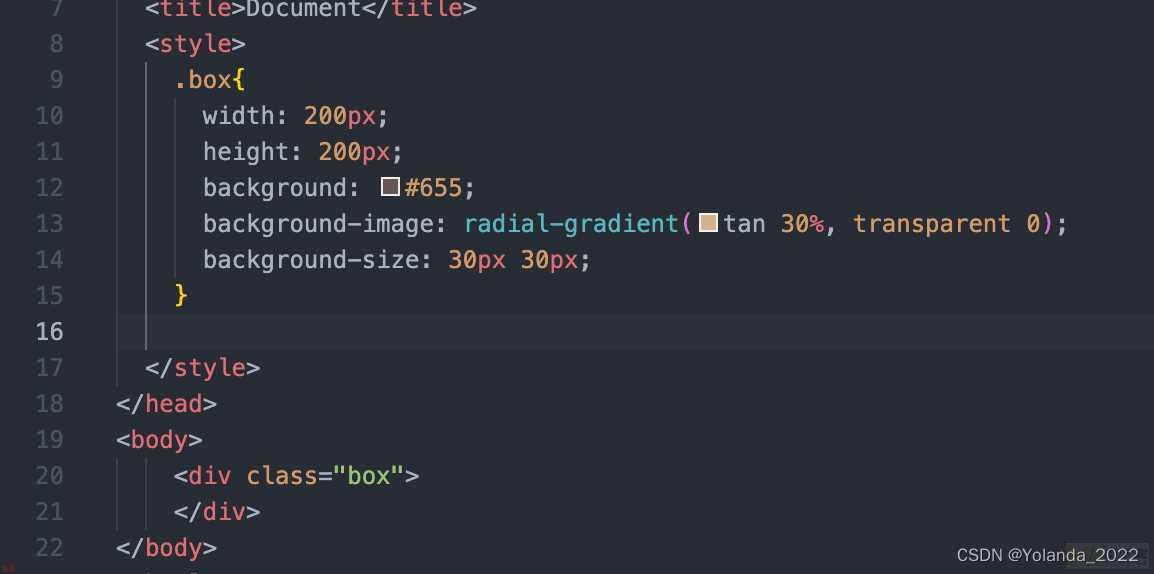
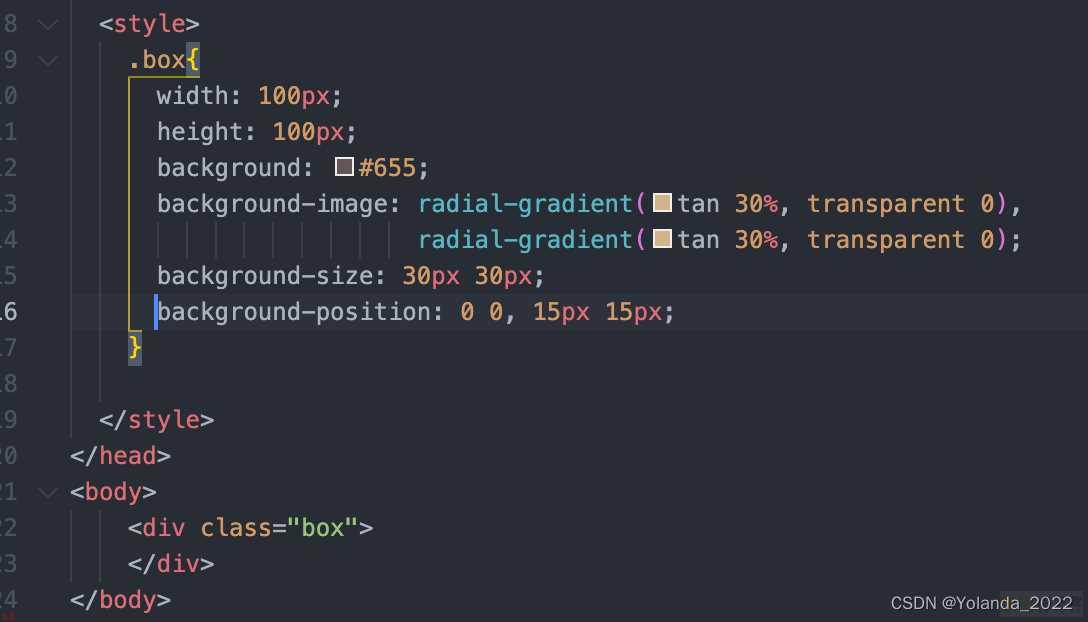
双层波点
请注意;为了达到效果;第二层背景的偏移定位值必须是贴片宽高的一半
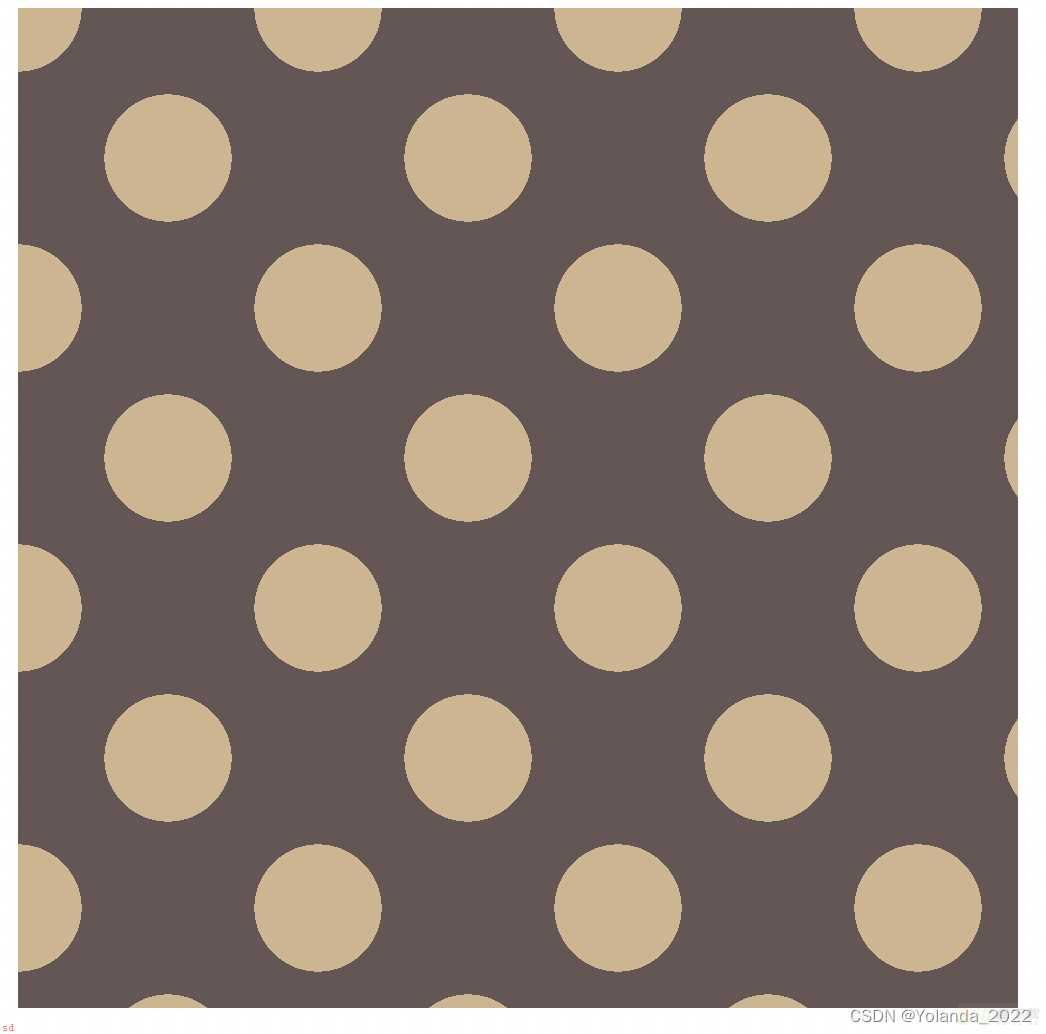
sass预处理器的做法;
;mixin polka($size, $dot, $base, $accent) {
  background: $base;
  background-image:radial-gradient($accent $dot, transparent 0),
                   radial-gradient($accent $dot, transparent 0);
  background-size: $size $size;
  background-position: 0 0, $size/2 $size/2;
}

;include polka(30px, 30%, #655, tan);
把第二层渐变在水平和垂直方向均移动贴片长度的一半;就可以把它们拼合成一个完整的方块:
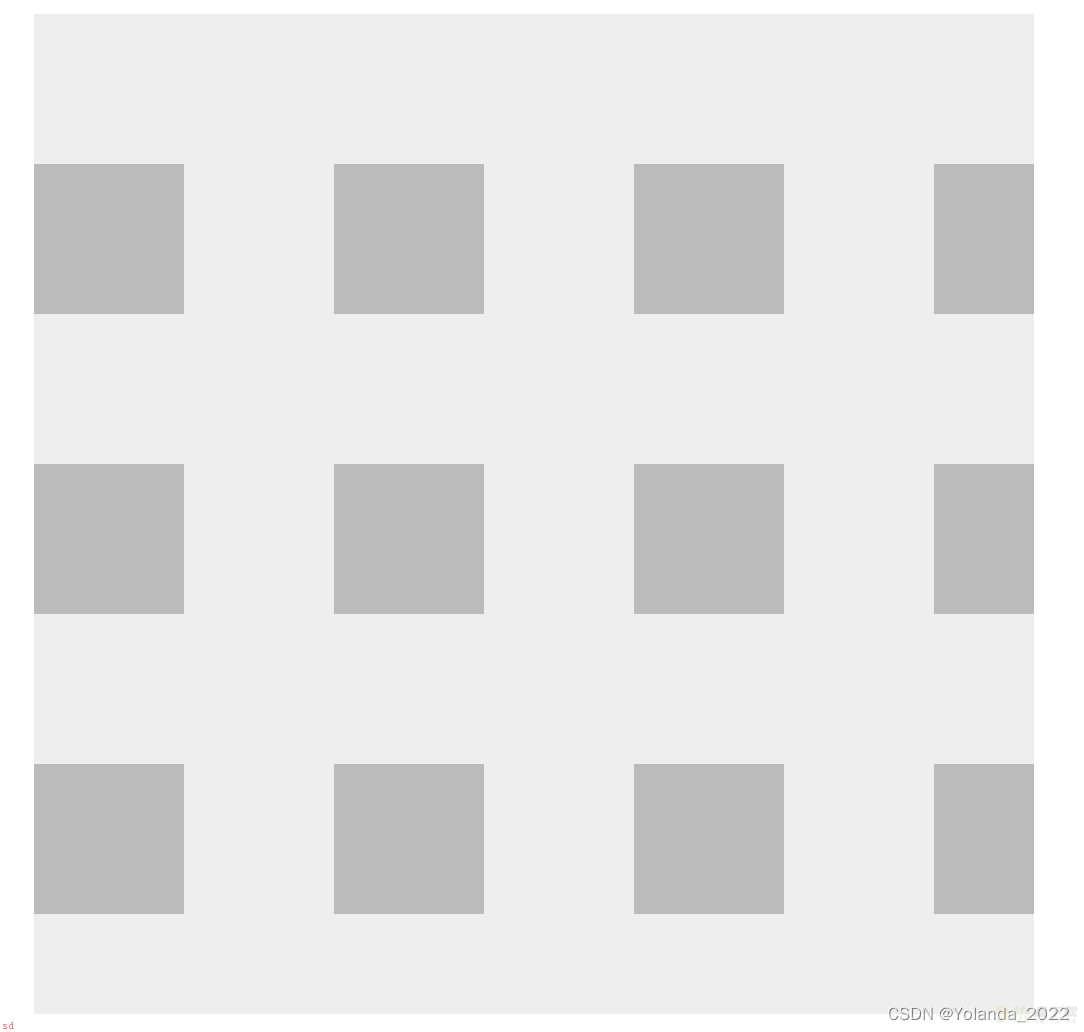
注意看这里是怎么去拼合的;background-position从0px 0px到15px 15px是怎么去做的。0px 0px是左上角原点。
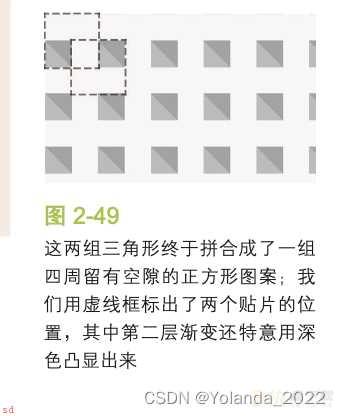
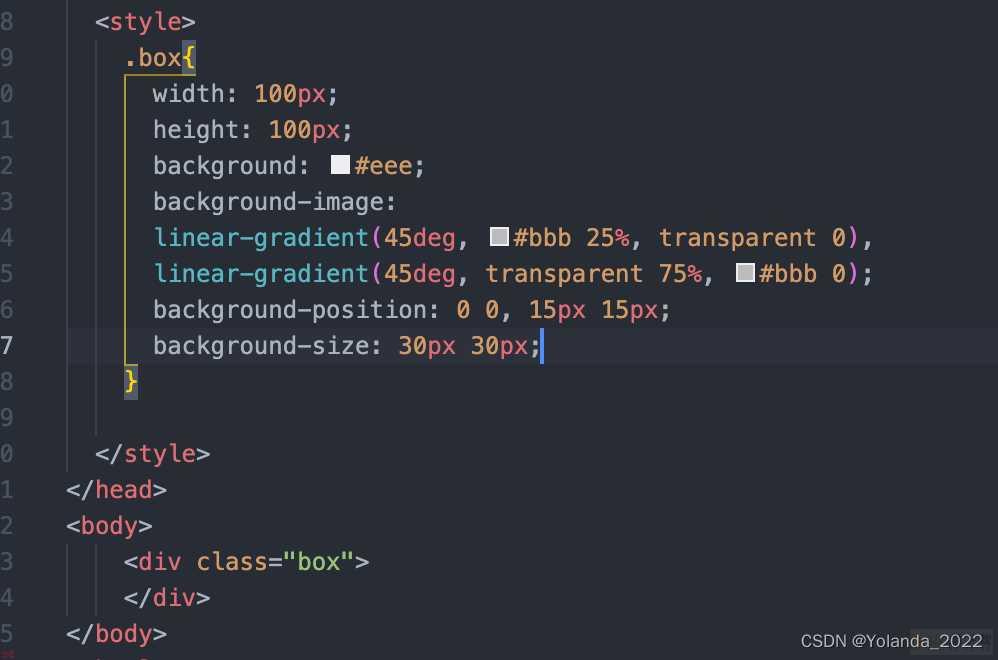
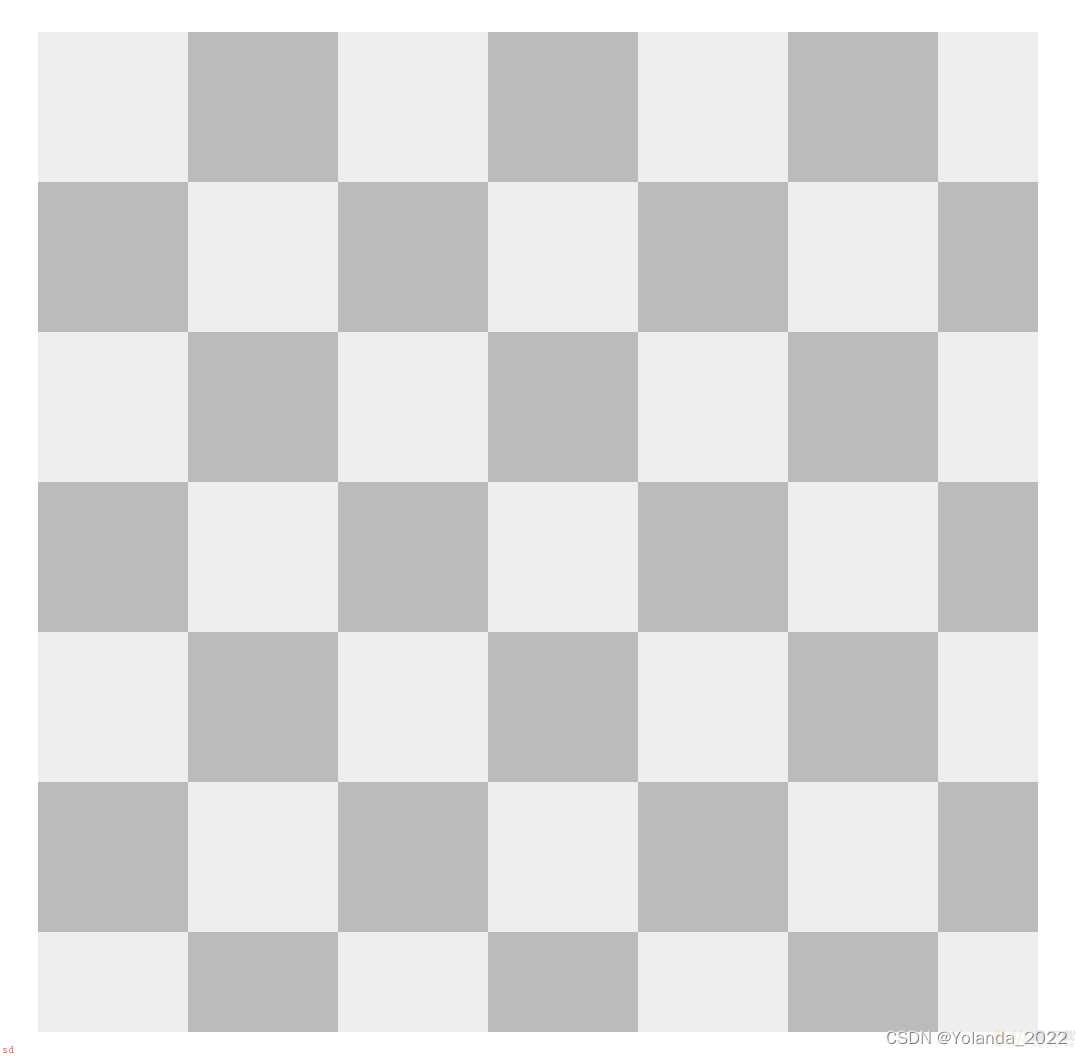
实现棋盘;
  <style>
    .box{
      width: 100px;
      height: 100px;
      background: #eee;
      background-image:
        linear-gradient(45deg, #bbb 25%, transparent 0),
        linear-gradient(45deg, transparent 75%, #bbb 0),
        linear-gradient(45deg, #bbb 25%, transparent 0),
        linear-gradient(45deg, transparent 75%, #bbb 0);
      background-position: 0 0, 15px 15px,15px 15px, 30px 30px;
      background-size: 30px 30px;
    }

  </style>
</head>
<body>
    <div class=;box;>
    </div>
</body>
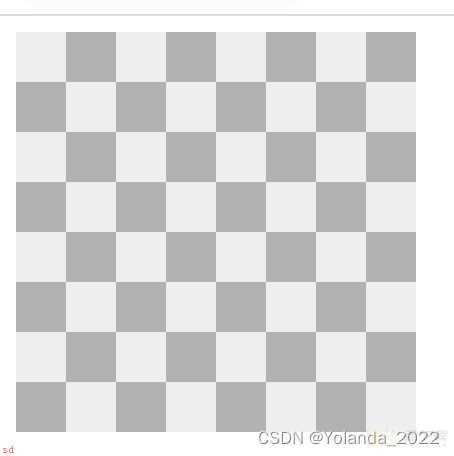
简写如下;其实就是一个正方形设置两个不同的起点;
  <style>
    .box{
      width: 100px;
      height: 100px;
      background: #eee;
      background-image:
       linear-gradient(45deg, rgba(0,0,0,.25) 25%, transparent 0, transparent 75%, rgba(0,0,0,.25) 0),
       linear-gradient(45deg, rgba(0,0,0,.25) 25%, transparent 0, transparent 75%, rgba(0,0,0,.25) 0);
      background-position: 0 0, 15px 15px;
      background-size: 30px 30px;
    }

  </style>
</head>
<body>
    <div class=;box;>
    </div>
</body>
sass的写法;
;mixin checkerboard($size, $base, SCSS $accent: rgba(0,0,0,.25)) {
background: $base;
 background-image:
     linear-gradient(45deg,$accent 25%, transparent 0,transparent 75%, $accent 0),
     linear-gradient(45deg,$accent 25%, transparent 0,transparent 75%, $accent 0);
background-position: 0 0, $size $size,
background-size: 2*$size 2*$size;
}
/* 调用时是这样的...... */
;include checkerboard(15px, #58a, tan);
svg的写法;
<svg xmlns=;http://www.w3.org/2000/svg; width=;100; height=;100; fill-opacity=;.25; >
   <rect x=;50; width=;50; height=;50; />
   <rect y=;50; width=;50; height=;50; />
</svg>
如下;把svg放在background里导入进去作为背景图片;通过background-size来控制svg背景图片的大小。
  <style>
    .box{
      width:200px;
      height: 200px;
      background: #eee url(;data:image/svg;xml,<svg xmlns=;http://www.w3.org/2000/svg; width=;100; height=;100; fill-opacity=;.25;><rect x=;50; width=;50; height=;50; /><rect y=;50; width=;50; height=;50; /></svg>;);
      background-size: 50px 50px;
    }


  </style>
</head>
<body>
    <div class=;box;>
    </div>
</body>
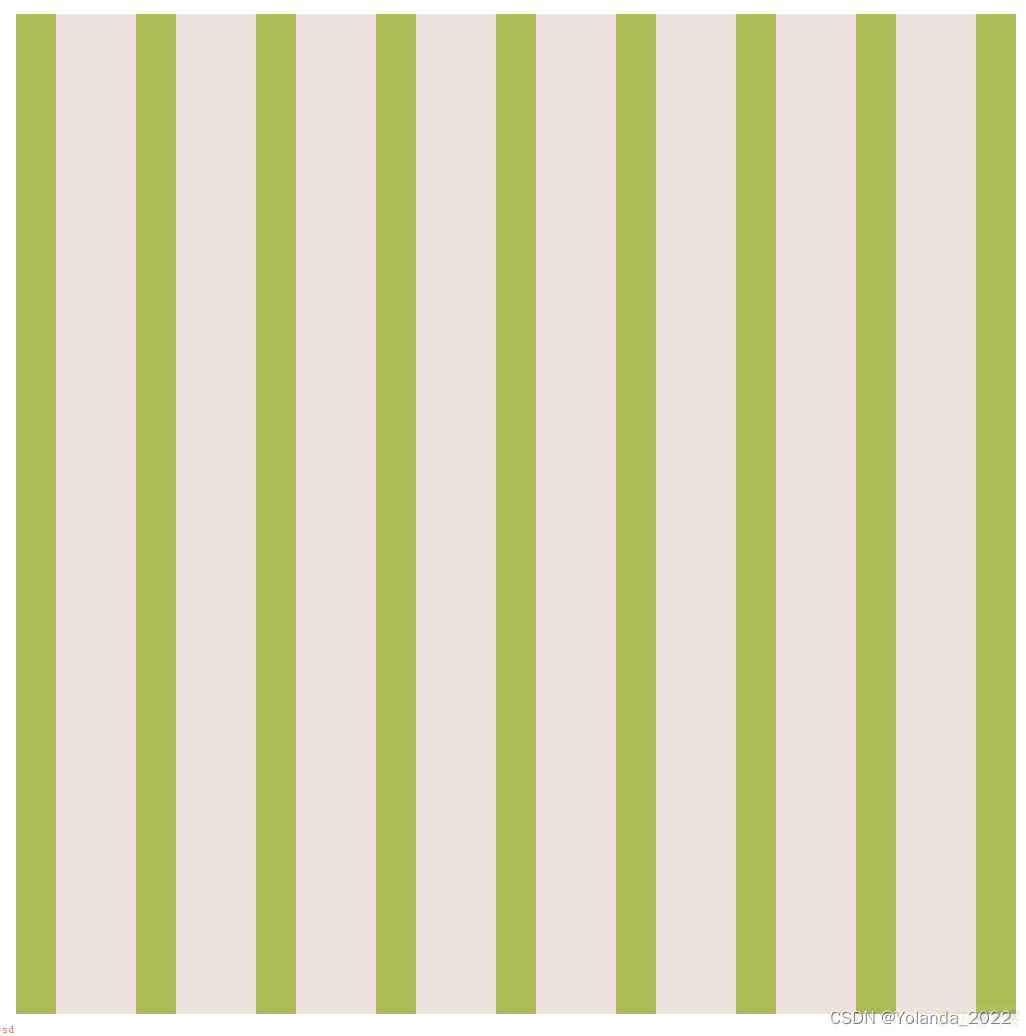
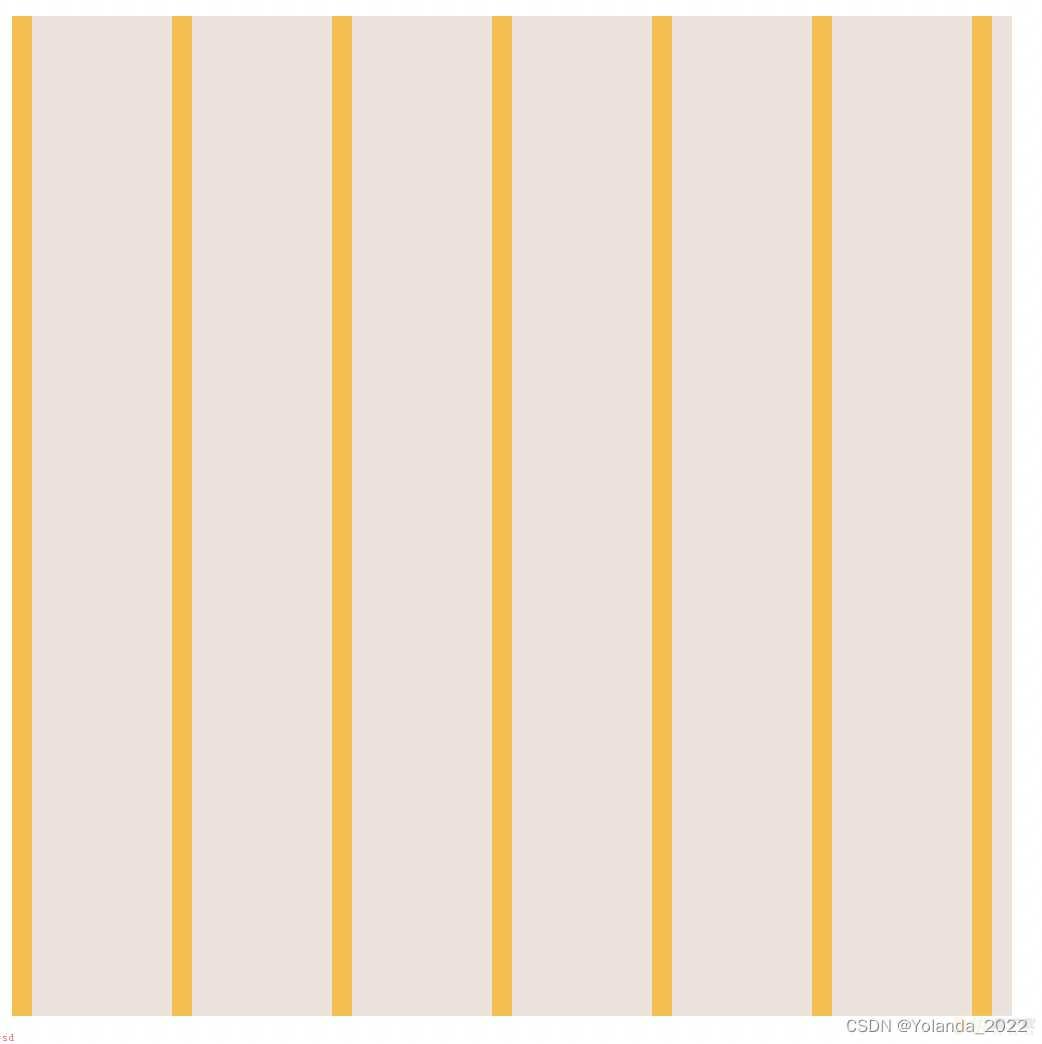
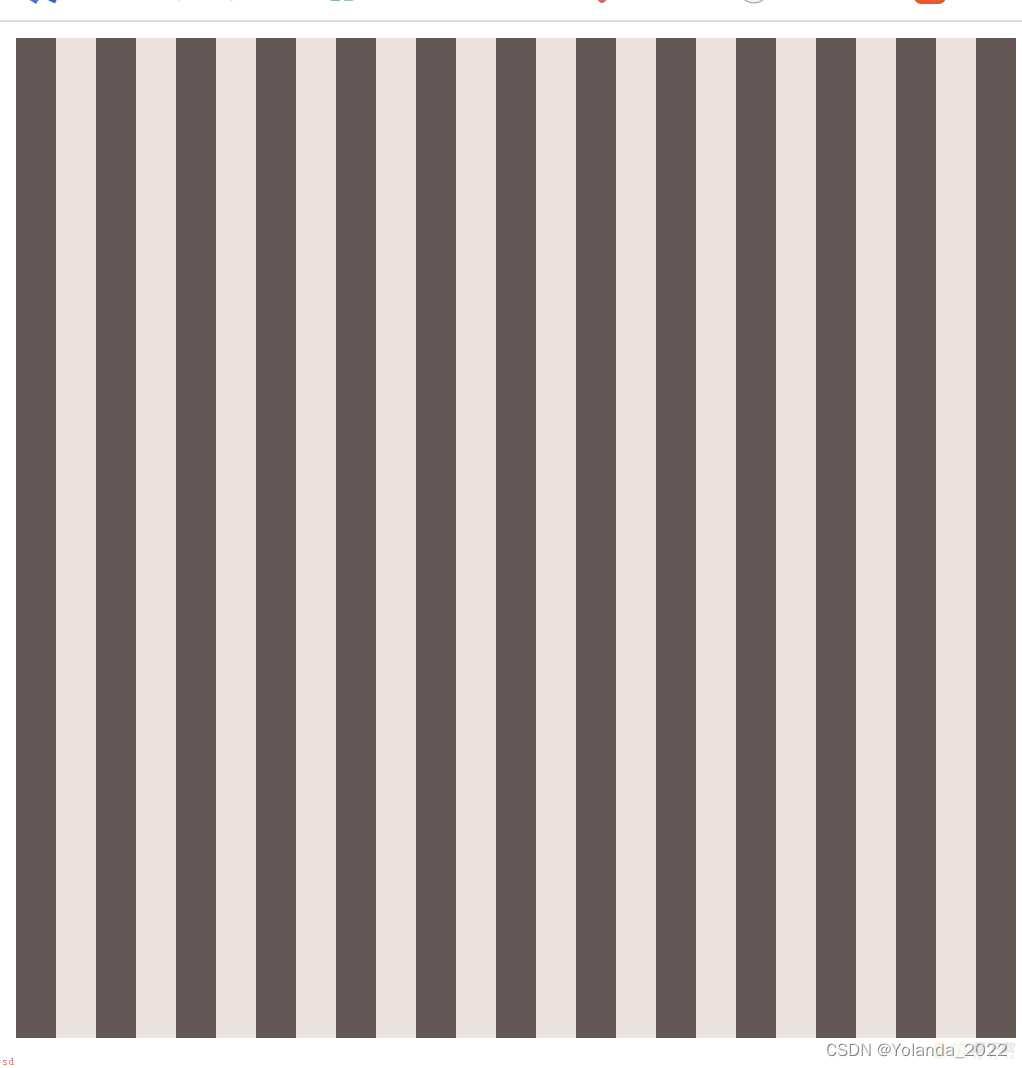
由上面三张重叠在一起合成下面这张;
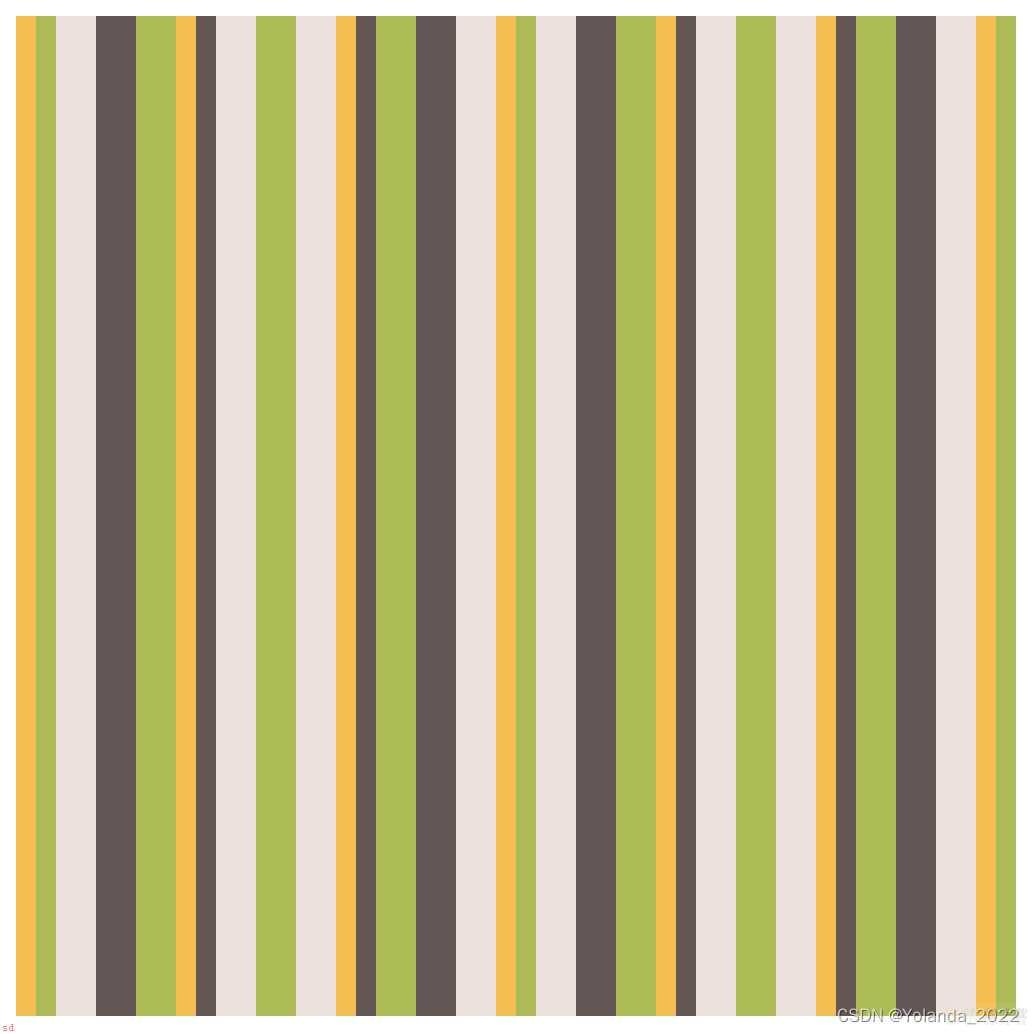
因为最顶层贴片的重复规律最容易被察觉;我们应该把平铺间距最大的贴片安排在最顶层(在我们的例子中是橙色条纹)。
这样的结果显明更有随机的感觉;但如果仔细观察的话;仍然可以看出图案每隔 240px 就会重复一次。这个组合图案中第一个贴片的终点;就是各层背景图像以不同间距重复数次后再次统一对齐的点。
这里贴片的尺寸实际上就是所有 background-size 的最小公倍数;而 40、60和80的最小公倍数正是240。
为了让最小公倍数最大化;这些数字最好是“相对质数”11。在这种情况下;它们的最小公倍数就是它们的乘积。举例来说;3、4 和 5 是相对质数;因此它们的最小公倍数就是 3×4×5=60。要达成相对质数;最简单的办法就是尽量选择质数;因为质数跟其他任意数字都是相对质数。
background: hsl(20, 40%, 90%); background-image:
    linear-gradient(90deg, #fb3 10px, transparent 0),
    linear-gradient(90deg, #ab4 20px, transparent 0),
    linear-gradient(90deg, #655 20px, transparent 0);
background-size: 80px 100%, 60px 100%, 40px 100%
我们根据相对质数的规律来设置不同贴片的宽度;
background: hsl(20, 40%, 90%); background-image:
    linear-gradient(90deg, #fb3 11px, transparent 0),
    linear-gradient(90deg, #ab4 23px, transparent 0),
    linear-gradient(90deg, #655 41px, transparent 0);
background-size: 41px 100%, 61px 100%, 83px 100%
平铺贴片的尺寸现在是 41×61×83=207583 像素;比任何我们所能想像出的屏幕分辨率都要大!
其他应用;
如果要生成一个动画;而且想让它看起来不是按照明显的规律在循环时;我们可以应用多个时长为质数的动画
最简单的办法是使用两个 HTML 元素:
一个元素用来把我们的石雕图片设为背景;另一个元素用来存放内容;并设置纯白背景;然后覆盖在前者之上:

  <style>
    .something-meaningful {
      background: url(stone-art.png);
      background-size: cover;
      padding: 1em;
    }
    .something-meaningful > div {
      background: white;
      padding: 1em;
     }
  </style>
</head>
<body>
  <div class=;something-meaningful;>
    <div> I have a nice stone art border, don;t I look pretty?
  </div>
</div>
</body>
做法二;
注意为什么是两个background-image;而不是whilte的background-color;再加上stone-art.png的background-image?
因为background-color为white的话;stone-art.png如何和白色重叠呢;而且白色在里面显示。
只有background-image可以重叠图片显示。
  <style>
    .something-meaningful {
        padding: 1em;
        border: 1em solid transparent;
        background: linear-gradient(white, white),url(stone-art.png);
        background-size: cover;
        background-clip: padding-box, border-box;
    }

  </style>
</head>
<body>
  <div class=;something-meaningful;>
     I have a nice stone art border, don;t I look pretty?
</div>
</body>
但是上面的还是有点问题;对比原图和边框最后的效果;感觉不对。
为嘛呢;原因是 background-origin 的默认值是 padding-box;
为了修正这个问题;只需把 background-origin 也设置为 border-box 就可以了

修正后的结果如下;

简写形式如下;
padding: 1em;
border: 1em solid transparent;
background:
    linear-gradient(white, white) padding-box,
    url(stone-art.jpg) border-box 0 / cover;

 <style>
    .something-meaningful {
      padding: 1em;
      border: 1em solid transparent;
      background:
            linear-gradient(white, white) padding-box,
            repeating-linear-gradient(-45deg,
              red 0, red 12.5%,
              transparent 0, transparent 25%,
              #58a 0, #58a 37.5%,
              transparent 0, transparent 50%)  0 / 5em 5em;
    }
  </style>
</head>
<body>
  <div class=;something-meaningful;>
     I have a nice stone art border, don;t I look pretty?
</div>
</body>
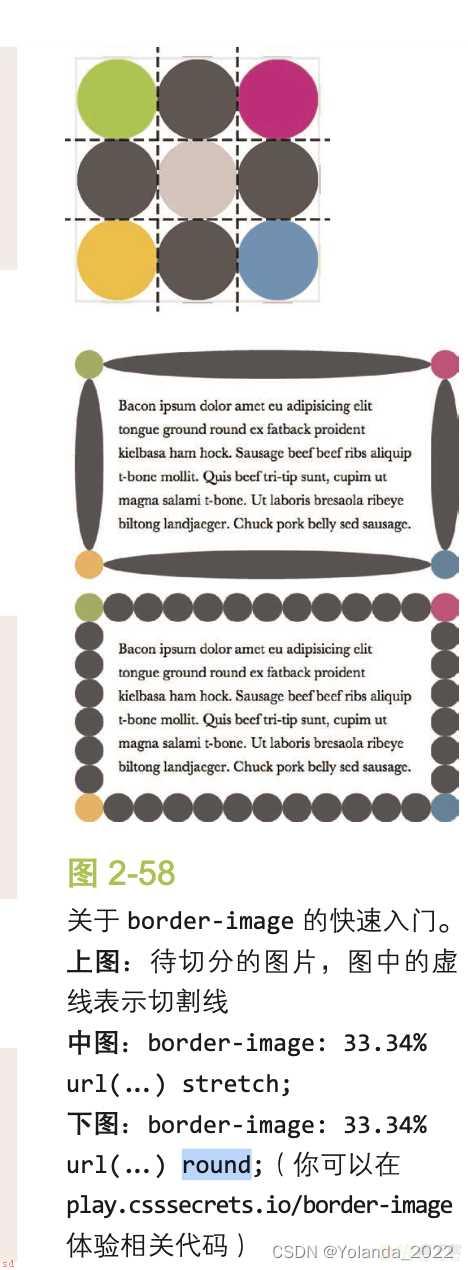
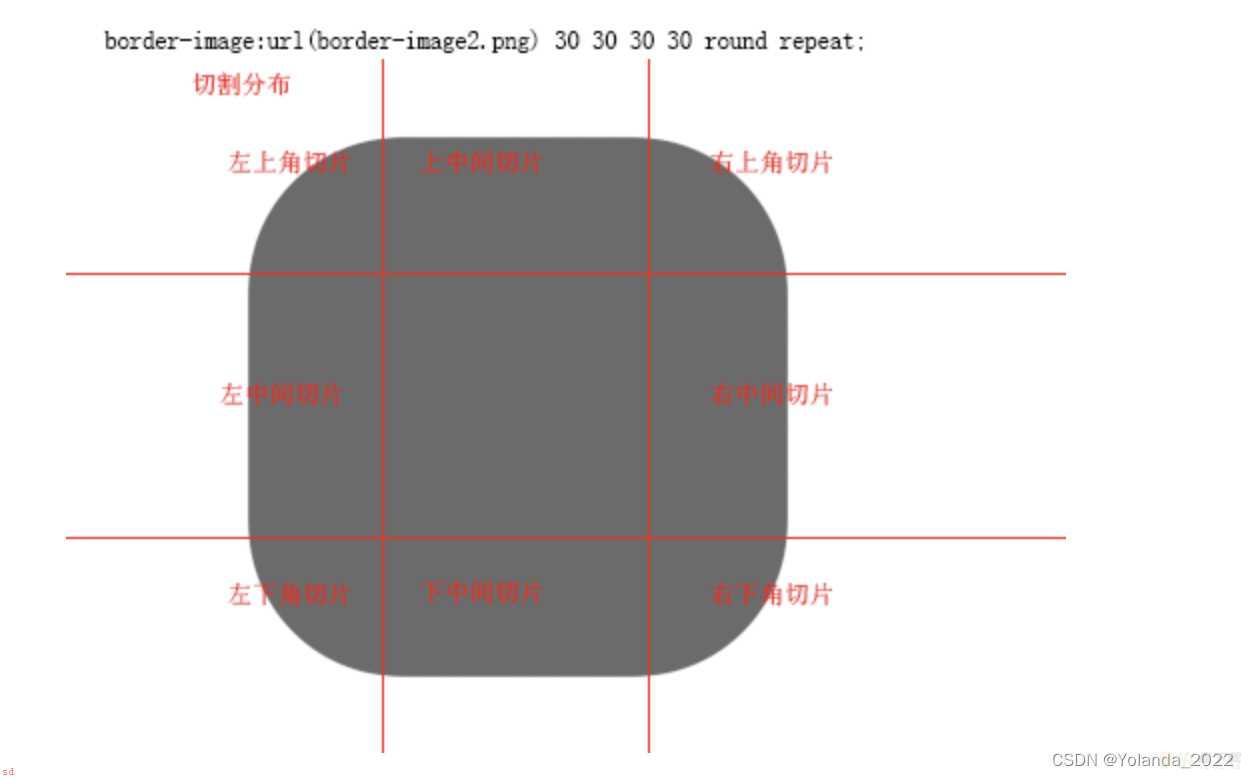
border-image-slice属性是如何使用的?
为什么border-image-slice的数值正好是border-width的时候;显示的图片就比较标准?
并不是这样;16是16px;是以图片本身的大小为标准去切割的;图片应该本身的大小是16*3px 的宽和高的。
使用boder-image来实现信封边框;
padding: 1em;
border: 16px solid transparent;
border-image: 16 repeating-linear-gradient(-45deg,
                   red 0, red 1em,
                   transparent 0, transparent 2em,
                   #58a 0, #58a 3em,
                   transparent 0, transparent 4em);
不论 border 的宽度设置的多大;后面切割的参数都是根据 border-image 引入图片的尺寸设置的参数, 或者说是根据引入图片大小设置的切割参数。
切割后的四周的八个切片;四个角根据 border 设置的大小全尺寸自动缩放显示到 border 对应的四个角。
除四个角外的其他中间切片;上中;右中间;下中;左中间;;可以根据设置做拉伸或重复的设置操作显示到对应的 border 位置。
此属性指定顶部;右;底部;左边缘的图像向内偏移;分为九个区域;四个角;四边和中间。图像中间部分将被丢弃;完全透明的处理;;除非填写关键字。
查看动画;了解具体是如何切割的;
https://www.runoob.com/cssref/css3-pr-border-image-slice.html

;keyframes ants { to { background-position: 100% } }
.marching-ants {
   padding: 1em;
   border: 1px solid transparent;
   background:
        linear-gradient(white, white) padding-box,
        repeating-linear-gradient(-45deg,
          black 0, black 25%, white 0, white 50%
        ) 0 / .6em .6em;
   animation: ants 12s linear infinite;
}
实际上是如下的背景图片;中部被白色填充起来

但是是如何让边框行走起来的呢?
利用animation动画;修改background-position属性;注意background-position是指定背景图片从元素的x轴和y轴的哪个位置开始展示。
注意:这里border-image-slice是100% 0% 0%
那么意思其实就是整个背景图片的截取;作为左上角;其他的三只角啥也没有。
.footnote {
  /* 有三个值的时候它分别控制 顶部 | 水平方向 | 底部 */
  border-top: .15em solid transparent;
	border-image:100% 0% 0% linear-gradient(90deg, currentColor 4em, transparent 0);
	padding-top: .5em;
	font: 220%/1.4 Baskerville, Palatino, serif;
}
  </style>
</head>
<body>
  <div class=;footnote;>
     I have a nice stone art border, don;t I look pretty?
</div>
</body>
我们往往不愿意对一个元素指定固定的宽度和高度;因为我们希望它能根据其内容自动调整并适应;而内容的长短不可能在事先就知道。如果它的宽高相等;就显示为一个圆;如果宽高不等;就显示为一个椭圆。
border-radius可以单独指定水平和垂直半径;只要用一个斜杠(/)分隔这两个值即可。
如何获得精确的椭圆?
如果我们有一个尺寸为200px×150px 的元素;就可以把它圆角的两个半径值分别指定为元素宽高的一半;从而得到一个精确的椭圆;border-radius: 100px / 75px;
border-radius不仅可以接受长度值;还可以接受百分比值。这个百分比值会基于元素的尺寸进行解析;即宽度用于水平半径的解析;而高度用于垂直半径的解析。
border-radius: 50%
只需要这一行代码;我们就可以得到一个自适应的椭圆了。
我们可以为所有四个角提供完全不同的水平和垂直半径;方法是在斜杠前指定 1~4 个值;在斜杠后指定另外 1~4 个值。
CSS 属性 border-radius 允许你设置元素的外边框圆角。当使用一个半径时确定一个圆形;当使用两个半径时确定一个椭圆。这个(椭)圆与边框的交集形成圆角效果。
官方已经很明显的指出使用border-radius可以绘制圆形或椭圆;区别在于使用一个半径还是两个半径;而border-radius就是规定图形四个角的半径大小
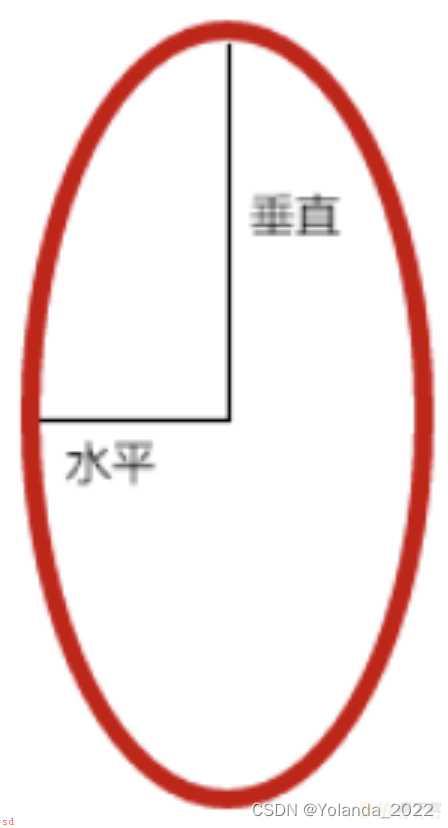
椭圆通常会有两个半径;一个水平半径;一个垂直半径;如下图;
正圆形的原理;
绘制圆形;首要条件保证宽高一样;border-radius如果只设置一个属性;那么则代表四个角的半径一样;且半径设置成元素宽高的一半;则相当于四个半圆合成了一个圆。
椭圆的原理;
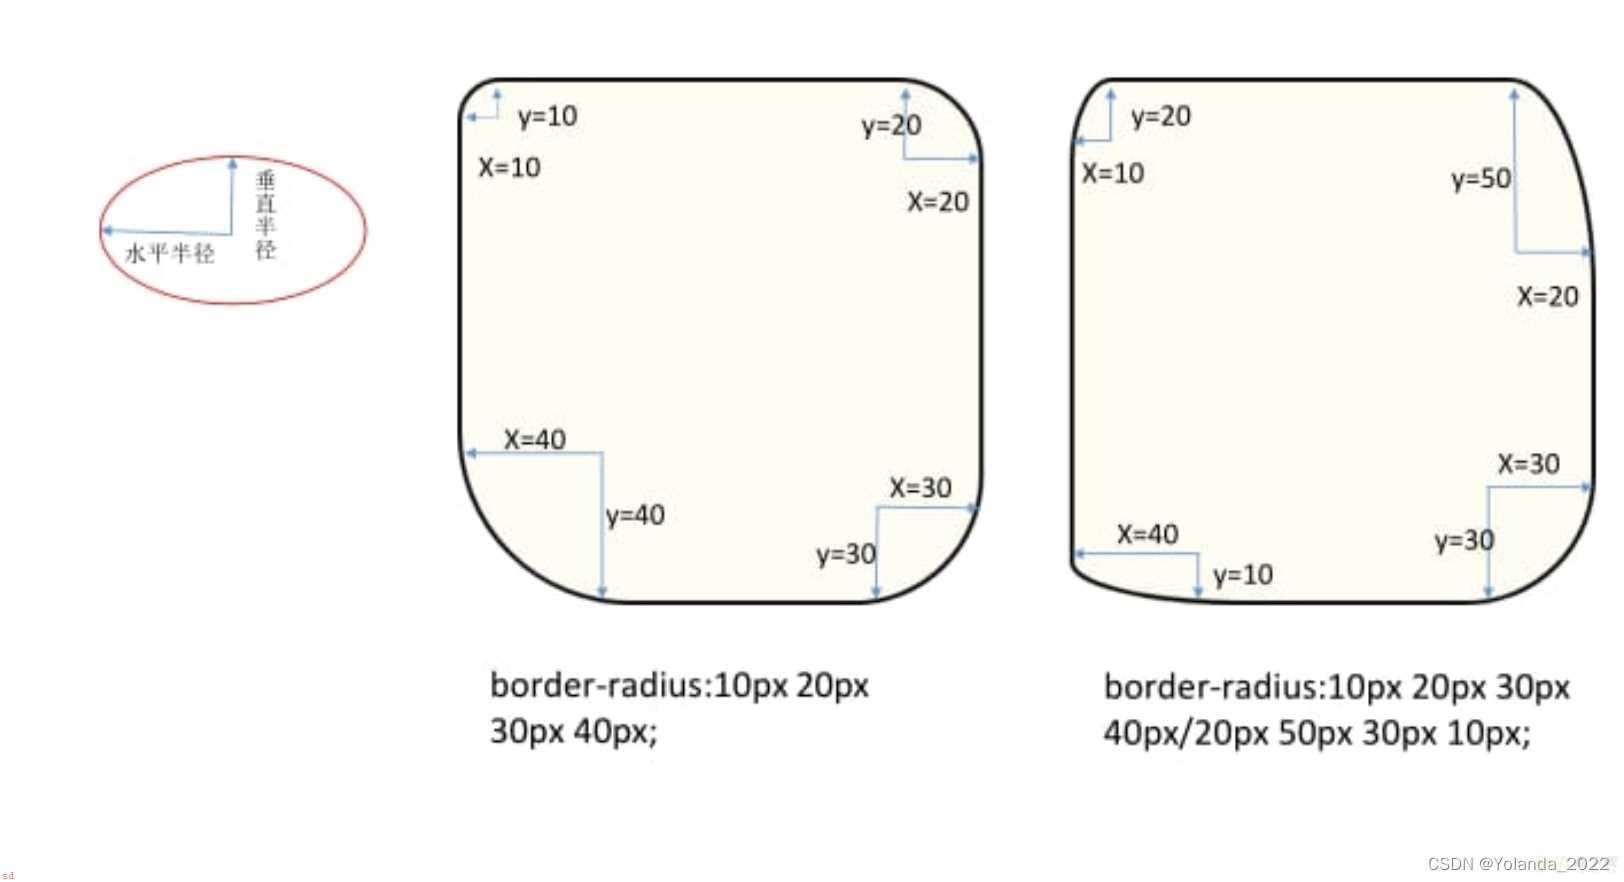
border-radius可以分别设置每个圆角的水平半径和垂直半径;通过这个属性;我们便可以绘制出椭圆。
border-radius:左上角水平圆角半径大小 右上角水平圆角半径大小 右下角水平圆角半径大小 左下角水平圆角半径大小 / 左上角垂直圆角半径大小 右上角垂直圆角半径大小 右下角垂直圆角半径大小 左下角垂直圆角半径大小
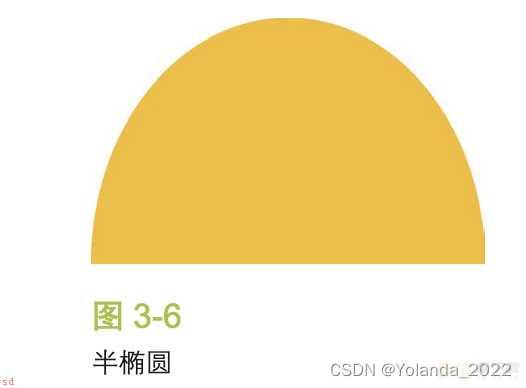
border-radius: 50% / 100% 100% 0 0;
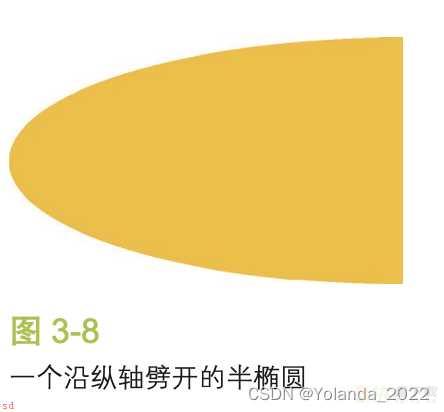
border-radius: 100% 0 0 100% / 50%
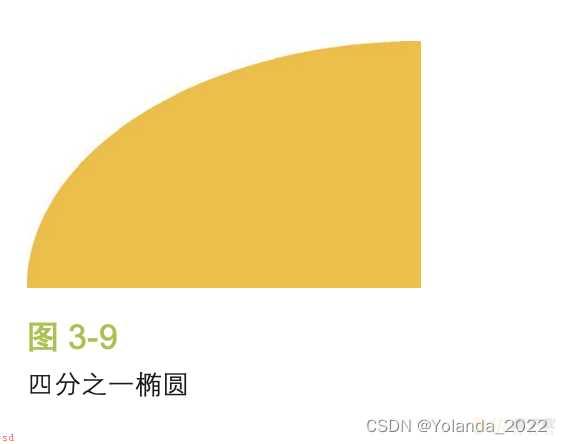
border-radius: 100% 0 0 0;
transform: skewX(-45deg);
但是这种做法;会导致它里面的文字也倾斜。
解决办法;
对内容再应用一次反向的 skew() 变形;从而抵消容器的变形效果。
<a href=;#yolo; class=;button;>
  <div>Click me</div>
</a>
.button {
  transform: skewX(-45deg);
}
.button > div {
  transform: skewX(45deg);
}
把所有样式(背景、边框等)应用到伪元素上;然后再对伪元素进行变形。因为我们的内容并不是包含在伪元素里的;所以内容并不会受到变形的影响。
一个简单的办法是给宿主元素应用 position: relative 样式;并为伪元素设置 position:absolute;然后再把所有偏移量设置为零;以便让它在水平和垂直方向上都被拉伸至宿主元素的尺寸。
其实原理是;利用伪元素脱离文档流;长和宽和父元素一致;做出平行四边形的形状。文字的话;父元素里的文字因为伪元素脱离文档流;是不受影响的。
  <style>
 .button {
	position: relative;
	display: inline-block;
	padding: .5em 1em;
	border: 0;
    margin: .5em;
	background: transparent;
	color: white;
}

.button::before {
	content: ;;;
	position: absolute;
	top: 0;
    right: 0;
    bottom: 0;
    left: 0;
	z-index: -1;
	background: #58a;
	transform: skew(45deg);
}
  </style>
</head>
<body>
  <button class=;button;>Click me</button>
</body>
做法是;在图片外套一个div, div旋转45度;把图片本身旋转-45度;使得图片能正着显示。
但是图片就无法填充完整菱形的外部div,那么我们把图片放大一点;就是根号2的倍数放大;scale(1.42),
那么图片就可以完整显示为菱形了。
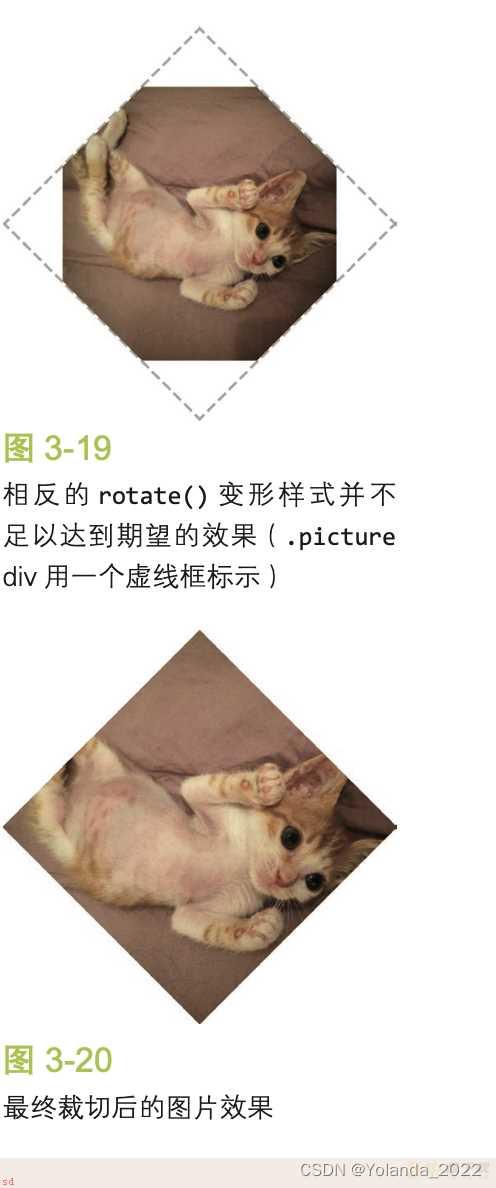
<style>
.diamond {
	width: 250px;
	height: 250px;
	transform: rotate(45deg);
	Overflow: hidden;
	margin: 100px;
}
.diamond img {
	max-width: 100%
	transform: rotate(-45deg) scale(1.42);
	z-index: -1;
	position: relative;
}
  </style>
</head>
<body>
  <div class=;diamond;>
    <img src=;a.png; alt=;...; />
  </div>
</body>
但是以上的做法只适合正方形图片;如果不是正方形呢?
我们可以使用裁剪属性clip-path:
裁切路径允许我们把元素裁剪为我们想要的任何形状。在这个例子中;我们将会使用 polygon()(多边形)函数来指定一个菱形。实际上;它允许我们用一系列(以逗号分隔的)坐标点来指定任意的多边形。我们甚至可以使用百分比值;它们会解析为元素自身的尺寸。
clip-path: polygon(50% 0, 100% 50%, 50% 100%, 0 50%);
clip-path 所能创造的奇迹还不止于此。这个属性甚至可以参与动画;只要我们的动画是在同一种形状函数
(比如这里是 polygon())之间进行的;而且点的数量是相同的。
img {
   clip-path: polygon(50% 0, 100% 50%,50% 100%, 0 50%);
   transition: 1s clip-path;
  }
img:hover {
  clip-path: polygon(0 0, 100%  0,100% 100%, 0 100%);
}
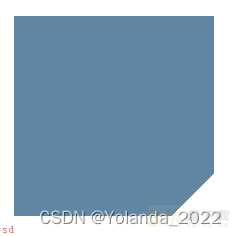
  <style>
    .box{
      width: 100px;
      height: 100px;
      background:linear-gradient(-45deg,transparent 15px, #58a 0);
    }
  </style>
</head>
<body>
  <div class=;box;>
  </div>
</body>
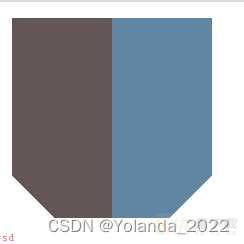
  <style>
    .box{
      width: 100px;
      height: 100px;
      background:
       linear-gradient(-45deg, transparent 15px, #58a 0) right,
       linear-gradient(45deg, transparent 15px, #655 0) left;
      background-size: 50% 100%
      background-repeat: no-repeat;
    }
  </style>
</head>
<body>
  <div class=;box;>
  </div>
</body>
right和left是background-position的设置。
background-size(百分比;:
Sets the width and height of the background image in percent of the parent element. The first value sets the width, the second value sets the height. If only one value is given, the second is set to “auto”.
四个角做切角效果
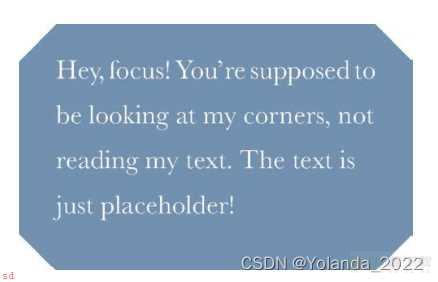
background: #58a;
background:
    linear-gradient(135deg,  transparent 15px, #58a 0)
        top left,
    linear-gradient(-135deg, transparent 15px, #58a 0)
        top right,
    linear-gradient(-45deg, transparent 15px, #58a 0)
        bottom right,
    linear-gradient(45deg, transparent 15px, #58a 0)
        bottom left;
background-size: 50% 50%
background-repeat: no-repeat;
使用scss来写;
注意 $br:$tl的意思是;变量br默认取的是tl的值。
内凹圆角效果;
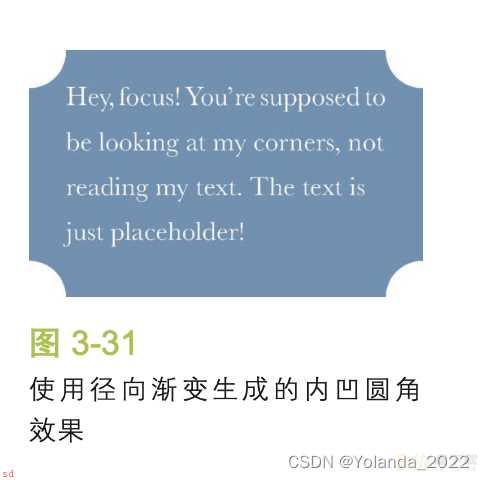
;mixin beveled-corners($bg,
$tl:0, $tr:$tl, $br:$tl, $bl:$tr) {
background: $bg; background:
linear-gradient(135deg, transparent $tl, $bg 0) top left,
linear-gradient(225deg, transparent $tr, $bg 0) top right,
linear-gradient(-45deg, transparent $br, $bg 0) bottom right,
linear-gradient(45deg, transparent $bl, $bg 0) bottom left;
background-size: 50% 50%
background-repeat: no-repeat;
}
;include beveled-corners(#58a, 15px, 5px);
svg切角边框效果
polygon是多边形;根据0,1 x轴坐标和y轴坐标;逗号隔开;来描点连成线;成为多边形。
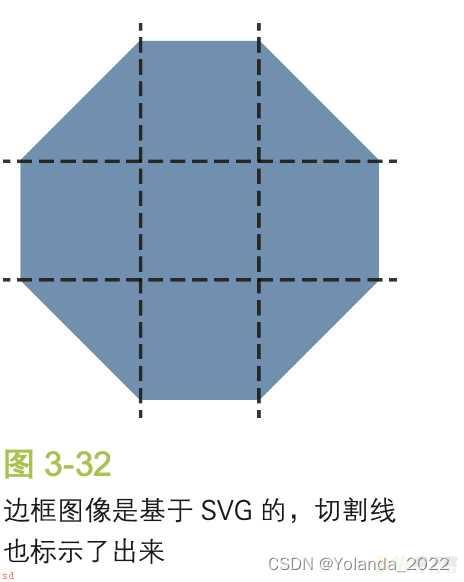
  <style>
    .box{
      width: 100px;
      height: 100px;
      border: 15px solid transparent;
      border-image: 1 url(;data:image/svg;xml,<svg xmlns=;http://www.w3.org/2000/svg; width=;3; height=;3; fill=%2358a;><polygon points=;0,1 1,0 2,0 3,1 3,2 2,3 1,3 0,2;/> </svg>;);
    }
  </style>
</head>
<body>
  <div class=;box;>
  </div>
请注意;我们使用的切片尺寸是 1。这并不表示 1 像素;它所对应的是SVG 文件的坐标系统(因此不需要单位)。
效果图如下;
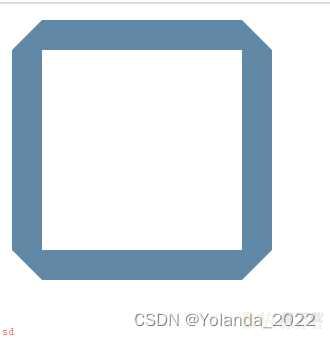
我们通过加上background属性;把内容颜色填实;同时background-clip来避免background覆盖到border.
  <style>
    .box{
      width: 100px;
      height: 100px;
      border: 15px solid transparent;
      border-image: 1 url(;data:image/svg;xml,<svg xmlns=;http://www.w3.org/2000/svg; width=;3; height=;3; fill=%2358a;><polygon points=;0,1 1,0 2,0 3,1 3,2 2,3 1,3 0,2;/> </svg>;);
      background: #58a;
      background-clip: padding-box;
    }
  </style>
</head>
<body>
  <div class=;box;>

  </div>
</body>
裁切路径方案(使用clip-path)
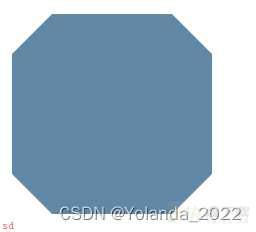
 .box{
      width: 100px;
      height: 100px;
      background: #58a;
      clip-path: polygon(20px 0,
      calc(100% - 20px) 0,
      100% 20px,100% calc(100% - 20px),
      calc(100% - 20px) 100%,
      20px 100%,
      0 calc(100% - 20px),
      0 20px);
    }
perspective:可以理解为值越大,你离元素的距离很远;效果越不明显;值越小则距离元素越近;效果越明显。
rotateX就是围绕着x轴转。
  <style>
.tab {
  width: 100px;
  height: 100px;
  margin:100px;
  position: relative;
  display: inline-block;
  padding: .5em 1em .35em;
  color: white;
}
.tab::before {
  content: ;;; /* 用伪元素来生成一个矩形 */
  position: absolute;
  top: 0;
  right: 0;
  bottom: 0;
  left: 0;
  z-index: -1;
  background: #58a;
  // 核心在这一句
  transform: perspective(.5em) rotateX(5deg);
}
  </style>
</head>
<body>
  <div class=;tab;>
  </div>
</body>
问题在于;为什么是子元素?为什么不能用自己来实现?
原因是为了里面的文本内容不变形。
我们可以为它指定 transform-origin:bottom;;当它在 3D 空间中旋转时;可以把它的底边固定住。
垂直方向上的缩放程度(也就是scaleY() 变形属性)在达到 130% 左右时刚好可以补足它在高度上的缩水:
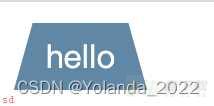
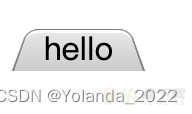
  <style>
.tab {
 position: relative;
 display: inline-block;
 padding: .5em 1em .35em;
 color: white;
}
.tab::before {
 content: ;;; /* 用伪元素来生成一个矩形 */
 position: absolute;
 top: 0;
 right: 0;
 bottom: 0;
 left: 0;
 z-index: -1;
 background: #58a;
 transform: scaleY(1.3) perspective(.5em) rotateX(5deg);
 transform-origin: bottom;
}
  </style>
</head>
<body>
  <div class=;tab;>
    hello
  </div>
</body>
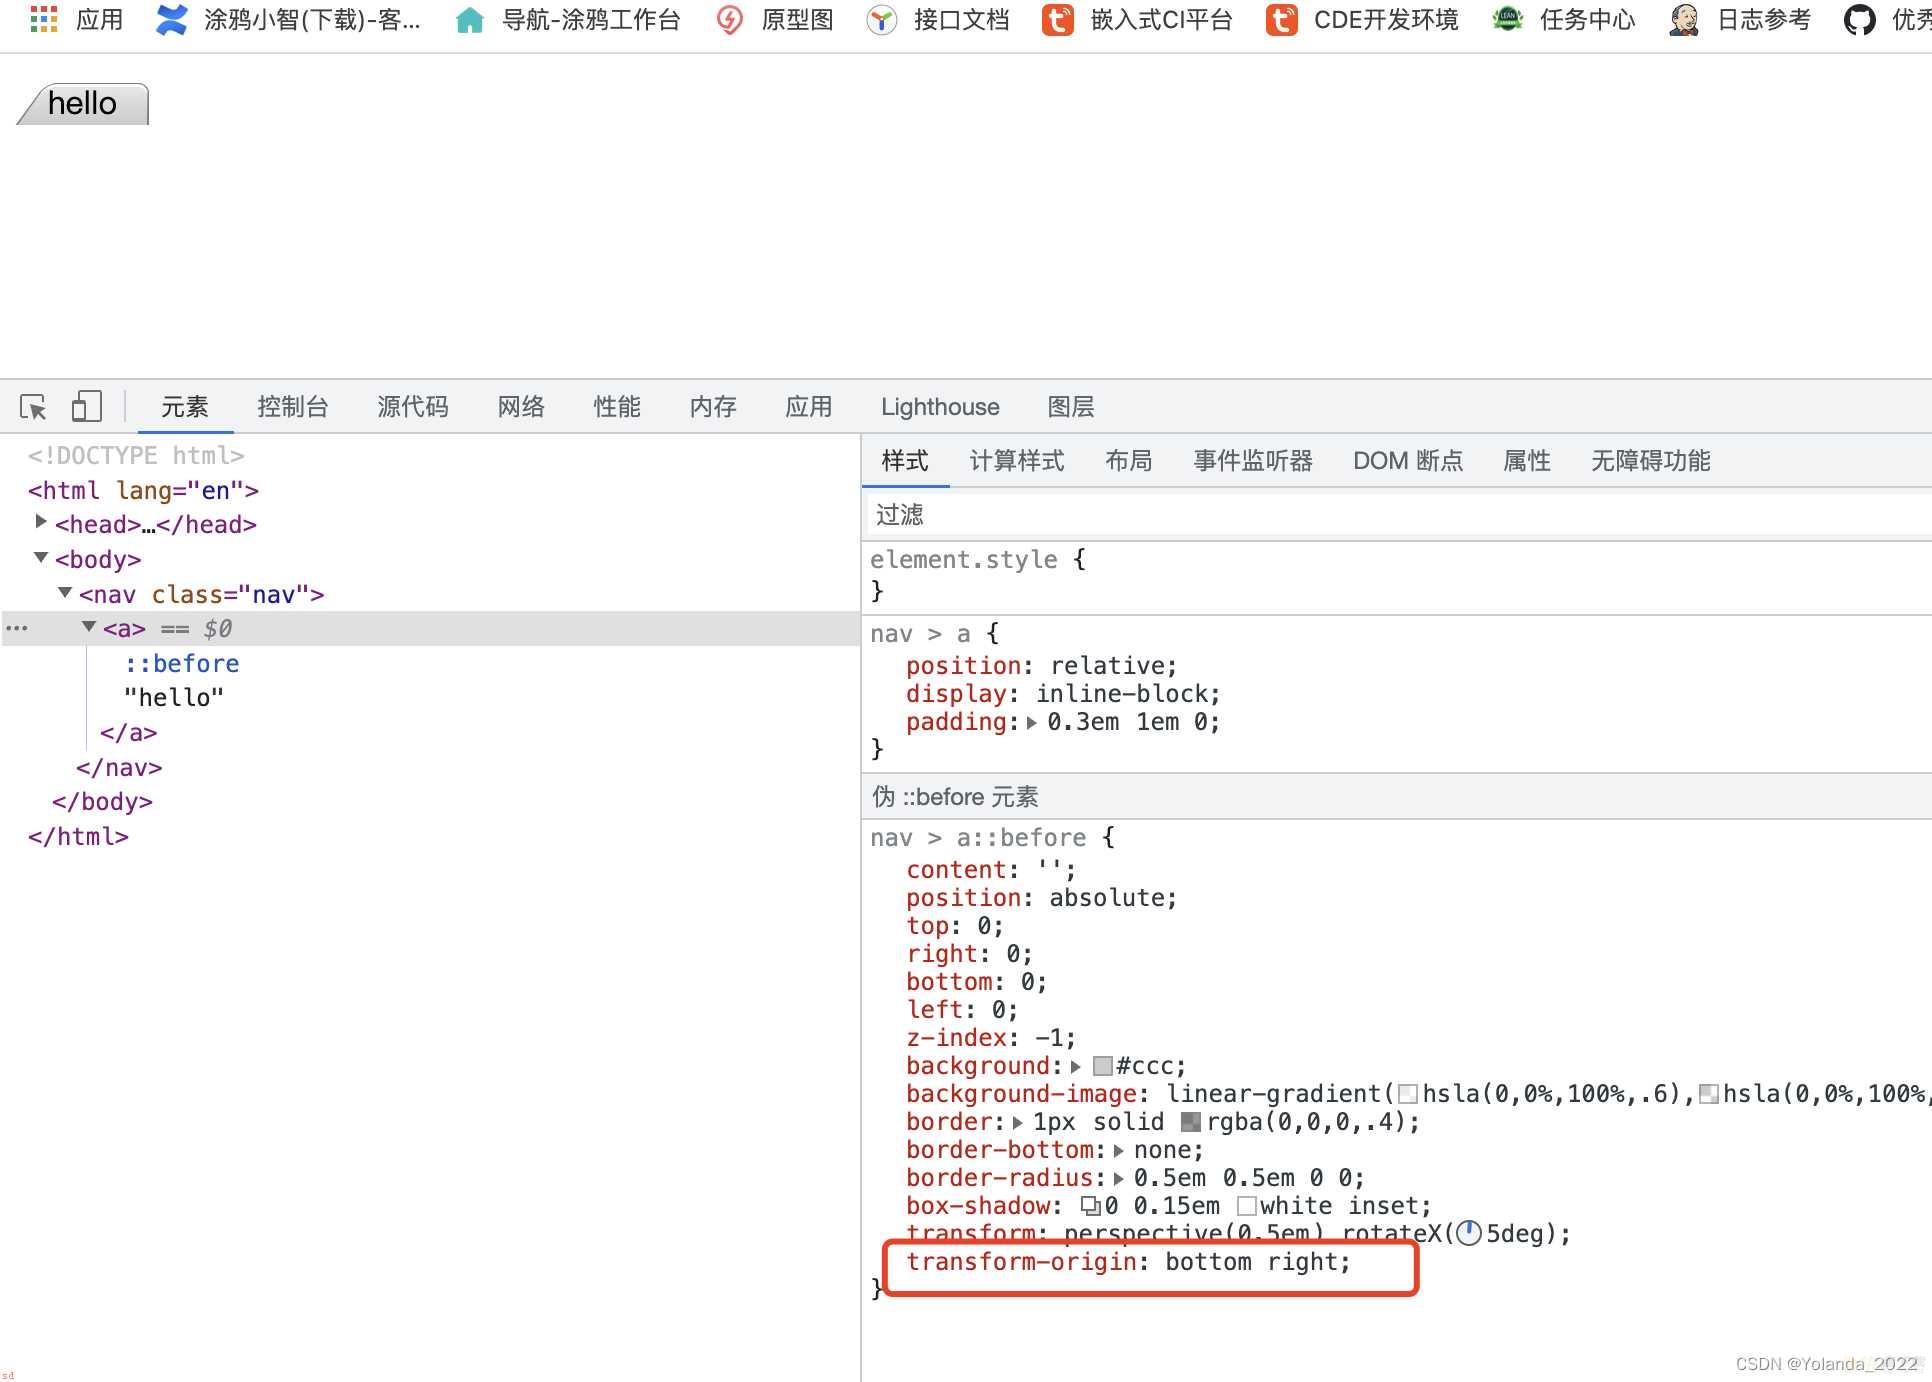
  <style>
nav > a {
position: relative;
display: inline-block;
padding: .3em 1em 0;
}
nav > a::before {
content: ;;;
position: absolute;
top: 0;
right: 0;
bottom: 0;
left: 0;
z-index: -1;
background: #ccc;
background-image: linear-gradient(hsla(0,0%,100%,.6),hsla(0,0%,100%,0));
border: 1px solid rgba(0,0,0,.4);
border-bottom: none;
border-radius: .5em .5em 0 0;
box-shadow: 0 .15em white inset;
transform: perspective(.5em) rotateX(5deg);
transform-origin: bottom;
}
  </style>
</head>
<body>
  <nav class=;nav;>
    <a>hello</a>
  </nav>
</body>
background-image是控制background的深浅的;上面浅;下面深。
transform-origin;bottom控制底边的长度和a标签的长度一致。
box-shadow是内置的白色阴影。
另外;我们只需要把 transform-origin 改成bottom left或bottom right;就可以立即得到左侧倾斜或右侧倾斜的标签页。
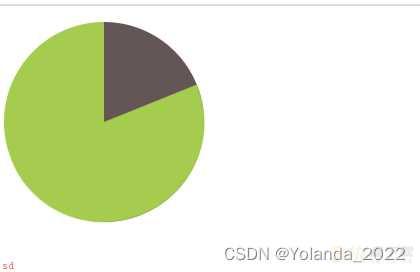
注意pie是一个左边黄绿色;右边褐色的圆形。
pie::before是pie的子元素;宽度是父元素的一半;高度同父元素。
  <style>
  .pie {
    width: 100px;
    height: 100px;
    border-radius: 50%
    background: yellowgreen;
    background-image:linear-gradient(to right, transparent 50%, #655 0);
  }

.pie::before {
  content: ;;;
  display: block;
  margin-left: 50%
  height: 100%
  /* content: ;;;
  display: block;
  margin-left: 50%
  height: 100%
  border-radius: 0 100% 100% 0 / 50%
  background: #655;
  transform-origin: left;
  transform: rotate(.1turn);  */
}
  </style>
</head>
<body>
  <div class=;pie;></div>
</body>
如下;border-radius使得子元素是个半圆;transform-origin设置旋转的基点是左边的中心点。
  <style>
  .pie {
    width: 100px;
    height: 100px;
    border-radius: 50%
    background: yellowgreen;
    background-image:linear-gradient(to right, transparent 50%, #655 0);
  }

.pie::before {
  content: ;;;
  display: block;
  margin-left: 50%
  height: 100%
  border-radius: 0 100% 100% 0 / 50%
  background: #655;
  transform-origin: left;
  transform: rotate(.1turn);
}
  </style>
</head>
<body>
  <div class=;pie;></div>
</body>
动画饼状进度条
 <style>
    .pie {
    width: 100px;
    height: 100px;
    border-radius: 50%
    background: yellowgreen;
    background-image:linear-gradient(to right, transparent 50%, #655 0);
   }
   ;keyframes spin {
     to { transform: rotate(.5turn);
    }
   }
   ;keyframes bg {
    50% { background: #655; }
   }
  .pie::before {
    content: ;;;
    display: block;
    margin-left: 50%
    height: 100%
    border-radius: 0 100% 100% 0 / 50%
    background-color: inherit;
    transform-origin: left;
    animation:
    spin 3s linear infinite,
     bg 6s step-end infinite;
  }
  </style>
</head>
<body>
  <div class=;pie;></div>
</body>
先是一个绿色的半圆;转了半圈后;颜色变成褐色重头开始转。step-end是颜色的最终颜色的意思。
如何设置不同百分比的饼图?
animation-play-state: paused; 动画暂停。
animation-delay: -20s; 为负值;表示动画进行到第20s的时候为初始状态。
 <style>
.pie {
	display: inline-block;
	position: relative;
	width: 100px;
	line-height: 100px;
	border-radius: 50%
	background: yellowgreen;
	background-image: linear-gradient(to right, transparent 50%, #655 0);
	color: transparent;
	text-align: center;
  /* 注意 animation-delay根据百分比设置;20%就设置-20s*/
    animation-delay: -20s;
}

;keyframes spin {
	to { transform: rotate(.5turn); }
}
;keyframes bg {
	50% { background: #655; }
}

.pie::before {
	content: ;;;
	position: absolute;
	top: 0; left: 50%
	width: 50% height: 100%
	border-radius: 0 100% 100% 0 / 50%
	background-color: inherit;
	transform-origin: left;
	animation: spin 50s linear infinite, bg 100s step-end infinite;
	animation-play-state: paused;
	animation-delay: inherit;
}
  </style>
</head>
<body>
<div class=;pie;>20%</div>
</body>
SVG 解决方案:
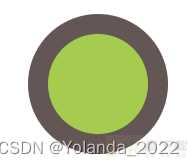
svg是背景画布;
circle是圆形标签;r是半径;cx是圆心x轴位置;cy是圆心y轴位置。
  <style>
  circle {
    fill: yellowgreen;
    stroke: #655;
    stroke-width: 10;
  }
  </style>
</head>
<body>
  <svg width=;100; height=;100;>
    <circle r=;30; cx=;50; cy=;50; />
  </svg>
</body>
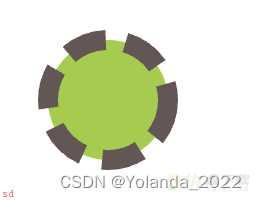
  <style>
  circle {
    fill: yellowgreen;
    stroke: #655;
    stroke-width: 10;
    stroke-dasharray: 20 10;
  }
  </style>
</head>
<body>
  <svg width=;100; height=;100;>
    <circle r=;30; cx=;50; cy=;50; />
  </svg>
</body>
这行代码表示我们想让虚线的线段长度为 20 且间隙长度为 10。

如下代码;svg是背景画布;把画布铺实;然后整体旋转饼图;结果如下。
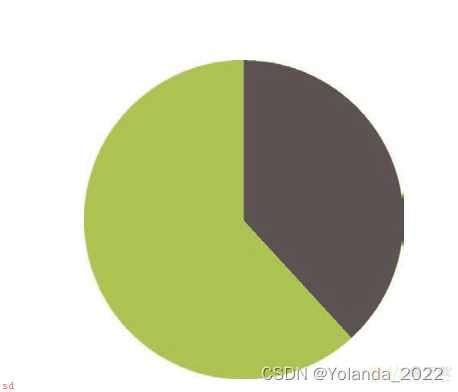
  <style>
  circle {
  fill: yellowgreen;
  stroke: #655;
  stroke-width: 50;
  stroke-dasharray: 60 158; /* 2π × 25 ≈ 158 */
  }
 svg{
  background: yellowgreen;
  border-radius: 50%
  transform: rotate(-90deg);
 }
  </style>

</head>
<body>
  <svg width=;100; height=;100;>
      <circle r=;25; cx=;50; cy=;50; />
  </svg>
</body>
svg版本的饼图进度条;
  <style>
    ;keyframes fillup {
to { stroke-dasharray: 158 158; }
}
circle {
fill: yellowgreen;
stroke: #655;
stroke-width: 50;
stroke-dasharray: 0 158;
animation: fillup 5s linear infinite;
}
 svg{
  background: yellowgreen;
  border-radius: 50%
  transform: rotate(-90deg);
 }
  </style>

</head>
<body>
  <svg width=;100; height=;100;>
      <circle r=;25; cx=;50; cy=;50; />
  </svg>
</body>
如何控制svg饼图的百分比?
我们可以给这个圆形指定一个特定的半径;从而让它的周长无限接近 100;这样就可以直接把比率的百分比值指定为 stroke-dasharray 的长度;不需要做任何计算了。因为周长是 2πr;半径就是16.
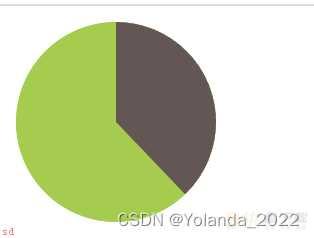
  <style>
svg {
width: 100px;
height: 100px;
transform: rotate(-90deg);
background: yellowgreen;
border-radius: 50%
}
circle {
 fill: yellowgreen;
 stroke: #655;
 stroke-width: 32;
/* stroke-dasharry的宽度是根据circle的半径来算的16*3.1415*2=100,那么我们写38;它就是38%的占比了 */
 stroke-dasharray: 38 100; /* 可得到比率为38%的扇区 */
}
  </style>
</head>
<body>
  <svg viewBox=;0 0 32 32;>
      <circle r=;16; cx=;16; cy=;16; />
  </svg>
</body>
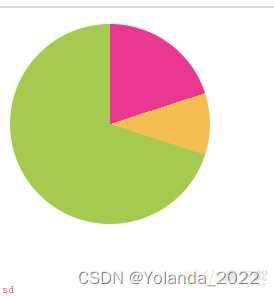
如何让饼图显示两种以上的颜色?
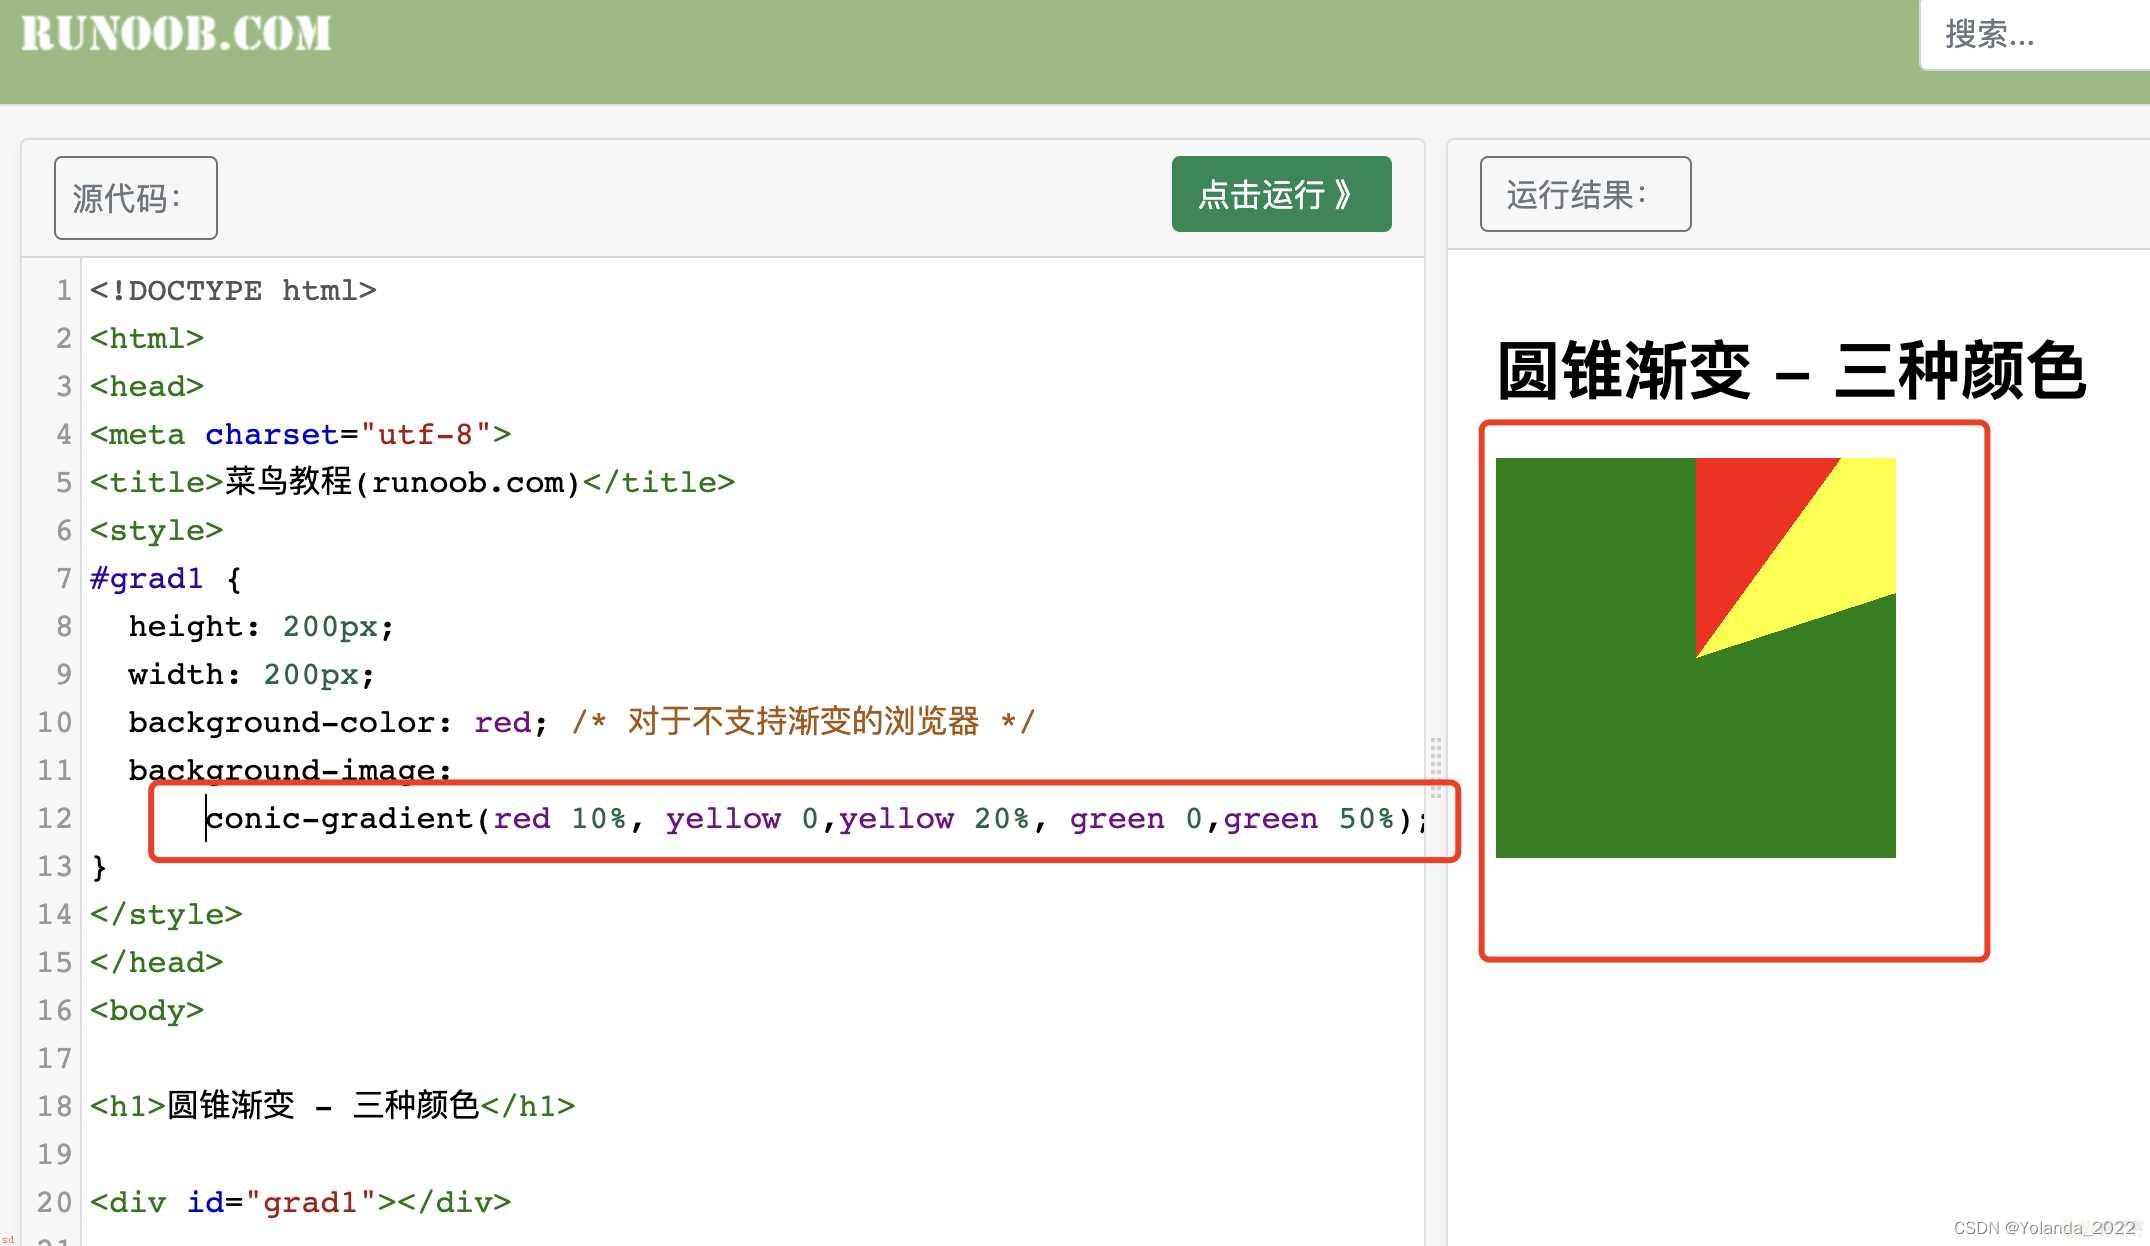
conic-gradient属性即可轻松实现。
  <style>
.pie {
width: 100px;
height: 100px;
border-radius: 50%
background: conic-gradient(deeppink 20%, #fb3 0, #fb3 30%, yellowgreen 0);
}

  </style>
</head>
<body>
<div class=;pie;></div>
</body>
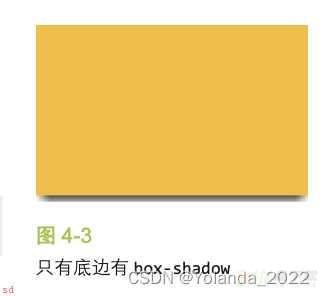
box-shadow的图形化讲解;

box-shadow: 2px 3px 4px rgba(0,0,0,.5);
(1) 以该元素相同的尺寸11和位置;画一个 rgba(0,0,0,.5) 的矩形。
(2) 把它向右移 2px;向下移 3px。
(3) 使用高斯模糊算法(或类似算法)将它进行4px的模糊处理。这在本质上表示在阴影边缘发生阴影色和纯透明色之间的颜色过渡长度近似于模糊半径的两倍(比如在这里是 8px)。
(4) 接下来;模糊后的矩形与原始元素的交集部分会被切除掉;因此它看起来像是在该元素的“后面”。
确切地说;我们将在顶部看到1px的投影(4px-3px)、在左侧看到2px(4px-2px)、在右侧看到 6px(4px;2px)、在底部看到 7px(4px;3px)。
但是如果我们希望投影只出现在底部呢?
我们使用box-shadow的第四个参数(扩张半径);这个参数会根据你指定的值去扩大或(当指定负值时)缩小投影的尺寸。
一个 -5px 的扩张半径会把投影的宽度和高度各减少 10px(即每边各 5px)。
如果我们应用一个负的扩张半径;而它的值刚好等于模糊半径;那么投影的尺寸就会与投影所属元素的尺寸完全一致。除非用偏移量(前两个长度参数)来移动它;我们将完全看不见任何投影。因此;如果给投影应用一个正的垂直偏移量;我们就会在元素的底部看到一道投影;而元素的另外三侧是没有投影的。
box-shadow: 0 5px 4px -4px black;
扩张半径设置为模糊半径相反值的一半;两个方向的偏移值是模糊半径加上扩张半径的像素值即可。
box-shadow: 3px 3px 6px -3px black;
唯一的办法是用两块投影(每边各一块)来达到目的。然后基本上就是把“单侧投影”中的技巧运用两次:
box-shadow: 5px 0 5px -5px black, -5px 0 5px -5px black;

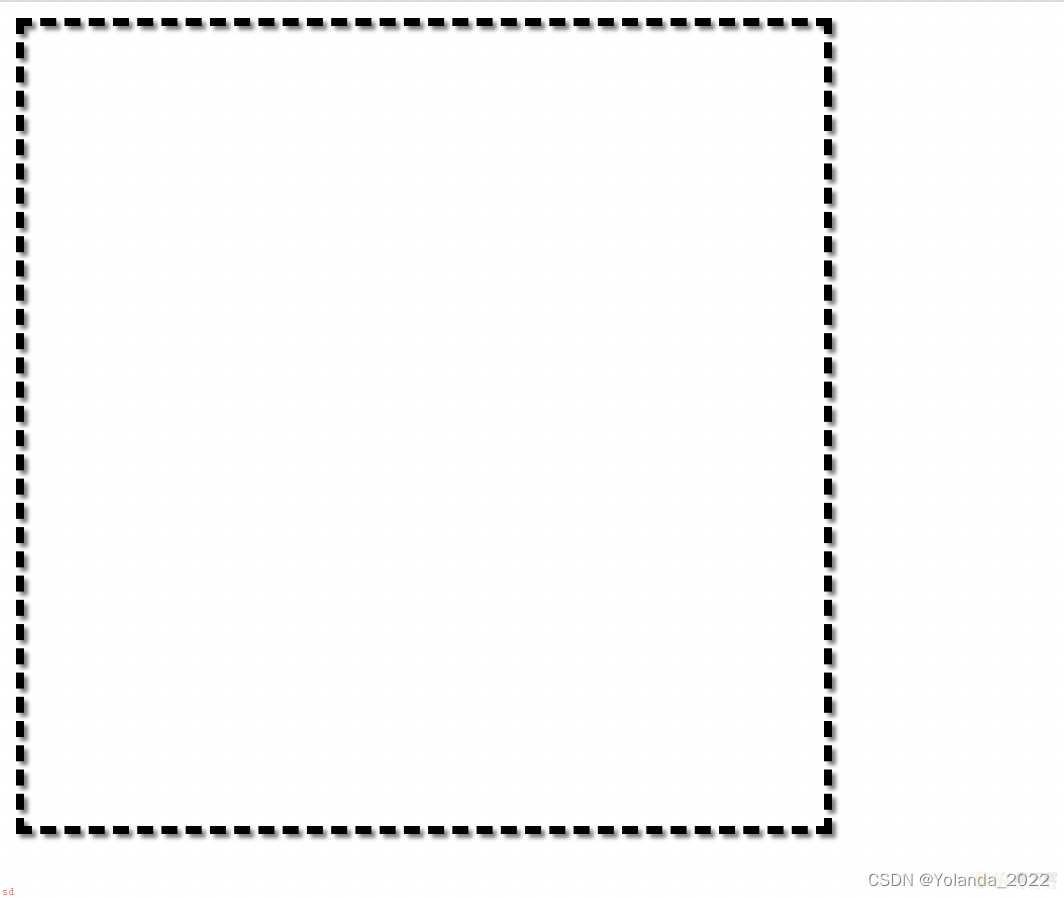
  <style>
.box{
  width: 400px;
  height: 400px;
  border:4px dashed;
  filter: drop-shadow(2px 2px 1px gray);
}
</style>
<body>
<div class=;box;></div>
</body>
如果你喜欢;可以把多个滤镜串连起来;只要用空格把它们分隔开就可以了
filter: blur() grayscale() drop-shadow();
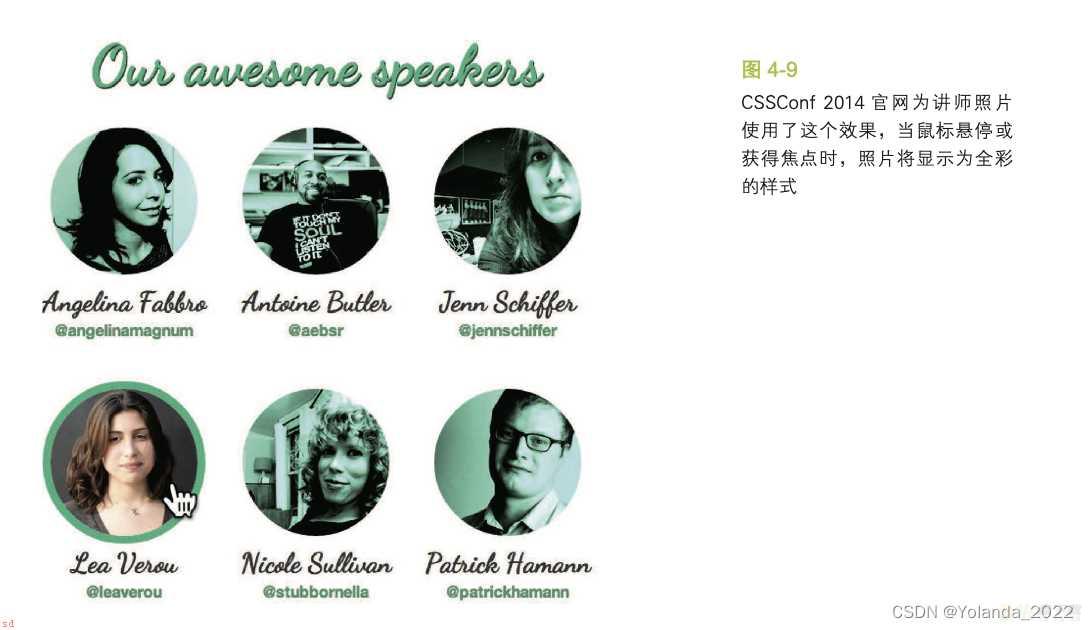
  <style>
img{
  width: 100px;
  height: 100px;
  transition: .5s filter;
  filter: sepia(1) saturate(4) hue-rotate(295deg);
}
img:hover, img:focus {
filter: none; }
</style>
<body>
  <img src=;a.png;/>
</body>
不用图片元素;而是用
元素——把这个元素的第一层背景设置为要染色的图片;并把第二层的背景设置为我们想要的主色调。 <style>
.tinted-image {
width: 100px;
height: 100px;
background-size: cover;
background-color: hsl(335, 100%, 50%);
background-blend-mode: luminosity;
transition: .5s background-color;
}
.tinted-image:hover {
background-color: transparent;
}
</style>
<body>
<div class=;tinted-image; style=;background-image:url(a.png);>
</div>
</body>
需要把图片包裹在一个容器中;并把容器的背景色设置为我们想要的主色调
  <style>
div{
  height: 100px;
  display: inline-block;
  background-color: aqua;
}
img {
  width: 100px;
  height: 100px;
  mix-blend-mode: multiply;
}
</style>
<body>
  <div>
    <img src=;a.png; alt=;Rawrrr!; />
  </div>
</body>

  <style>
body {
  background: url(;a.png;) 0 / cover fixed;
}
main {
  background: hsla(0,0%,100%,.3);
}
</style>
<body>
  <main>
    <blockquote>
        ;The only way to get rid of a temptation[...];
    </blockquote>
</main>
</body>
方法二;添加一个伪元素;将其绝对定位;并把所有偏移量置为 0;这样就可以将它完整地覆盖到 元素之上
为什么我们必须要用伪元素?
因为如果直接对main做blur处理;main里的文字也会被模糊处理。
使用 z-index: -1; 来把伪元素移动到宿主元素的后面。
margin:-30px
模糊效果在中心区域看起来非常完美;但在接近边缘处会逐渐消退。这是因为模糊效果会削减实色像素所能覆盖的范围;削减的幅度正是模糊半径的长度。我们需要让伪元素相对其宿主元素的尺寸再向外扩大至少 20px(即它的模糊半径)
overflow:hidden
只要对main元素应用overflow: hidden;;就可以把多余的模糊区域裁切掉了。
 <style>
body, main::before {
background: url(;a.png;) 0 / cover fixed;
  fixed---做背景图片不跟随内容滚动的效果
}
main {
  position: relative;
  background: hsla(0,0%,100%,.3);
  overflow: hidden;
}
main::before {
content: ;;;
position: absolute;
top: 0;
right: 0;
bottom: 0;
left: 0;
z-index: -1;
filter: blur(20px);
margin: -30px;
}
</style>
<body>
  <main>
    <blockquote>
        ;The only way to get rid of a temptation[...];
    </blockquote>
</main>

45度折角效果
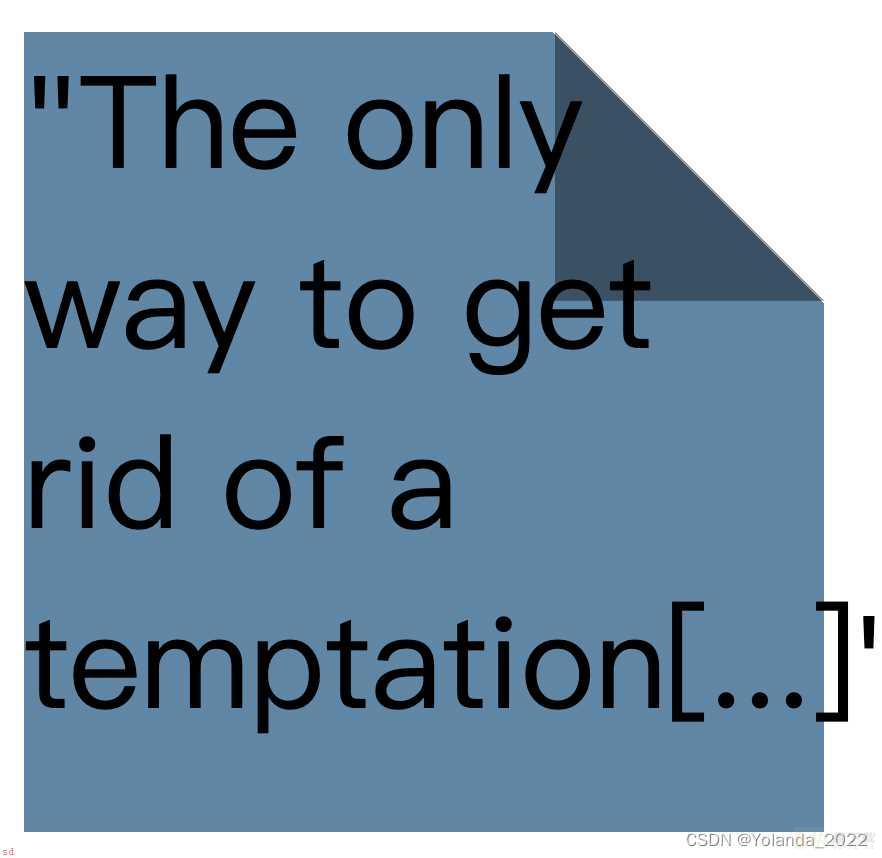
  <style>
main{
  width: 100px;
  height: 100px;

  background:
  linear-gradient(to left bottom,
        transparent 50%, rgba(0,0,0,.4) 0)
        no-repeat 100% 0 / 2.1em 2.1em,
  linear-gradient(-135deg,
        transparent 1.5em, #58a 0)


}
</style>
<body>
  <main>

        ;The only way to get rid of a temptation[...];

</main>
</body>
不规则折角效果
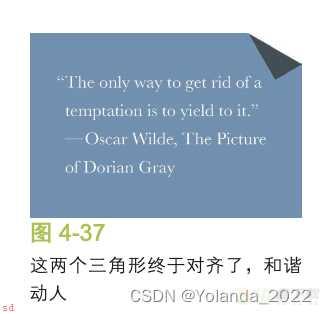
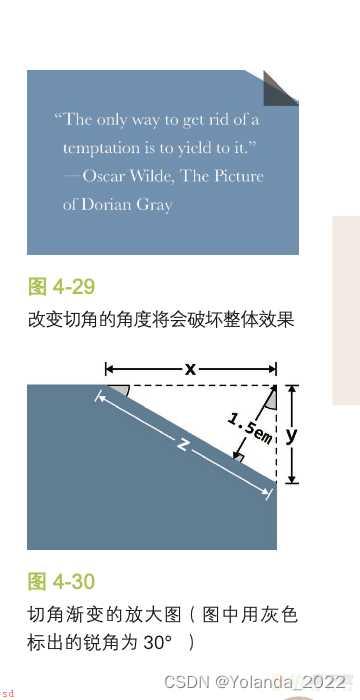
经过计算x=3,y=1.73
注意;to left bottom就是分布的方向是往左下角去分布的。
3em 1.73em就是长方形盒子的长和宽。
1.5em是垂直线。
  <style>
main{
  width: 100px;
  height: 100px;

  background:
  linear-gradient(to left bottom,
        transparent 50%, rgba(0,0,0,.4) 0)
        no-repeat 100% 0 / 3em 1.73em,
  linear-gradient(-150deg,
        transparent 1.5em, #58a 0)

}
</style>
<body>
  <main>
        ;The only way to get rid of a temptation[...];
</main>
</body>
使用伪元素实现不规则折角效果;
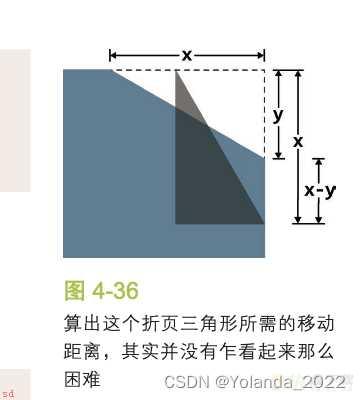
transform-origin: bottom right;是为了让旋转更稳定。
transform: translateY(-1.3em) rotate(-30deg);
-1.3em就是x-y的值。
  <style>
.note {
  width: 100px;
  height: 100px;
position: relative;
background: #58a; /* 回退样式 */
background: linear-gradient(-150deg,
            transparent 1.5em, #58a 0);
}
.note::before {
content: ;;;
position: absolute;
top: 0;
right: 0;
background:
  linear-gradient(to left bottom,transparent 50%, rgba(0,0,0,.4) 0) 100% 0 no-repeat;
height: 3em;
width: 1.73em;
transform: translateY(-1.3em) rotate(-30deg);
transform-origin: bottom right;
}
</style>
<body>
<div class=;note;>
  ;The only way to get rid of a temptation[...];
</div>
</body>
<!DOCTYPE html>
<html>
<head>
<style>
div {
width: 55px;
border: 1px solid black;
}
div.a {
-webkit-hyphens: none;
-ms-hyphens: none;
hyphens: none;
}
div.b {
-webkit-hyphens: manual;
-ms-hyphens: manual;
hyphens: manual;
}
div.c {
-webkit-hyphens: auto;
-ms-hyphens: auto;
hyphens: auto;
}
</style>
</head>
<body>
<h1>hyphens 属性</h1>
<h2>hyphens: none</h2>
<p>单词不用连字符;不换行;。</p>
<div class=;a;>A veryveryvery long word.</div>
<h2>hyphens: manual</h2>
<p>单词只在 ‐ 或 ­ 处有连字符;如果需要;。</p>
<div class=;b;>A veryveryvery long word.</div>
<h2>hyphens: auto</h2>
<p>在算法确定的位置插入单词连字符;如果需要;。</p>
<div class=;c;>A veryveryvery long word.</div>
</body>
</html>
<!DOCTYPE html>
<html>
<head>
<style>
/**
* Custom underlines
*/
body {
font: 250%/1.6 Baskerville, Palatino, serif;
}
a {
background: linear-gradient(gray, gray) no-repeat;
background-size: 100% 1px;
background-position: 0 1.02em;
text-shadow: .05em 0 white, -.05em 0 white;
}
p:nth-child(2) a {
background: linear-gradient(90deg, gray 66%, transparent 0) repeat-x;
background-size: .2em 2px;
background-position: 0 1em;
}
</style>
</head>
<body>
<p>“The only way to <a>get rid of a temptation</a> is to <a>yield</a> to it.”</p>
<p>“The only way to <a>get rid of a temptation</a> is to <a>yield</a> to it.”</p>
</body>
</html>
红色波浪线
<!DOCTYPE html>
<html>
<head>
<style>
body {
font: 250%/1.6 Baskerville, Palatino, serif;
}
a {
background: linear-gradient(-45deg, transparent 40%, red 0, red 60%, transparent 0) 0 1em,
linear-gradient(45deg, transparent 40%, red 0, red 60%, transparent 0) .1em 1em;
background-repeat: repeat-x;
background-size: .2em .1em;
text-shadow: .05em 0 white, -.05em 0 white;
}
</style>
</head>
<body>
<p>“The only way to <a>get rrid of a temptatoin</a> is to <a>yeild</a> to it.”</p>
</body>
</html>
凸版印刷效果
<!DOCTYPE html>
<html>
<head>
<style>
/**
* Letterpress
*/
body {
font: 250%/1.6 Baskerville, Palatino, serif;
}
p {
padding: .8em 1em;
background: hsl(210, 13%, 60%);
color: hsl(210, 13%, 30%);
text-shadow: 0 1px 1px hsla(0,0%,100%,.8);
}
p ; p {
background: hsl(210, 13%, 30%);
color: hsl(210, 13%, 60%);
text-shadow: 0 -1px 1px black;
}
</style>
</head>
<body>
<p>“The only way to get rid of a temptation is to yield to it.”</p>
<p>“The only way to get rid of a temptation is to yield to it.”</p>
</body>
</html>
空心字效果
/**
 * Stroked text
 */

h1 {
	margin: 0;
	color: white;
}

h1:first-child {
  text-shadow:
  1px 1px black,
  -1px -1px black,
  1px -1px black,
  -1px 1px black;
}

h1 text { fill: currentColor }
h1 use {
	stroke: black;
	stroke-width: 6;
	stroke-linejoin: round;
}

body {
	background: deeppink;
	font: bold 200%/1 Rockwell, serif;
}


<h1>CSS</h1>

<h1>
<svg overflow=;visible; width=;2em; height=;1.2em;>
<use xlink:href=;#css; />
<text id=;css; y=;1em;>CSS</text>
</svg>
</h1>
文字外发光效果
<!DOCTYPE html>
<html>
<head>
<style>
/**
 * Glowing text
 */

 body {
	background: #203;
	font: bold 500%/1 Rockwell, serif;
}

a {
	color: #ffc;
	text-decoration: none;
	transition: 1s;
}

a:hover { text-shadow: 0 0 .1em, 0 0 .3em; }
</style>
</head>
<body>
  <a href=;http://csssecrets.io;>Glow</a>
</body>
</html>
首先了解path的d属性

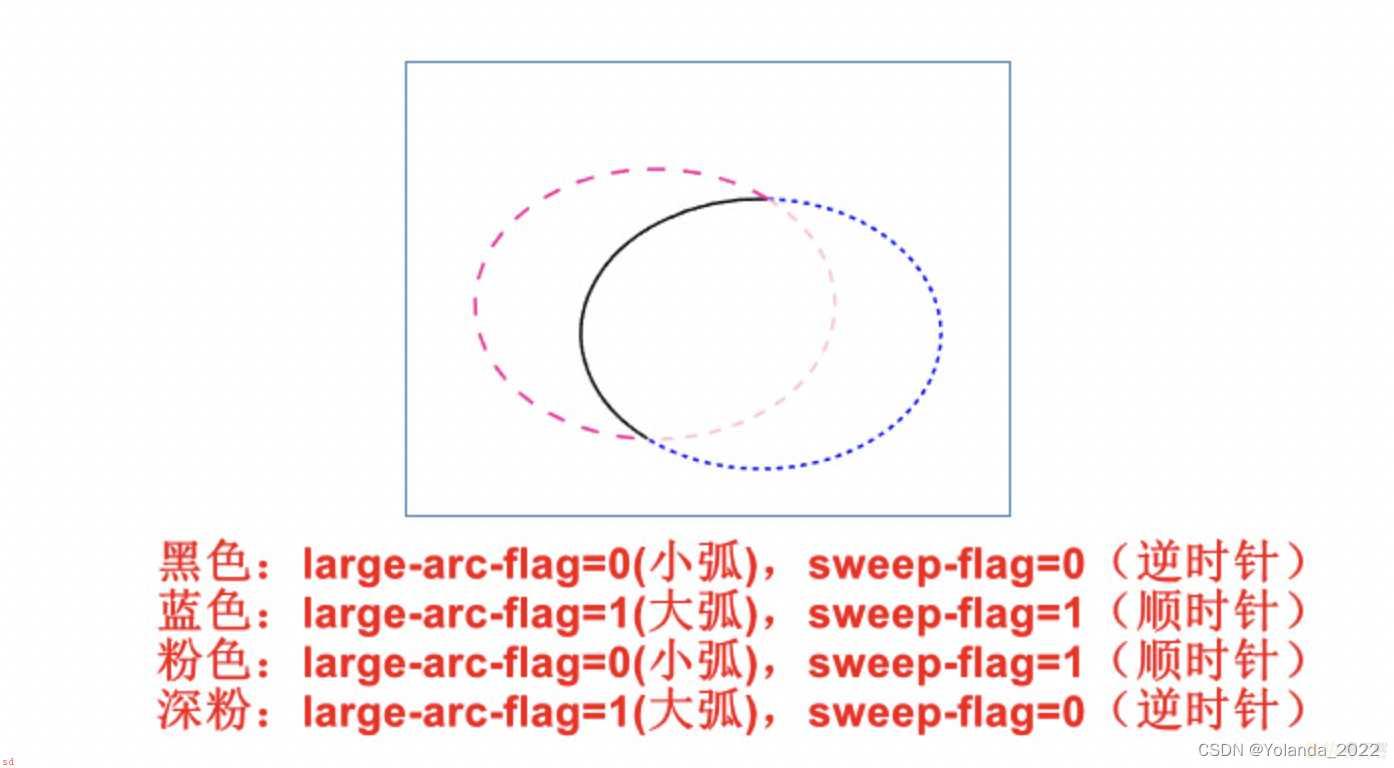
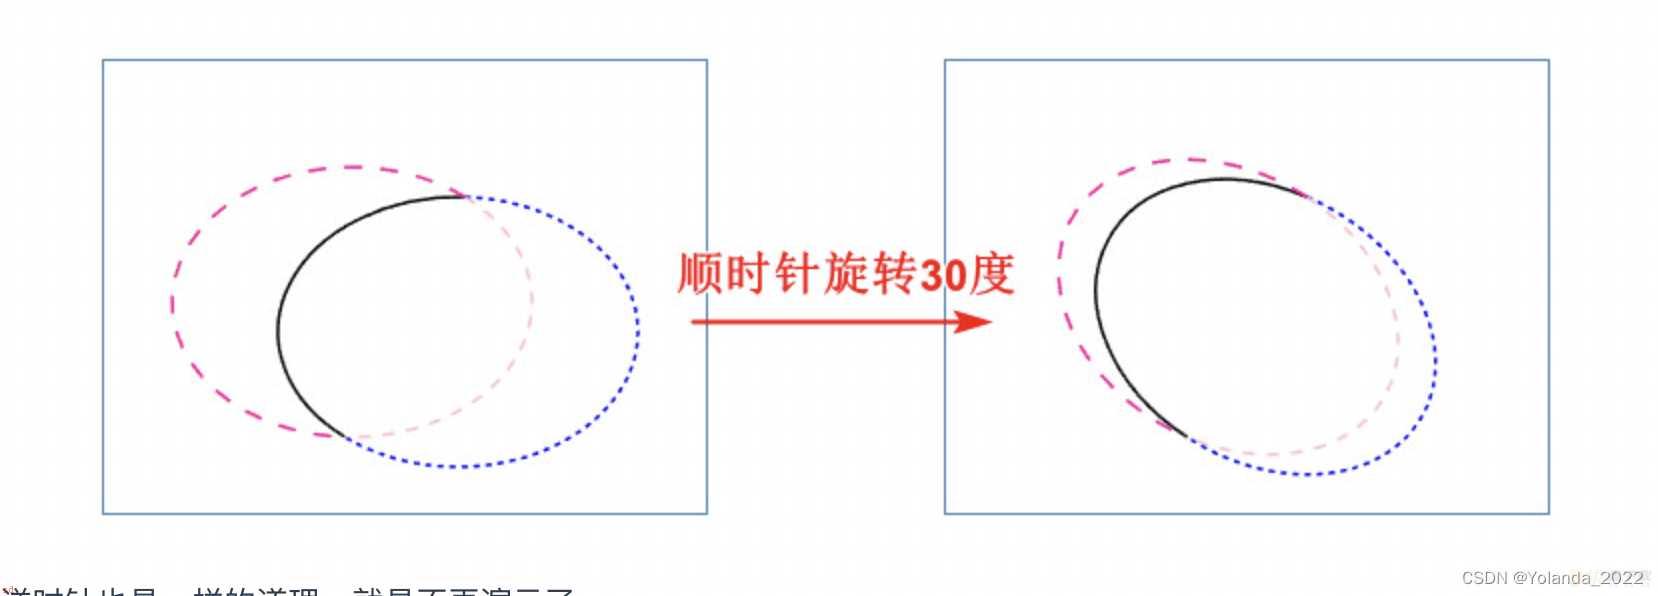
这个参数就是用来旋转用的;可以为正和负数.
正数表示顺时间旋转。负数表示逆时针旋转。
 <!-- 画圆 M cx cy m -r 0 a r r 0 1 0 (r * 2) 0 a r r 0 1 0 -(r * 2) 0 -->
<svg width=;100px; height=;100px; viewBox=;0 0 200 200;>
  <path d=;M 100 100 m -75 0 a 75 75 0 1 0 150 0    a 75 75 0 1 0 -150 0;
        fill=;none; stroke=;orange; stroke-width=;10;/>
</svg>
<!-- 画圆弧 (rx ry x-axis-rotation large-arc-flag sweep-flag x y) -->
<svg width=;100px; height=;100px; viewBox=;0 0 200 200;>
  <path d=;M 100 100 m 75 0 a 75 75 0 0 1 -75 75;
        fill=;none; stroke=;green; stroke-width=;10;/>
</svg>
<!-- 画圆弧;使用transform改变起始位置 -->
<svg width=;100px; height=;100px; viewBox=;0 0 200 200;>
  <path  d=;M 100 100 m 75 0 a 75 75 0 0 1 -75 75; transform=;rotate(45 100 100);
         fill=;none; stroke=;green; stroke-width=;10;/>
</svg>
  <style>

.circular {
	width: 5em;
	height: 5em;
	margin: 1em auto 0;
}
.circular svg {
	display: block;
	overflow: visible;
	transition: 10s linear transform;
}
.circular svg:hover {
  transform: rotate(-2turn);
}

.circular text { fill: currentColor }
.circular path { fill: none; }
</style>
<body>
  <div class=;circular;>
    <svg viewBox=;0 0 100 100;>
    <path d=;M 0,50 a 50,50 0 1,1 0,1 z; id=;circle; />
          <text>
             <textPath xlink:href=;#circle;>
                circular reasoning works because
            </textPath>
          </text>
        </svg>
    </div>
</body>
js版本;避免重复过多svg元素的书写;
  <style>

.circular {
	width: 5em;
	height: 5em;
	margin: 1em auto 0;
}
.circular svg {
	display: block;
	overflow: visible;
	transition: 10s linear transform;
}
.circular svg:hover { transform: rotate(-2turn); }

.circular text { fill: currentColor }
.circular path { fill: none; }
</style>
<body>
  <div class=;circular;>
    circular reasoning works because
  </div>
  <script>
    function $$(selector, context) {
	context = context || document;
	var elements = context.querySelectorAll(selector);
	return Array.prototype.slice.call(elements);
}

$$(;.circular;).forEach(function(el) {
	var NS = ;http://www.w3.org/2000/svg;;

	var svg = document.createElementNS(NS, ;svg;);
	svg.setAttribute(;viewBox;, ;0 0 100 100;);

	var circle = document.createElementNS(NS, ;path;);
	circle.setAttribute(;d;, ;M0,50 a50,50 0 1,1 0,1z;);
	circle.setAttribute(;id;, ;circle;);

	var text = document.createElementNS(NS, ;text;);
	var textPath = document.createElementNS(NS, ;textPath;);
	textPath.setAttributeNS(;http://www.w3.org/1999/xlink;, ;xlink:href;, ;#circle;);
	textPath.textContent = el.textContent;
	text.appendChild(textPath);

	svg.appendChild(circle);
	svg.appendChild(text);

	el.textContent = ;;;
	el.appendChild(svg);
});
  </script>
</body>
整个透明边框即可;边框用box-shadow来实现即可。
border: 10px solid transparent;
box-shadow: 0 0 0 1px rgba(0,0,0,.3) inset;
background-clip: padding-box;
伪元素同样可以代表其宿主元素来响应鼠标交互。
我们可以在按钮的上层覆盖一层透明的伪元素;并让伪元素在四个方向上都比宿主元素大出 10px:
button {
position: relative;
  /* [其余样式] */ }
button::before {
  content: ;;;
  position: absolute;
  top: -10px;
  right: -10px;
  bottom: -10px;
  left: -10px;
}
通过clip属性裁剪掉原生的复选框
  <style>
input[type=;checkbox;] ; label::before {
  content: ;a0;; /* 不换行空格 */
  display: inline-block;
  vertical-align: .2em;
  width: .8em;
  height: .8em;
  margin-right: .2em;
  border-radius: .2em;
  background: silver;
  text-indent: .15em;
  line-height: .65;
}
input[type=;checkbox;]:checked ; label::before {
  content: ;2713;;
  background: yellowgreen;
}
input[type=;checkbox;] {
  position: absolute;
  clip: rect(0,0,0,0);
}
input[type=;checkbox;]:focus ; label::before {
  box-shadow: 0 0 .1em .1em #58a;
}
input[type=;checkbox;]:disabled ; label::before {
  background: gray;
  box-shadow: none;
  color: #555;
}
</style>
<body>
  <input type=;checkbox; id=;awesome; />
   <label for=;awesome;>Awesome!</label>
</body>
  <style>
input[type=;checkbox;] {
  position: absolute;
  clip: rect(0,0,0,0);
}
input[type=;checkbox;] ; label {
display: inline-block;
padding: .3em .5em;
background: #ccc;
background-image: linear-gradient(#ddd, #bbb);
border: 1px solid rgba(0,0,0,.2);
border-radius: .3em;
box-shadow: 0 1px white inset;
text-align: center;
text-shadow: 0 1px 1px white;
}
input[type=;checkbox;]:checked ; label, input[type=;checkbox;]:active ; label {
box-shadow: .05em .1em .2em rgba(0,0,0,.6) inset;
border-color: rgba(0,0,0,.3);
background: #bbb;
}
</style>
<body>
  <input type=;checkbox; id=;awesome; />
<label for=;awesome;>Awesome!</label>
</body>
通过一层半透明的遮罩层来把后面的一切整体调暗;以便凸显某个特定的 UI 元素;引导用户关注。
这个效果最常见的实现方法就是增加一个额外的 HTML 元素用于遮挡背景。
伪元素问题;
我们可以用伪元素来消除额外的 HTML 元素;比如:
body.dimmed::before {
  position: fixed;
  top: 0;
  right: 0;
  bottom: 0;
  left: 0;
  z-index: 1;
  background: rgba(0,0,0,.8);
}
问题;
伪元素无法绑定独立的 JavaScript 事件处理函数
  <style>
main.de-emphasized {
  filter: blur(3px) contrast(.8) brightness(.8);
}
dialog{
  display: block;
  position: absolute;
  top:50%
  left:50%
  transform: translate(-50%,-50%);
  z-index: 2;
}
</style>
<body>
<div>
  <main class=;de-emphasized;>
    Bacon Ipsum dolor sit amet...
    Bacon Ipsum dolor sit amet...
    Bacon Ipsum dolor sit amet...
    Bacon Ipsum dolor sit amet..
    Bacon Ipsum dolor sit amet..
    Bacon Ipsum dolor sit amet...
    Bacon Ipsum dolor sit amet...
    Bacon Ipsum dolor sit amet...
    Bacon Ipsum dolor sit amet...
    Bacon Ipsum dolor sit amet..
    Bacon Ipsum dolor sit amet..
  </main>
  <dialog>
    O HAI, I;m a dialog. Click on me to dismiss.
  </dialog>
</div>
</body>
容器还有更多内容时;一层淡淡的阴影会出现在容器的顶部和 / 或底部的效果。
/**
 * Scrolling hints
 */

ul {
	display: inline-block;
	overflow: auto;
	width: 7.2em;
	height: 7em;
	border: 1px solid silver;
	padding: .3em .5em;
	list-style: none;
	margin-top: 2em;
	font: 100 200%/1.6 ;Frutiger LT Std;, sans-serif;
	background: linear-gradient(white 15px, hsla(0,0%,100%,0)) 0 0 / 100% 50px,
	            radial-gradient(at top, rgba(0,0,0,.2), transparent 70%) 0 0 / 100% 15px,
	            linear-gradient(to top, white 15px, hsla(0,0%,100%,0)) bottom / 100% 50px,
	            radial-gradient(at bottom, rgba(0,0,0,.2), transparent 70%) bottom / 100% 15px;
	background-repeat: no-repeat;
	background-attachment: local, scroll, local, scroll;
	margin-top: 30px;
}
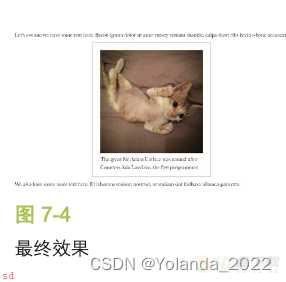
min-content;
这个关键字将解析为这个容器内部最大的不可断行元素的宽度(即最宽的单词、图片或具有固定宽度的盒元素)1
<p>Some text [...]</p> HTML <figure>
<img src=;adamcatlace.jpg; /> <figcaption>
        The great Sir Adam Catlace was named after
        Countess Ada Lovelace, the first programmer.
    </figcaption>
</figure>
<p>More text [...].</p>
figure {
  width: min-content;
  margin: auto;
}
table-layout。它的默认值是 auto;其行为模式被称作自动表格布局算法。
不过;它还接受另外一个值fixed;这个值的行为要明显可控一些。
fixed的特点;
1.它把更多的控制权交给了网页开发者(没错;就是你);只把较少的控制权留给渲染引擎。我们设置的(宽度)样式会直接起作用;而不仅仅被视为一种提示;
2.同时;溢出行为(包括text-overflow)与其他元素行为也是一样的;因此表格的内容将只能影响表格行的高度了。
3.这种固定表格布局算法不仅更容易预测、便于使用;同时也明显更快。因为表格的内容并不会影响单元格的宽度;所以在页面的下载过程中;表格不需要频繁重绘。相信我们都对页面加载过程中表格不断重新调整列宽的恐怖情景记忆犹新。对于固定表格布局来说;这种情况再也不会发生了。
在使用时;我们只需要对
元素或其他具有 display: table 样式的元素应用这个属性即可。请注意;为了确保这个技巧奏效;需要为这些表格元素指定一个宽度(哪怕是 100%)。同样;为了让 text-overflow:ellipsis 发挥作用;我们还需要为那一列指定宽度。table {
table-layout: fixed;
width: 100%
}
li:only-child {
/* 只有一个列表项时的样式 */
}

li:first-child:nth-last-child(4), li:first-child:nth-last-child(4) ~ li {
/* 当列表正好包含四项时;命中所有列表项 */ }


/* 定义mixin */
;mixin n-items($n) {
&:first-child:nth-last-child(#{$n}), &:first-child:nth-last-child(#{$n}) ~ & {
;content; }
}
/* 调用时是这样的:*/ li {
;include n-items(4) {
/* 属性与值写在这里 */
 }
}


这里的 n 表示一个变量;理论上的范 围是 0 到 ; ∞

li:first-child:nth-last-child(n;4), li:first-child:nth-last-child(n;4) ~ li {
/* 当列表至少包含四项时;命中所有列表项 */ }


li:first-child:nth-last-child(-n;4), li:first-child:nth-last-child(-n;4) ~ li {
  /* 当列表最多包含四项时;命中所有列表项 */
}

li:first-child:nth-last-child(n;2):nth-last-child(-n;6),
li:first-child:nth-last-child(n;2):nth-last-child(-n;6) ~ li {
/* 当列表包含2~6项时;命中所有列表项 */
}
ps:波浪选择器用来选择所有匹配到的兄弟元素
不必再用外层元素套着内层定宽的内容;并且定宽的内容为了居中去设置margin:auto;
我们有更好的做法;去除外层元素;设置内层元素padding:1em calc(50%-450px)即可
;假设内层元素宽度我们希望它是900px的话;
如下代码是否能实现垂直居中;答案是不能的;因为
原因在于margin 的百分比值是以父元素的宽度而非高度作为解析基准的。没错;即使对于margin-top 和 margin-bottom 来说也是这样!
main {
  width: 18em;
  padding: 1em 1.5em;
  margin: 50% auto 0;
  transform: translateY(-50%);
}
我们使用vh实现视口垂直居中;
main {
  width: 18em;
  padding: 1em 1.5em;
  margin: 50vh auto 0;
  transform: translateY(-50%);
}
如何让页脚在页面内容不够多的时候也能沉到底部?
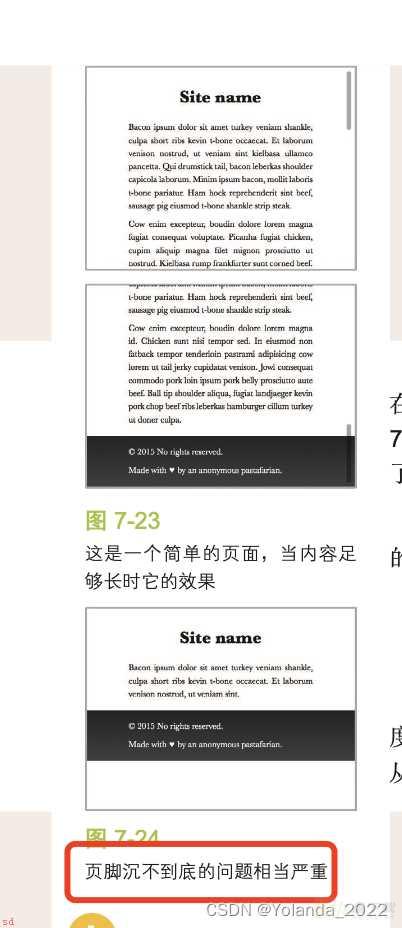
flex: 1; === flex: 1 1 auto;
body {
display: flex;
flex-flow: column;
min-height: 100vh;
}
main { flex: 1; }
关于回弹效果
回弹效果是指当一个过渡达到最终值时;往回倒一点;然后再次回到最终值;如此往复一次或多次;并逐渐收敛;最终稳定在最终值。
  <style>
;keyframes bounce {
60%, 80%, to { transform: translateY(350px); }
70% { transform: translateY(250px); }
90% { transform: translateY(300px); }
}
.ball {
/* 尺寸样式、颜色样式等 */
width: 50px;
height: 50px;
border-radius: 50%
background-color: green;
 animation: bounce 3s;
}
  </style>
</head>
<body>
<div class=;ball;></div>
</body>
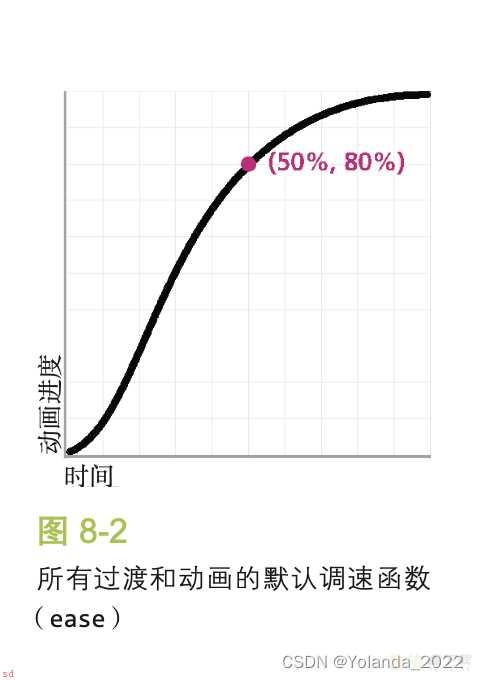
每当这个小球改变运动方向时;它的移动过程都是持续加速的;这看起来很不自然。产生这个结果的原因在于;它的调速函数在所有关键帧的衔接中都是一样的。
这条曲线指定了动画过程在整段时间中是如何推进的(缓动曲线)
如果不指定调速函数;它就会得到一个默认值。这个默认的缓动效果并不是我们想像中的匀速效果;而是如图 8-2 所示。请注意(图 8-2 中粉色圆点所在的位置);当时间进行到一半时;这个过渡已经推进到 80% 了!
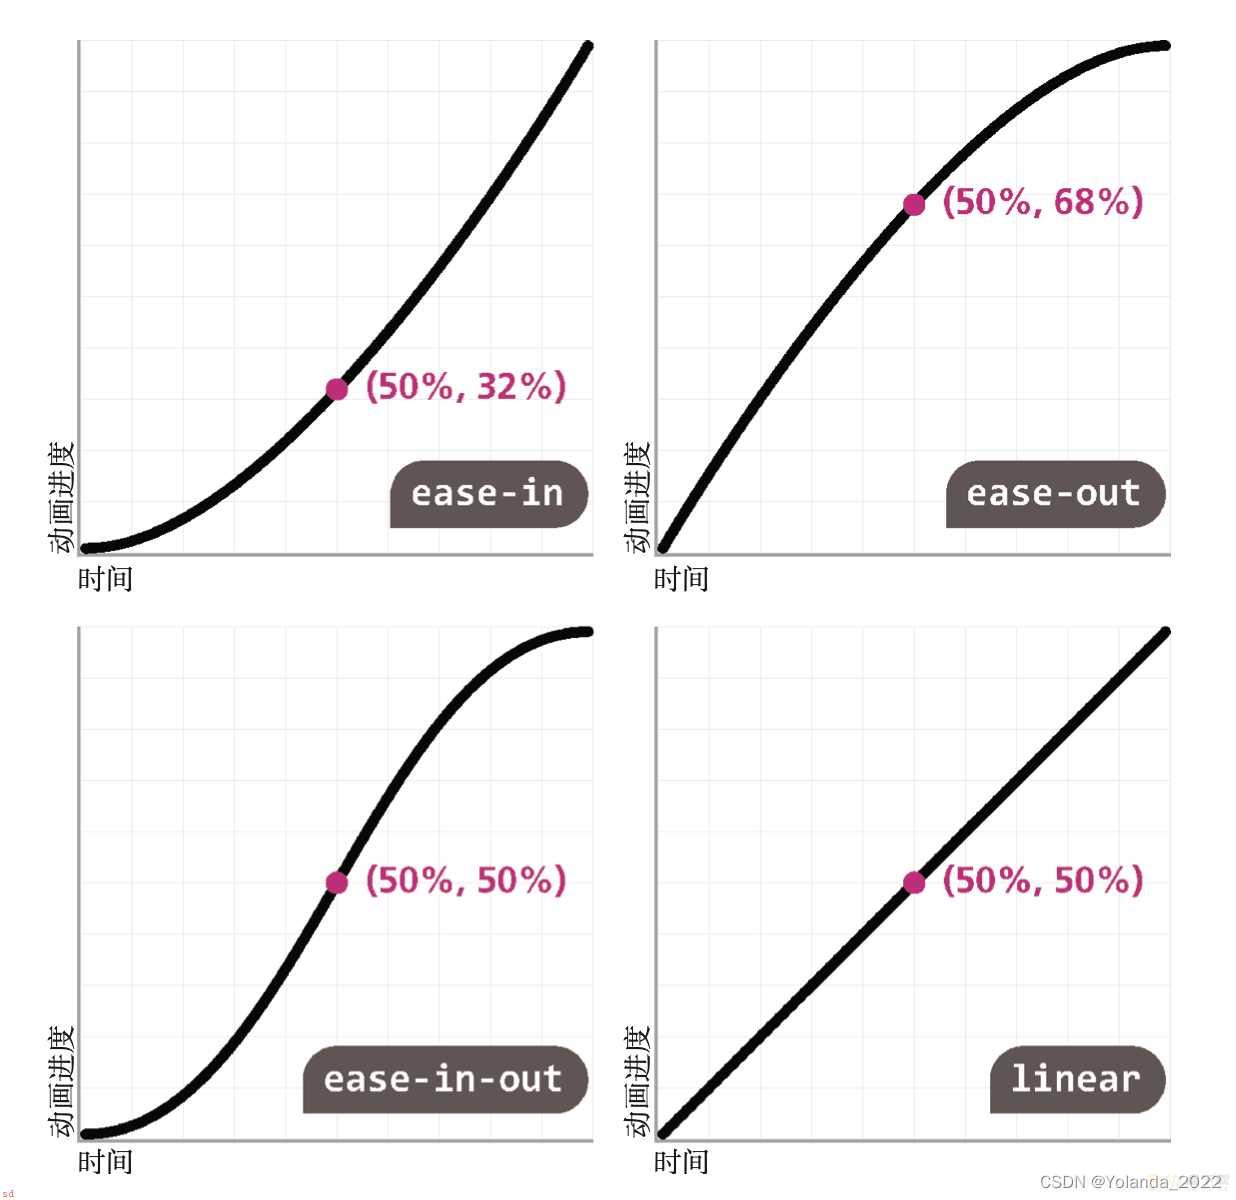
我们希望下落方向上的调速函数是加速的(ease-out);而弹起方向上是减速的(ease-in)。
60% 设置animation-timing-function: ease-out; 意思是60%之后是减速的。
    /* 0-60% 加速 ease-in   60%-70%减速 70%-80% 加速  80%-90% 减速 90%-to 加速 */
;keyframes bounce {
  60%, 80%, to {
  transform: translateY(400px);
animation-timing-function: ease-out; }
70% { transform: translateY(300px); }
90% { transform: translateY(360px); }
}
.ball {
/* 尺寸样式、颜色样式等 */
width: 50px;
height: 50px;
border-radius: 50%
background-color: green;
animation: bounce 3s ease-in;
}
  </style>
</head>
<body>
<div class=;ball;></div>
</body>
贝塞尔曲线
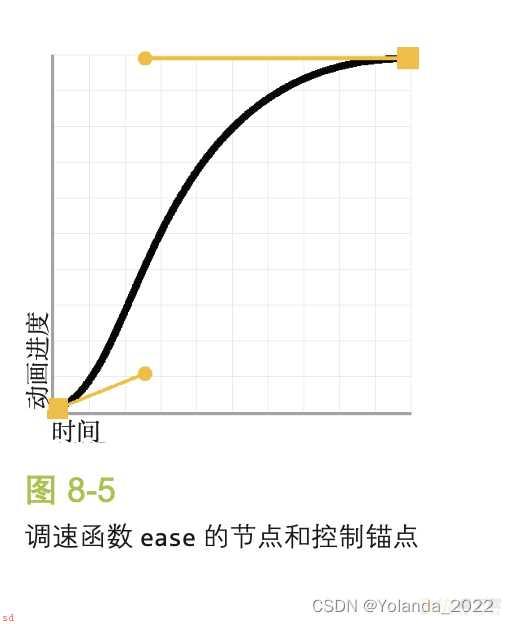
语法形式是这样的:cubic-bezier(x1, y1, x2, y2);其中 (x1, y1) 表示第一个控制锚点的坐标;而 (x2, y2) 是第二个。曲线片断的两个端点分别固定在(0,0) 和 (1,1);前者是整个过渡的起点(时间进度为零;动画进度为零);后者是终点(时间进度为 100%动画进度为 100%)。
如何获取反向版本?
只要我们把控制锚点的水平坐标和垂直坐标互换;就可以得到任何调速函数的反向版本。
如下ease-in是ease-out的反向版本。
;ease等 同 于 cubic-bezier(.25,.1,.25,1); 因 此 它 的 反 向 版 本 就 是 cubic-bezier(.1,.25,1,.25);
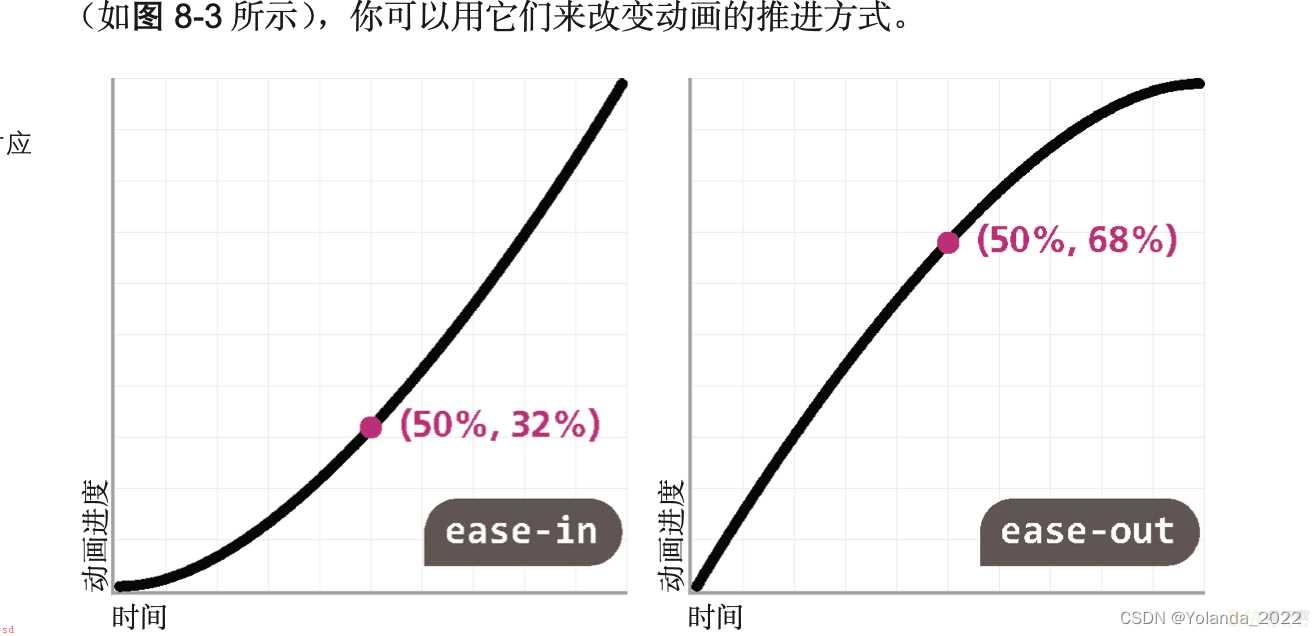
那么我们的回弹函数使用ease和ease的反向版本;会更加真实。
;keyframes bounce { 60%, 80%, to {
transform: translateY(400px);
animation-timing-function: ease; }
70% { transform: translateY(300px); }
90% { transform: translateY(360px); } }
.ball {
/* 外观样式 */
animation: bounce 3s cubic-bezier(.1,.25,1,.25); }
弹性过渡
假设有一个文本输入框;每当它被聚焦时;都需要展示一个提示框.
  <style>
 input:not(:focus) ; .callout {
   transform: scale(0);
}
.callout {
  display: inline-block;
 transition: .5s transform;
 transform-origin: 1.4em -.4em;
}
  </style>
</head>
<body>
  <label>
    Your username: <input id=;username; />
    <span class=;callout;>Only letters, numbers, underscores (_) and hyphens (-) allowed!</span>
    </label>
</body>
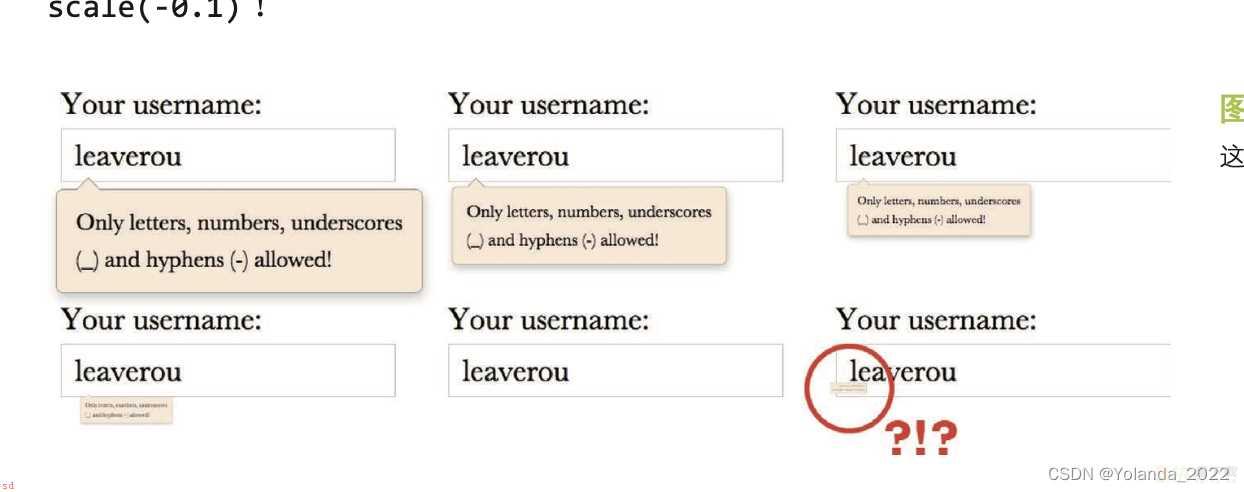
当用户聚焦到这个文本输入框时;会有一个半秒钟的过渡;如图 8-8 所示。这个过渡没有什么问题;但如果它在结尾时能再夸张一点的话;会显得更加自然和生动(比如说;先扩大到 110% 的尺寸;然后再缩回100%。
https://dabblet.com/gist/6cf33228089efef8a5ac
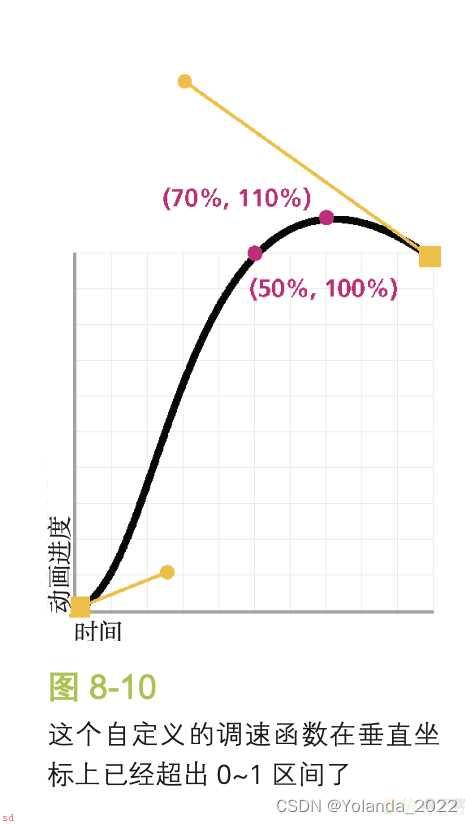
自定义调速函数 cubic-bezier()
我们可以在垂直方向上突破 0~1 区间;从而让过渡达到低于 0 或高于 100% 的程度。你能猜到这意味着什么吗?它表示如果我们要从scale(0) 的变形程度过渡到 scale(1);就还将经历一个比最终值更大的状态;比如 scale(1.1)
input:not(:focus) ; .callout:not(:hover) {
	transform: scale(0);
	transition: .25s transform;
}

.callout {
	transition: .5s cubic-bezier(.25,.1,.3,1.5) transform;
	transform-origin: 1.4em -.4em;
}
注意以上代码transition: .25s transform;的作用在于;
避免提示框消失的时候仍然用贝塞尔曲线;导致右下角scale(-0.1)的情况出现。所以我们要用
transition: .25s transform;默认的ease曲线来覆盖掉cubic-bezier(.25,.1,.3,1.5)的曲线。
但是为什么要设置.25s呢;因为不设置这个;只是设置ease的话;
提示框的关闭动作明显要迟钝一些。
因为cubic-bezier(.25,.1,.3,1.5)在50%的时候;就达到了从scale(0)到scale(1)的变化了。
但是ease的话;会花100%的时间才从scale(1)到scale(0)呢;所以我们再把消失的时间也加快覆盖掉好了;就是0.25s(0.5s的一半;;这样就不迟钝了。
gif动画特点;
GIF 不具备 Alpha 透明的特性;
我们无法在 CSS 层面修改动画的某些参数;比如动画的持续时间、循环次数、是否暂停等。
css实现loading:
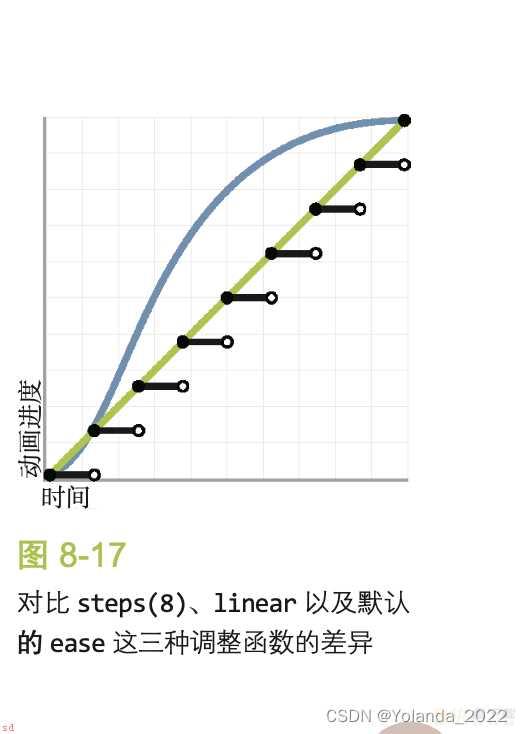
使用steps;8;表示有八帧。而不是平滑的过渡效果。
  <style>
;keyframes loader {
   to { background-position: -800px 0; }
}
.loader {
 width: 100px;
 height: 100px;
 background: url(http://dabblet.com/img/loader.png) 0 0;
 animation: loader 1s infinite steps(8);
/* 把文本隐藏起来 */
 text-indent: 200%
white-space: nowrap;
overflow: hidden;
}


  </style>
</head>
<body>
   <div class=;loader;>
2323
   </div>
</body>

平滑的闪烁动画
  <style>
;keyframes blink-smooth { to { color: transparent } }
.Highlight {
  width: 200px;
  height: 100px;
  color:black;
   animation: 1s blink-smooth 3 alternate;
 }

  </style>
</head>
<body>
   <div class=;highlight;>
闪烁的文字
   </div>
</body>
生硬普通的闪烁动画
steps(1)什么意思?0-50% 变化1次;50%-100% 变化1次;但是最后100%这一幕跳过;
0.5s显示透明色
1s显示黑色
  <style>
 ;keyframes blink { 50% { color: transparent } }
.highlight {
  width: 200px;
  height: 100px;
  color:black;
  animation: 1s blink 3 steps(1);
}

  </style>
</head>
<body>
   <div class=;highlight;>
闪烁的文字
   </div>
</body>
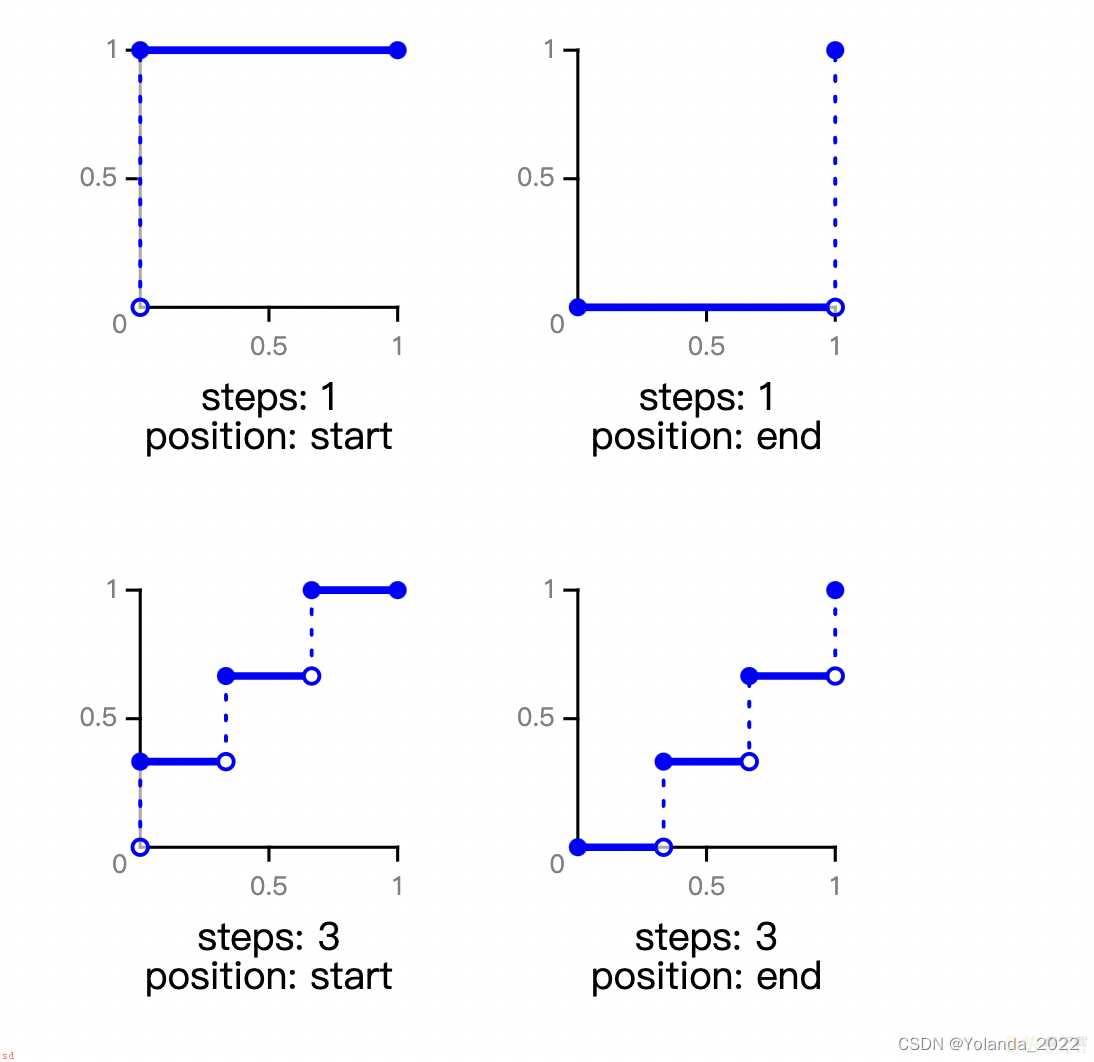
steps(1, start)
steps(3, end)
start/end2个参数都会选择性的跳过前后部分;start跳过0%end跳过100%
steps(n,end)中的n作用于每两个关键帧之间;而不是整个动画。
所以0-80%之间变化n次;80%-100%之间变化n次。
  <style>

;keyframes circle {
        0% {background: red}
        80%{background: yellow}
        100% {background: blue}
    }
    .a{
      height: 100px;
      width: 100px;
      animation:circle 4s infinite steps(1, start);
    }
    .b{
      height: 100px;
      width: 100px;
      animation:circle 4s infinite steps(3, end);
    }

</style>
<body >
<p>1、steps;1; start;</p>
<div  class=;a;></div>
<p>2、steps;1; end;</p>
<div class=;b;></div>
</body>
如何了解steps(2),默认是end,所以最终状态red是跳过的。
黑色-浅灰- 透明-浅红----回到黑色
也就是0-50%有两次变化;
50%-100%有两次变化但是跳过100%
  <style>

;keyframes blink { 50% { color: transparent } 100%{
  color:red;
} }
.highlight {
  width: 200px;
  height: 100px;
  color:black;
  animation: 5s blink infinite steps(2);
}

</style>
<body >
  <div class=;highlight;>
    闪烁的文字
       </div>
</body>
两个动画重叠;
动画1:改变文字div的宽度;0-100%之间变换15次。
但是不是说100%的要跳过吗。
100%是跳过了;但是动画结束的时候是15ch;所以还是可以完整显示的。
动画2:闪烁光标的实现;0.5s透明 1s黑色。
  <style>
;keyframes typing {
	from { width: 0 }
}

;keyframes caret {
	50% { border-right-color: transparent; }
}

h1 {
	font: bold 200% Consolas, Monaco, monospace;
	width: 15ch;
	white-space: nowrap;
	overflow: hidden;
	border-right: .05em solid;
	animation: typing 8s steps(15),
	           caret 1s steps(1) infinite;
}
  </style>
</head>
<body>
  <h1>CSS is awesome!</h1>
</body>
注意steps(number,position)的时间和进度对照表。
hover的时候图片移动;动画开始;不hover的时候;动画暂停。但是关键问题在于;鼠标移出图片时;它会生硬地跳回最左侧。如何解决这个问题?
利用animation-play-state即可。注意以下css属性的书写顺序。
  <style>
;keyframes panoramic {
    to { background-position: 100% 0;
    }
}
.panoramic {
width: 100px;
height: 100px;
background: url(;a.png;);
background-size: 200px 100px;
animation: panoramic 10s linear infinite alternate;
animation-play-state: paused;

}
.panoramic:hover, .panoramic:focus{
animation-play-state: running;
}
      </style>
    </head>
    <body>
     <div class=;panoramic;>
     </div>
   </body>
如下的做法;把旋转的中心点transform-origin设置在avatar的中间为x轴点的位置;150px为以avatar的top往下150px为y轴点的位置。rotate;1turn)旋转一周。但是问题在于图片本身也会旋转;如何让图片本身不转动?
;keyframes spin {
to { transform: rotate(1turn); }
}
.avatar {
  display: block;
	width: 50px;
  margin:0px auto 0px;
	border-radius: 50%
	overflow: hidden;
animation: spin 3s infinite linear;
transform-origin: 50% 150px; /* 150px = 路径的半径 */
}


.path {
	width: 300px;
  height: 300px;
	margin: 100px auto;
	border-radius: 50%
	background: #fb3;
}
      </style>
    </head>
    <body>
      <div class=;path;>
        <img src=;http://lea.verou.me/book/adamcatlace.jpg; class=;avatar; />
      </div>
   </body>
我们可以使用两个元素;在img外再套一个元素;这个元素绕圈;animation-direction: reverse;让img反向绕圈。
;keyframes spin {
to { transform: rotate(1turn); }
}

.avatar {
  display: block;
	width: 50px;
  height: 50px;
  margin:0px auto;
	border-radius: 50%
	overflow: hidden;
animation: spin 3s infinite linear;
transform-origin: 50% 150px; /* 150px = 路径的半径 */
}
.avatar>img{
  width: 50px;
  height: 50px;
  animation: inherit;
  animation-direction: reverse;
}

.path {
	width: 300px;
  height: 300px;
	margin: 100px auto;
	border-radius: 50%
	background: #fb3;
}
      </style>
    </head>
    <body>
      <div class=;path;>
        <div class=;avatar;>
        <img src=;http://lea.verou.me/book/adamcatlace.jpg;/> </div>
        </div>
   </body>
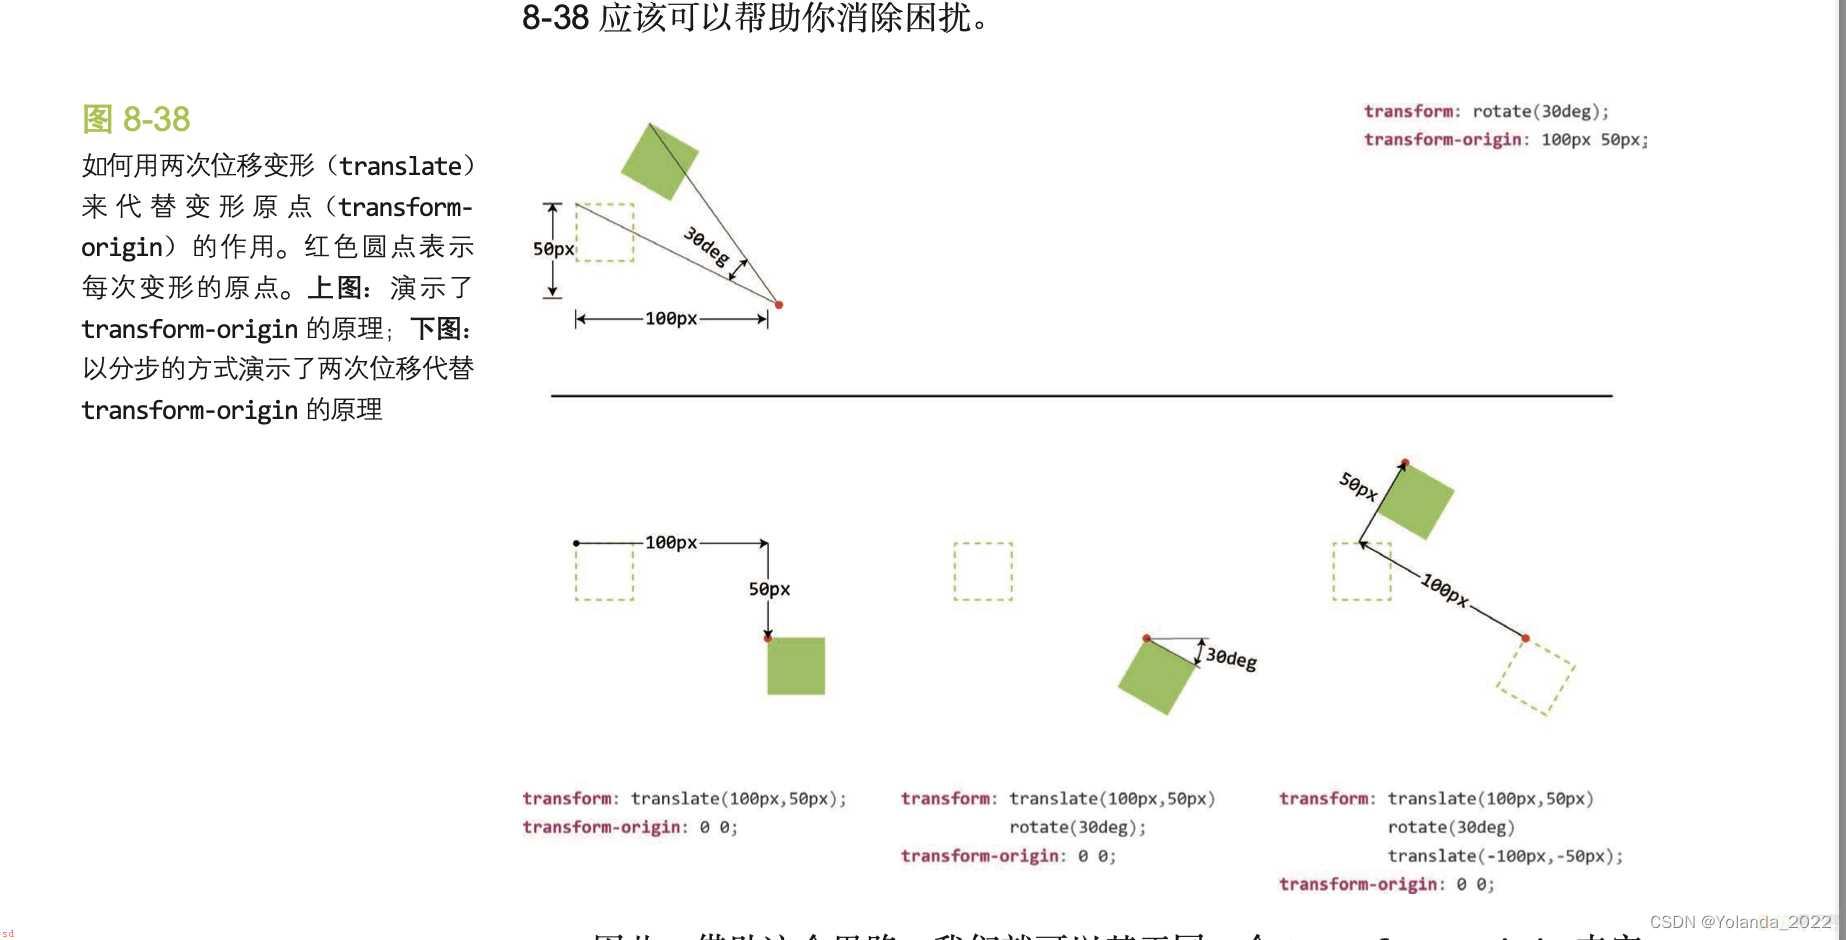
transform-origin是语法糖;以下两段代码是同等的效力。
transform: rotate(30deg);
transform-origin: 200px 300px;


transform: translate(200px, 300px) rotate(30deg)
translate(-200px, -300px); transform-origin: 0 0;
