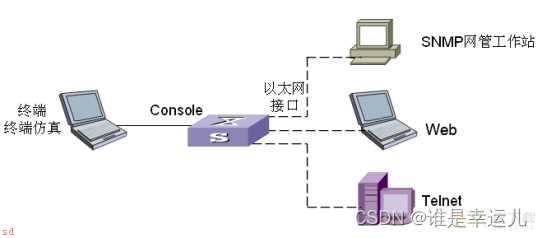
 ;1;通过带外方式对设备进行管理
;2;通过Telnet对设备进行远程管理
;3;通过Web对设备进行远程管理
;4;通过SNMP管理工作站对设备进行远程管理
实验1 交换机基本配置
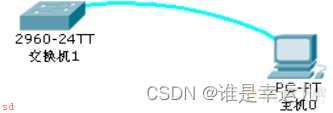 ;1;硬件的连接
;2;软件的设置
;3;交换机的基本配置
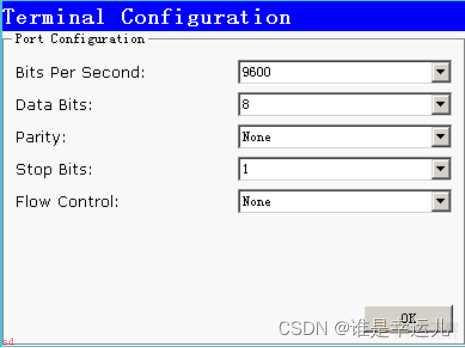
终端配置窗口
Switch>enable /由用户模式进入特权模式
Switch#configure terminal /进入全局配置模式
Switch(config)#hostname sw2960 /设置提示符为sw2960
sw2960(config)#interface fastEthernet 0/1 /进入端口配置模式
sw2960(config-if)#exit /退出端口配置模式;回到全局配置模式
sw2960(config)#ex /使用简写命令退出全局配置模式;回到特权模式
sw2960#? /显示当前模式下可用的命令
sw2960#write /将当前运行时配置参数保存到flash Memory
sw2960#reload /重新启动交换机
实验2 Telnet的配置与实现
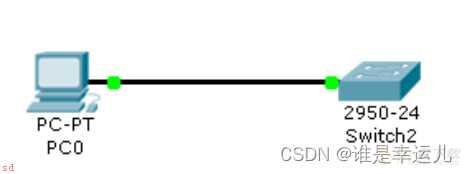 ;1;硬件的连接
;2;软件的设置
;3;交换机Telnet的配置
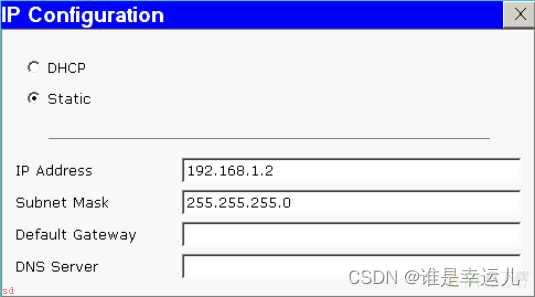 设置PC的IP地址
Switch>en /enable命令的简写;以下命令中多处采用命令简写
Switch#conf t
Switch(config)#int vlan 1
Switch(config-if)#ip add 192.168.1.1 255.255.255.0 /设置管理交换机的IP地址
Switch(config-if)#no shut /启用接口
Switch(config-if)#ex
Switch(config)#enable secret 0 1234 (密文密码) /配置进入特权模式的密码为1234
enable password 1234 (明文密码) 如果两个密码都设置了;密文密码生效
Switch(config)#line vty 0 4 /进入VTY端口
Switch(config-line)#password 4321 /设置Telnet的登录密码为4321
Switch(config-line)#login /允许Telnet登录
;4;验证
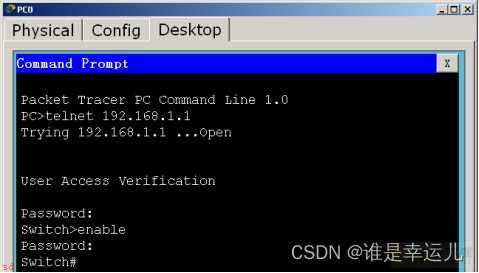 遇到的问题及解决办法;
1.
 原因;是将命令当成了域名进行解析
解决办法;
;1;在全局模式下输入;no ip domain-lookup;取消域名搜索;
;2;Ctrl;shift;6
 表示输入的命令是错误的
实验3;ssh远程管理网络设备
R1(config)#hostname R1
R1(config)#ip domain-name ccie.com;设置域名;
R1(config)#crypto key generate rsa 设置密码加密方式为RSA;加密方式;
How many bits in the modulus [512]: 1024加密长度;生成1024内存的密码;
R1(config)#username admin privilege 0 ;设置安全级别为0;级别越高越安全;secret ccie;密码;
R1(config)#line vty 0 4
R1(config-line)#exec-timeout 10 0 超时时间为10分钟
R1(config-line)#logging synchronous 日志同步
R1(config-line)#login local 使用本地用户名和密码登录
R1(config-line)#transport input ssh 使用ssh登录
PC机ssh -l admin 192.168.10.152;路由器IP地址;
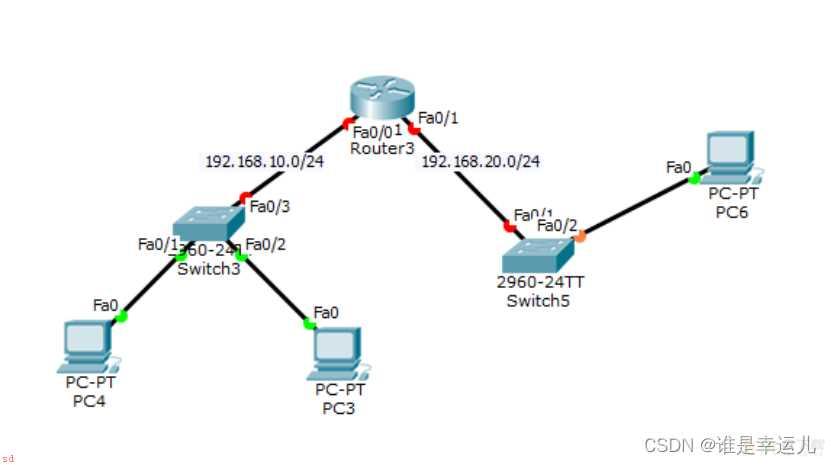
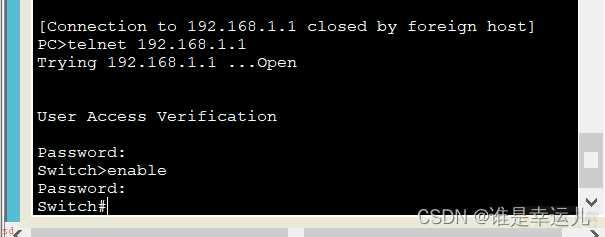 思考;如何实现在任意PC机上都可以远程管理设备?
 实验4;IOS的升级
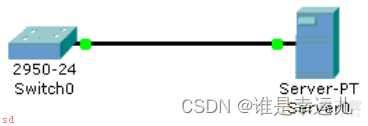 1;硬件的连接
2;软件的设置
3;交换机的配置
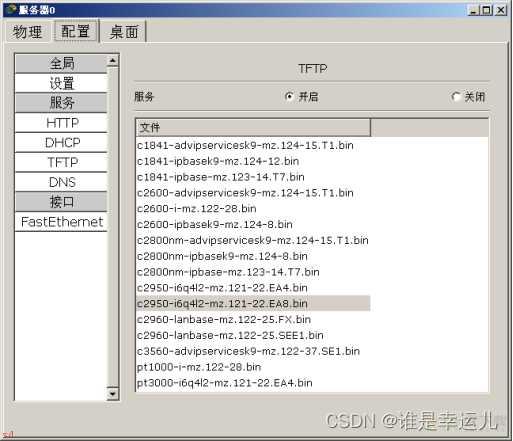 路由器;
路由器;
R1#show flash:
R1#dir;查看目录;
R1#delete 文件名
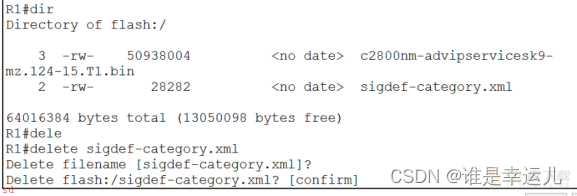 备份IOS;
R1#show flash
R1#copy flash: tFTP:
Source filename []? c2800nm-ad….
Address or name of remote host []? 192.168.10.3;tftp服务器地址;
Destination filename [runningcof]? R1.bin
还原IOS;
R1#dir
R1#delete c28800nm….
R1#dir
R1#copy tftp: flash:
Address or name of remote host []? 192.168.10.3
Source filename []? R1.bin
Destination filename [R1.bin]?c2800nm-ad….
升级IOS;
R1#show version 查看当前的ios版本
 如果要使用以下版本;
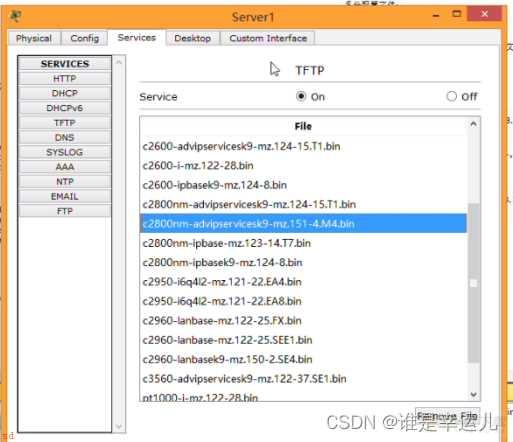 #R1 delete c2800nm… 删除原来的ios版本;因为可能装不下两个;
R1#copy tftp: flash:
Address or name of remote host []? 192.168.10.3
Source filename []? c2800nm…;新的ios版本;
R1#reload 重启后就会加载新的iso文件
R1#show version
配置AAA认证;
R1的配置
a.console线
R1(config)#username admin 1 password Admin 1
R1(config)#aaa new-model
R1(config)#aaa authentication login default local
R1(config)#line console 0
R1(config-line)#login authentication default
b.VTY线
R1(config)#aaa authentication login telnet-login local
R1(config)#line vty 0 4
R1(config)#login authentication telnet-login
思科路由器的启动过程简单来说分为三个部分;
1.硬件检查
2.运行ISO
3.导入配置文件